Greetings fellow fallen vikings who have found their way here to this post detailing the building of my base in the world of Hellhalla (SNxQJCe49Y). I’ve recently been unable to play the game all that much due to work travel so I’ve been spending my spare time writing up my experiences in constructing the first major base in this play through. So yea it is quite long-winded since I’ve had plenty of time bored in hotels to work on it. Still, I’ve tried to remain concise.
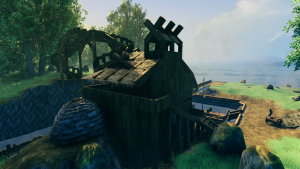
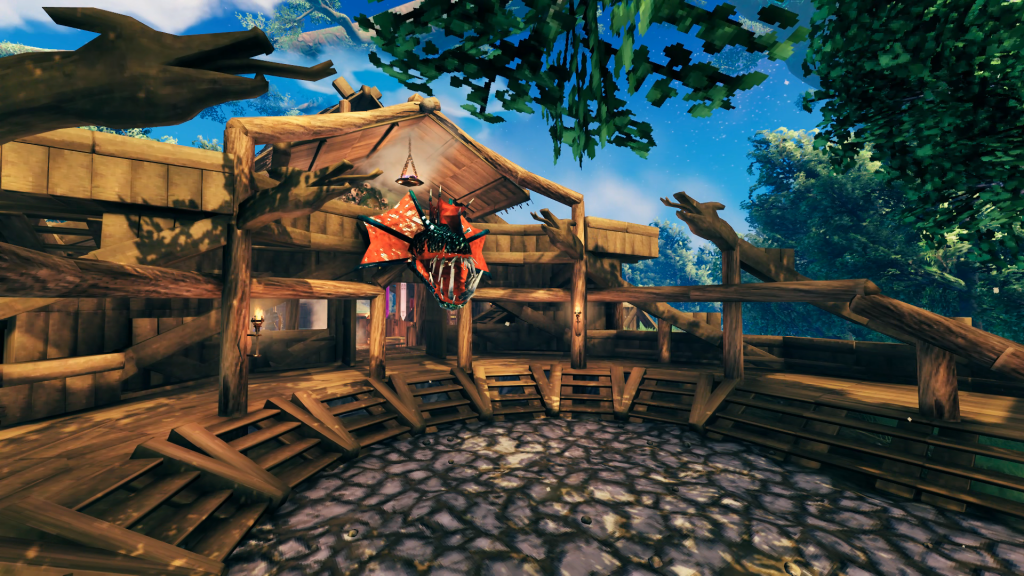
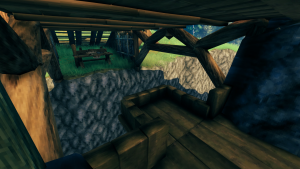
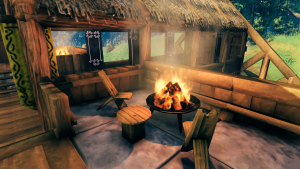
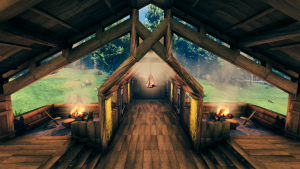
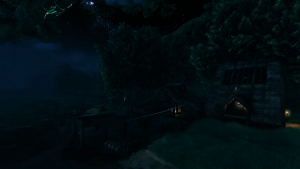
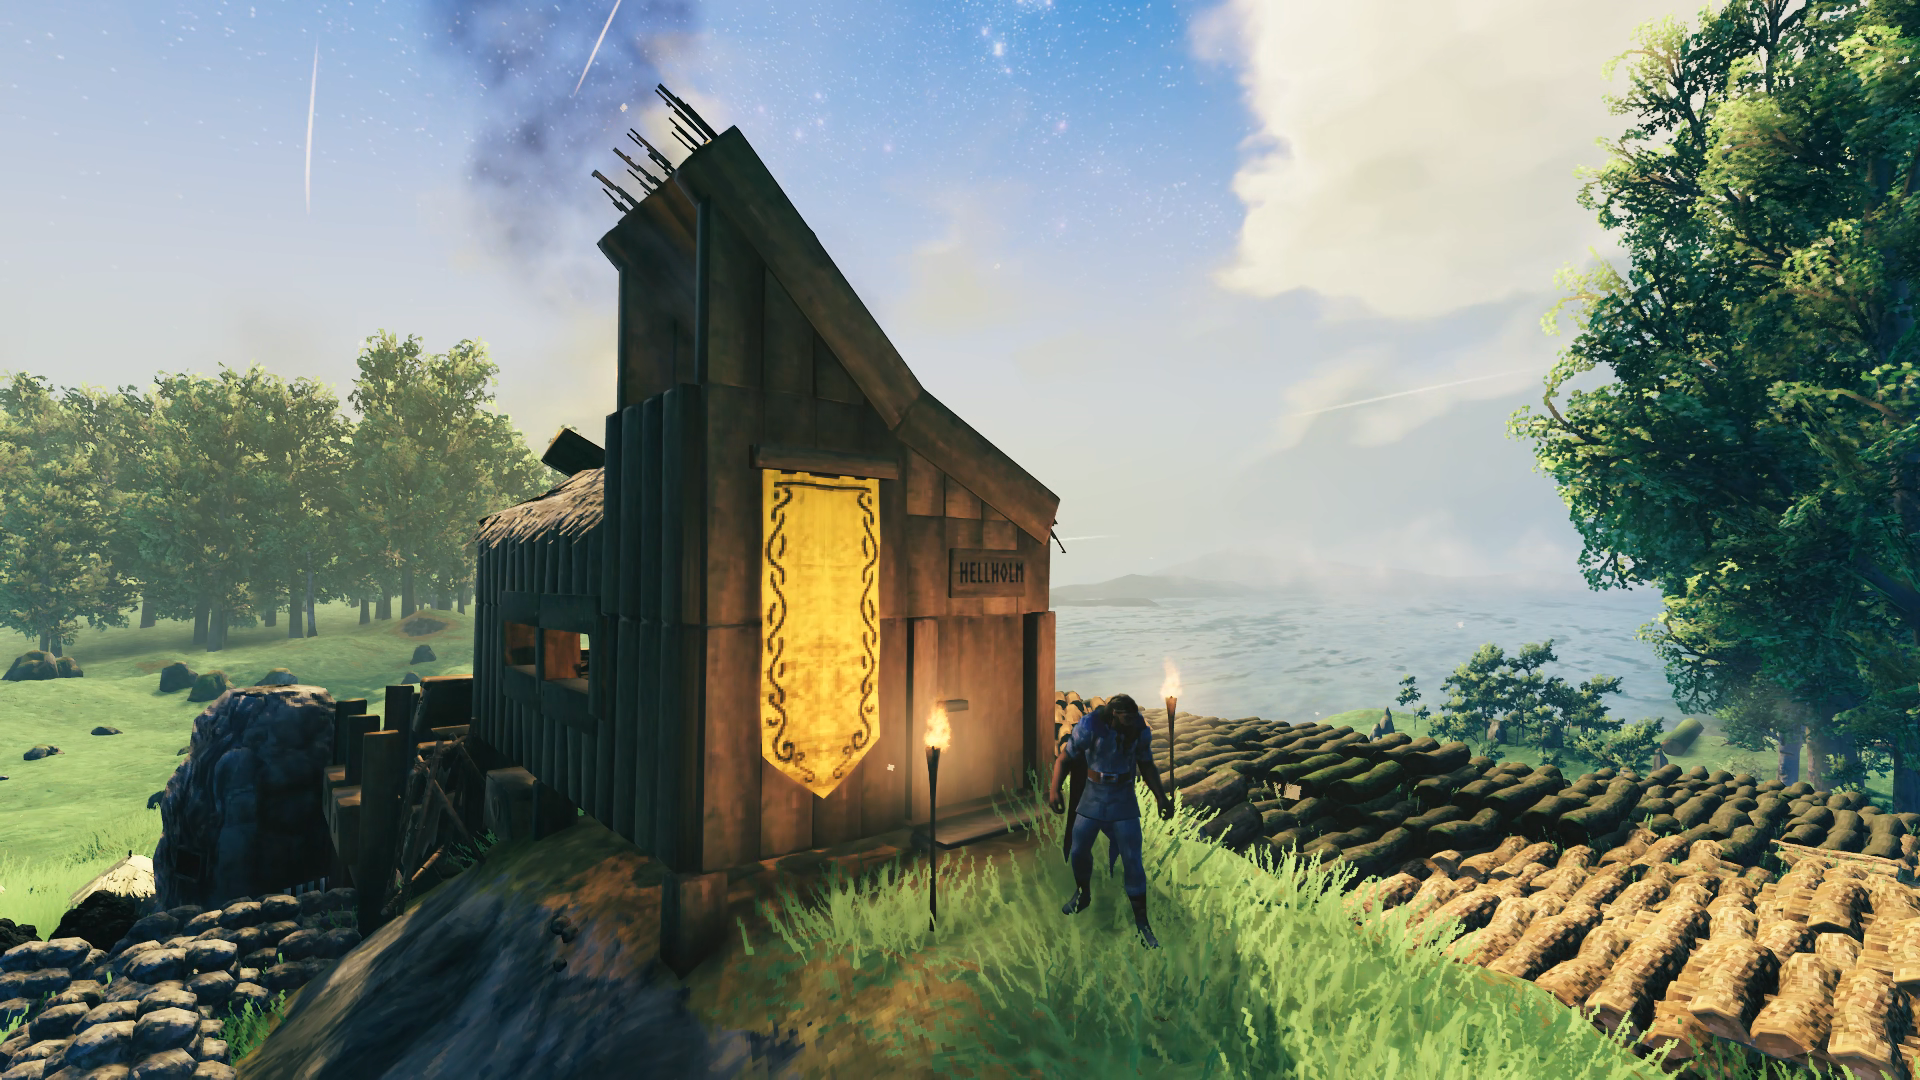
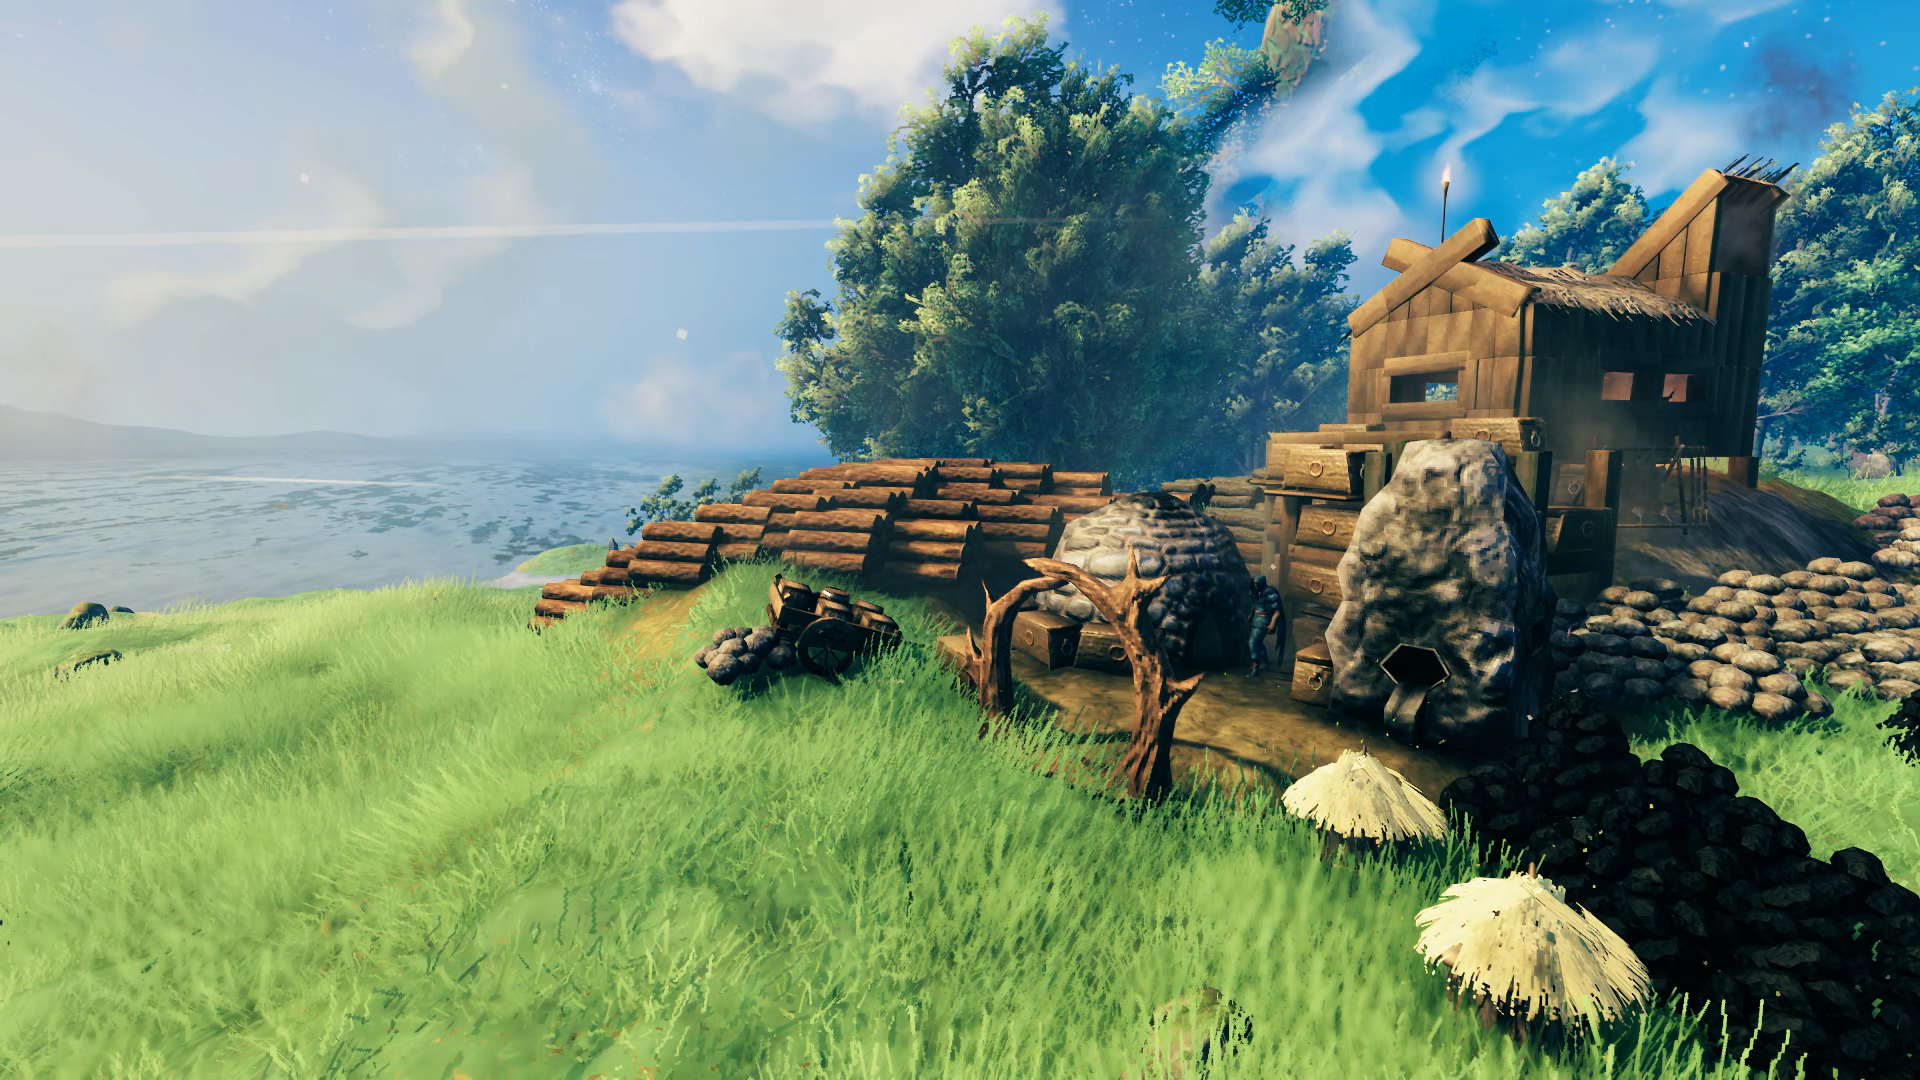
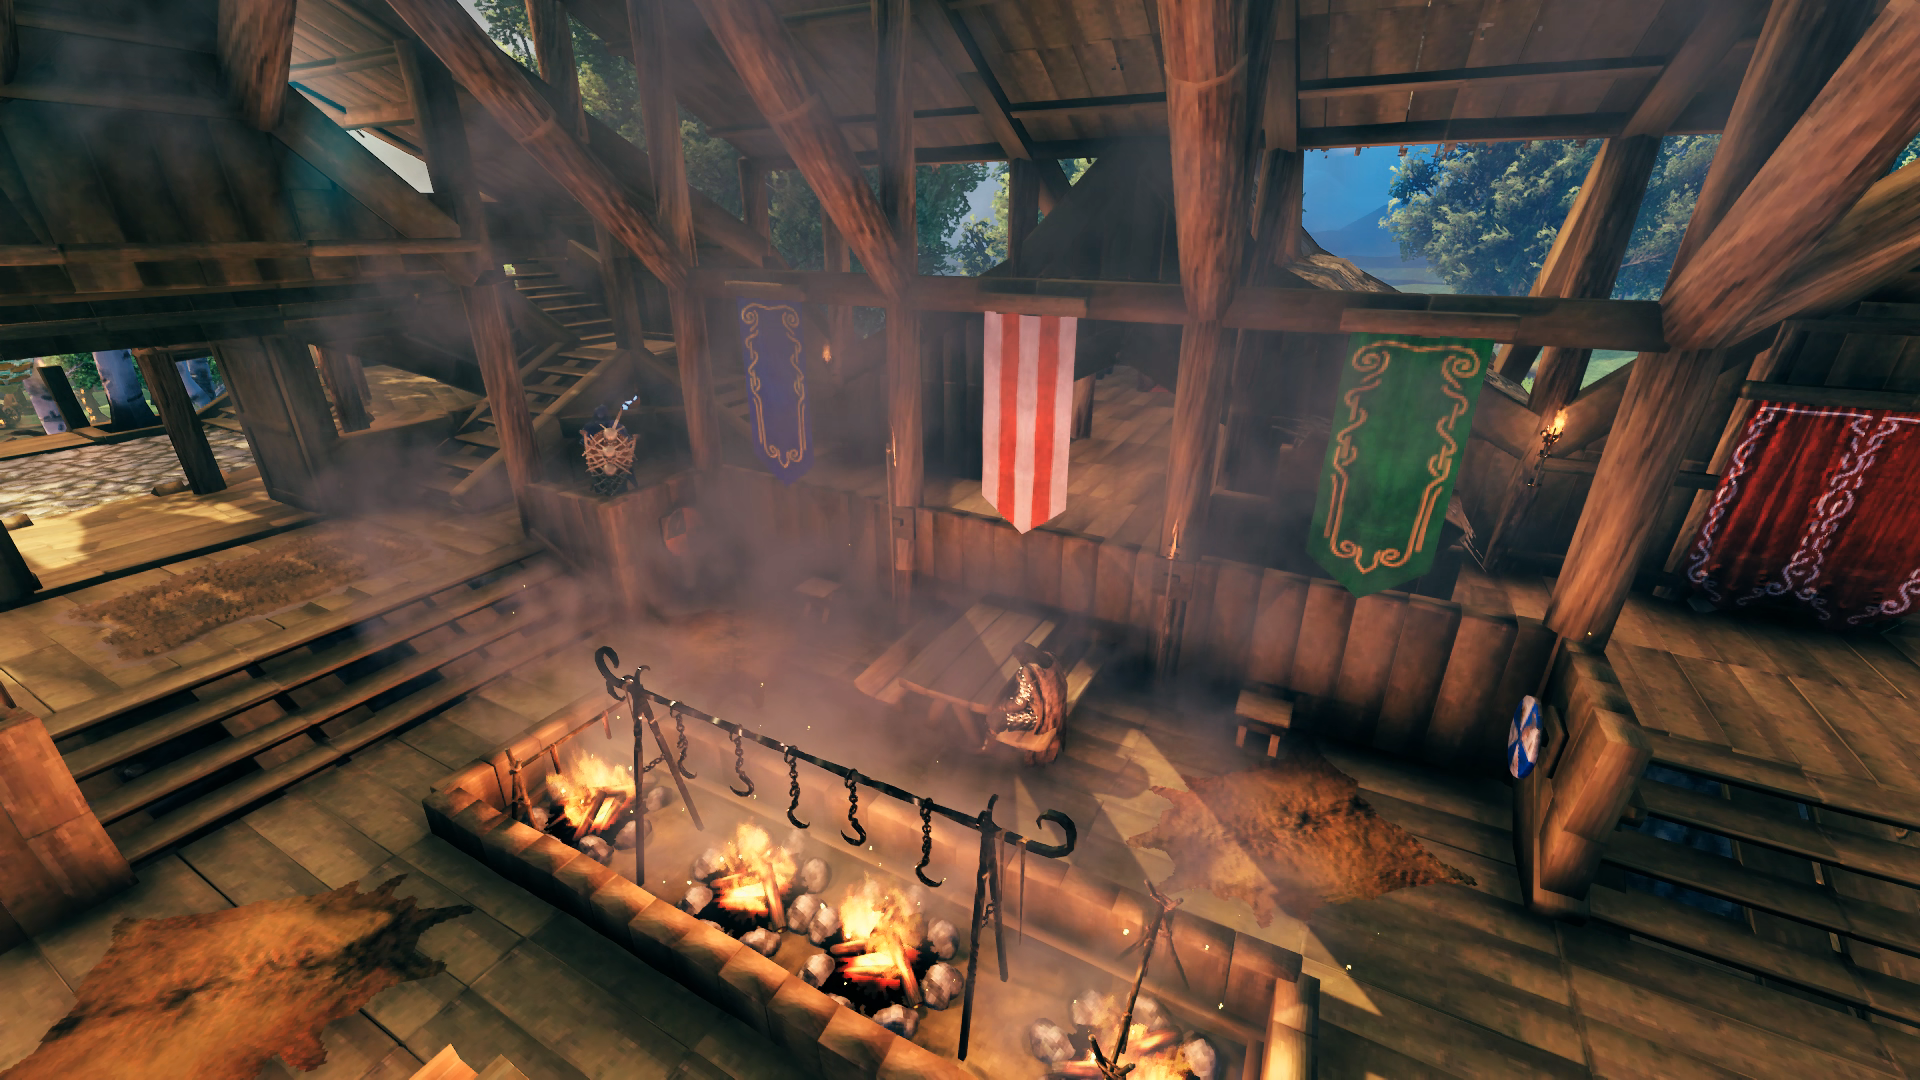
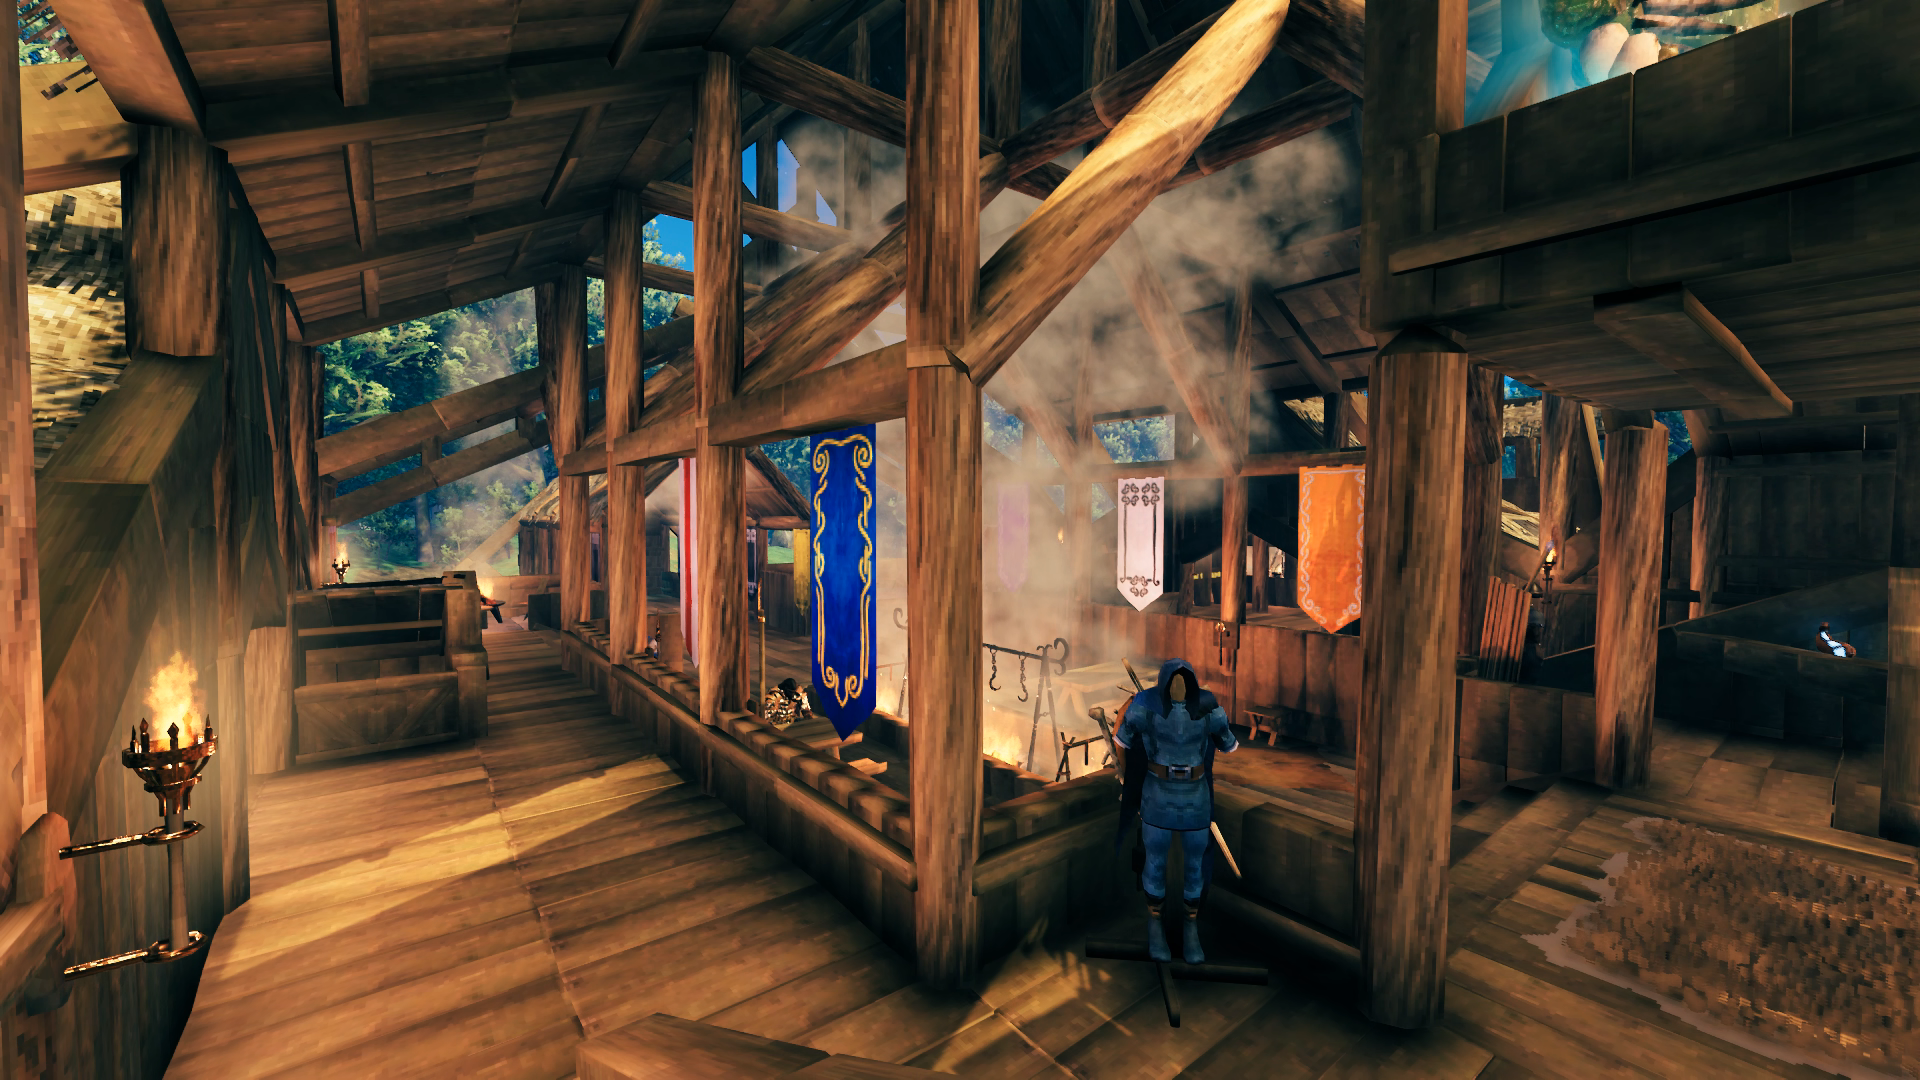
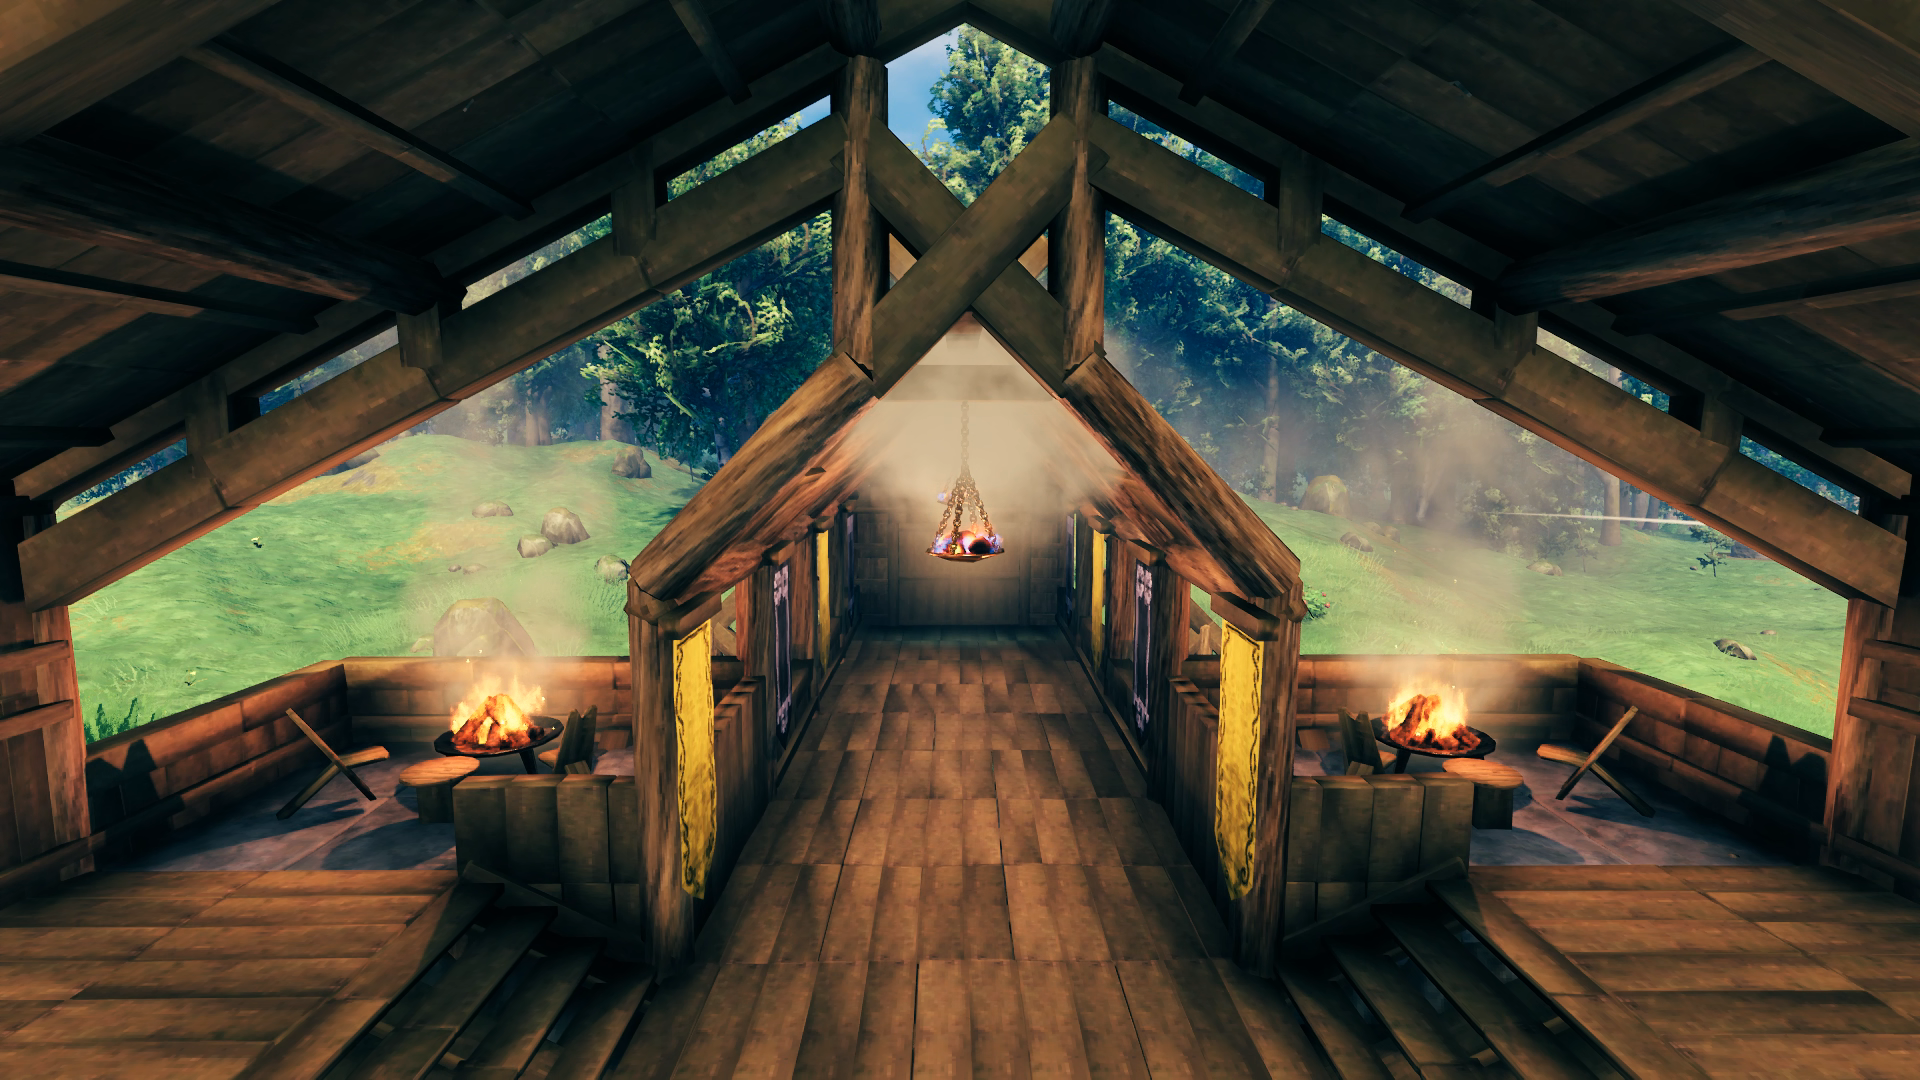
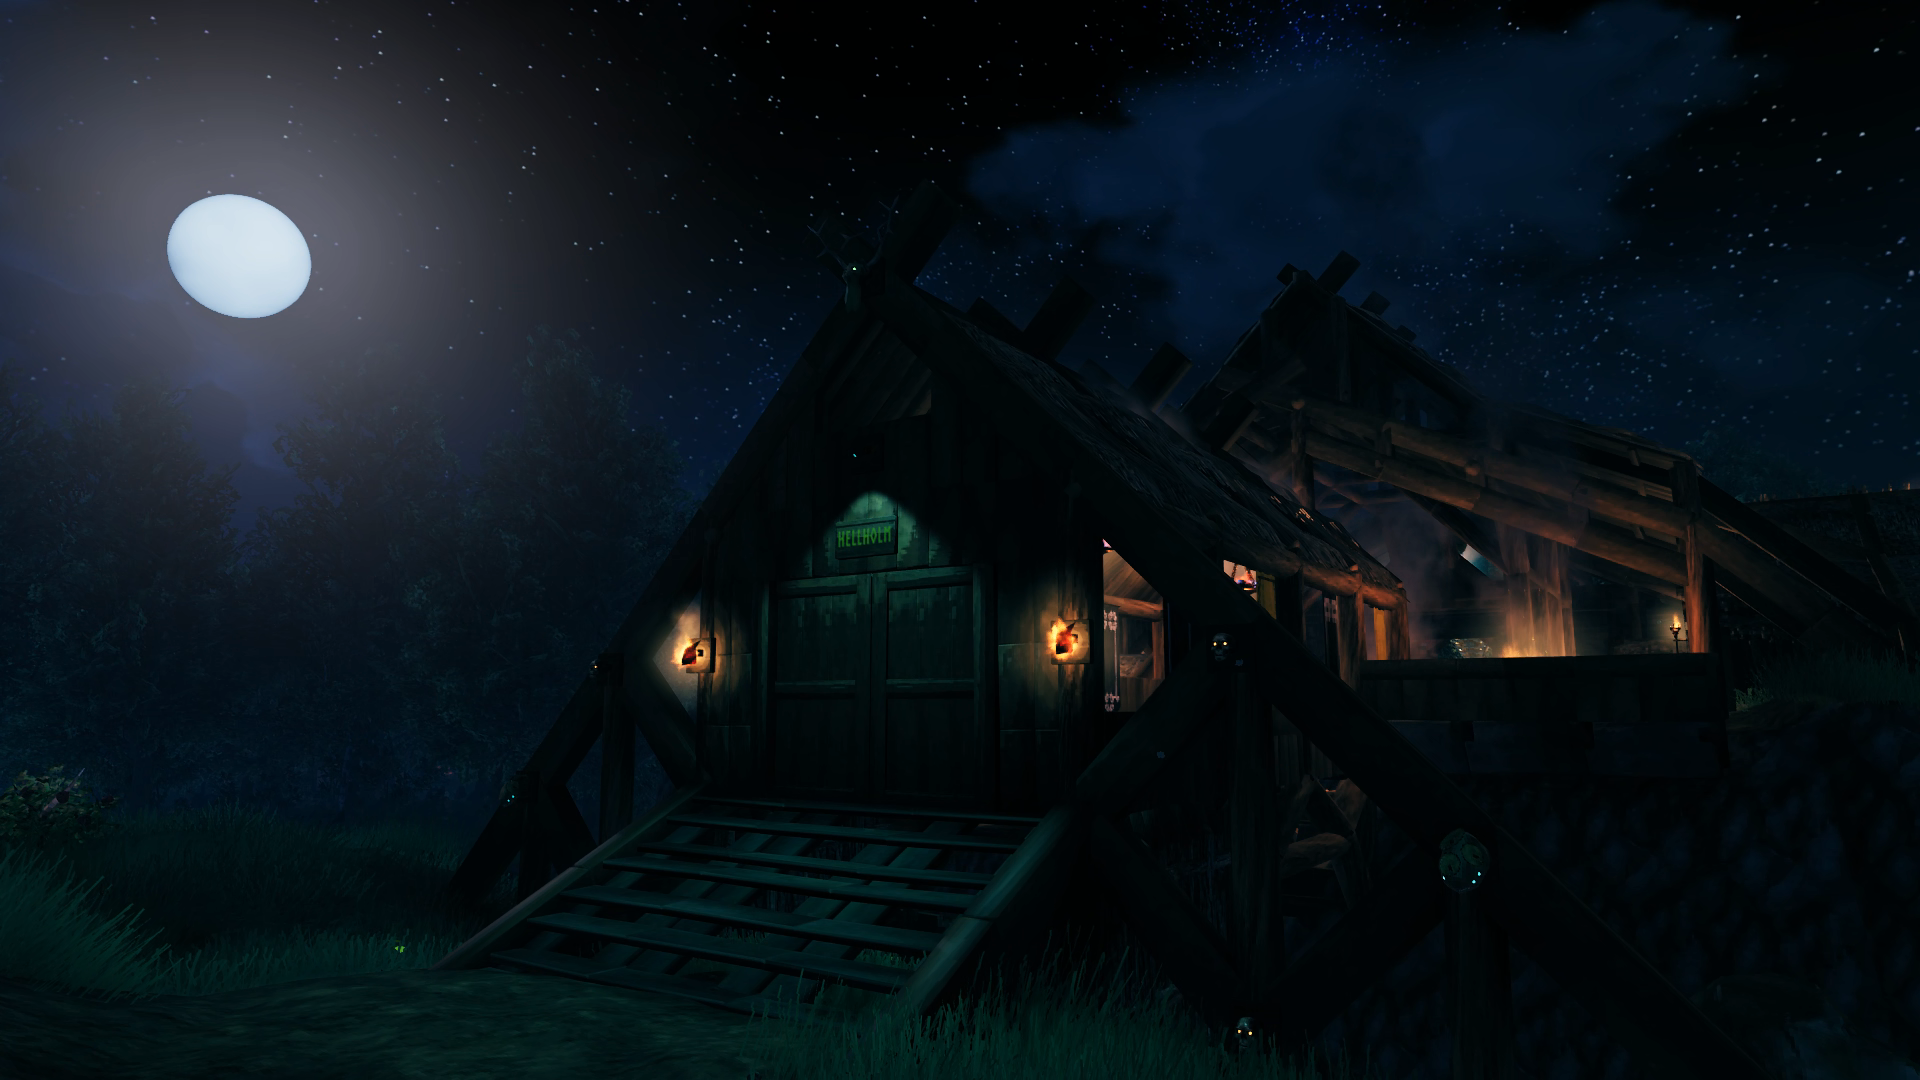
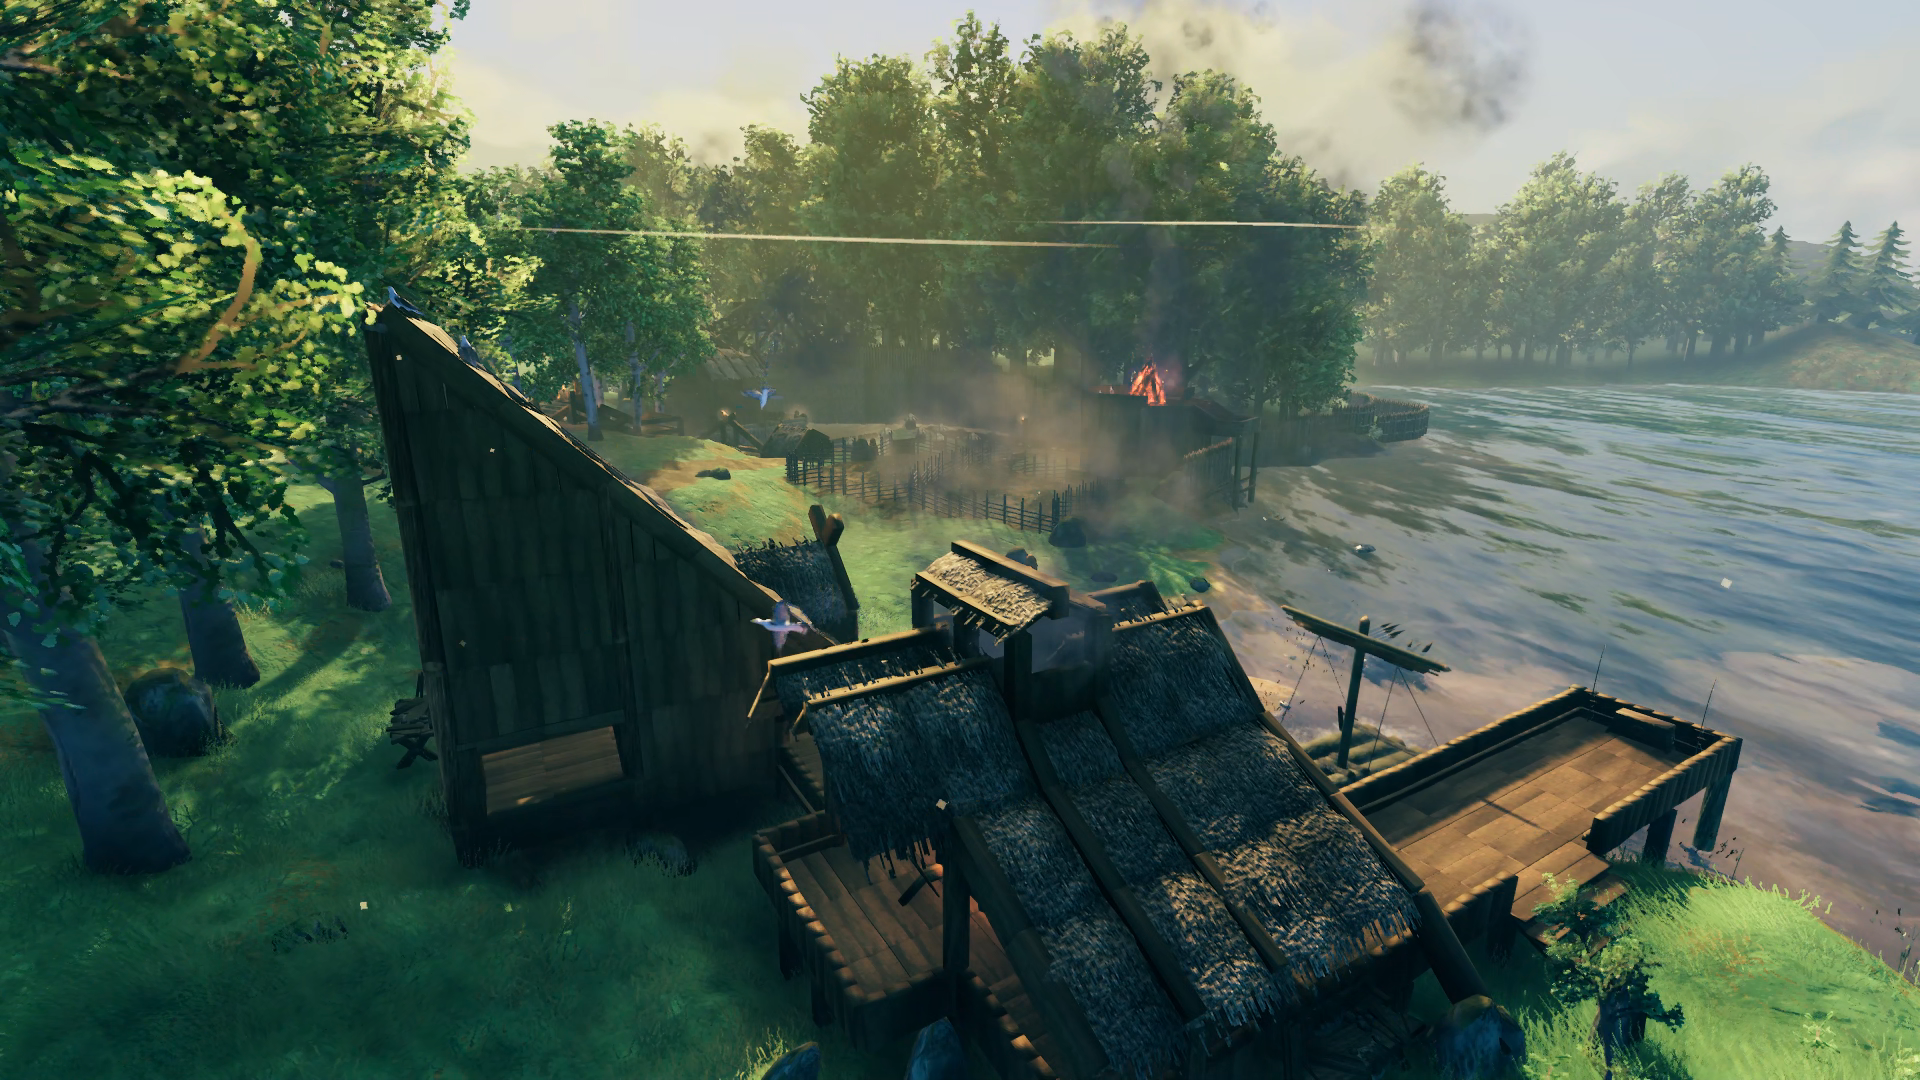
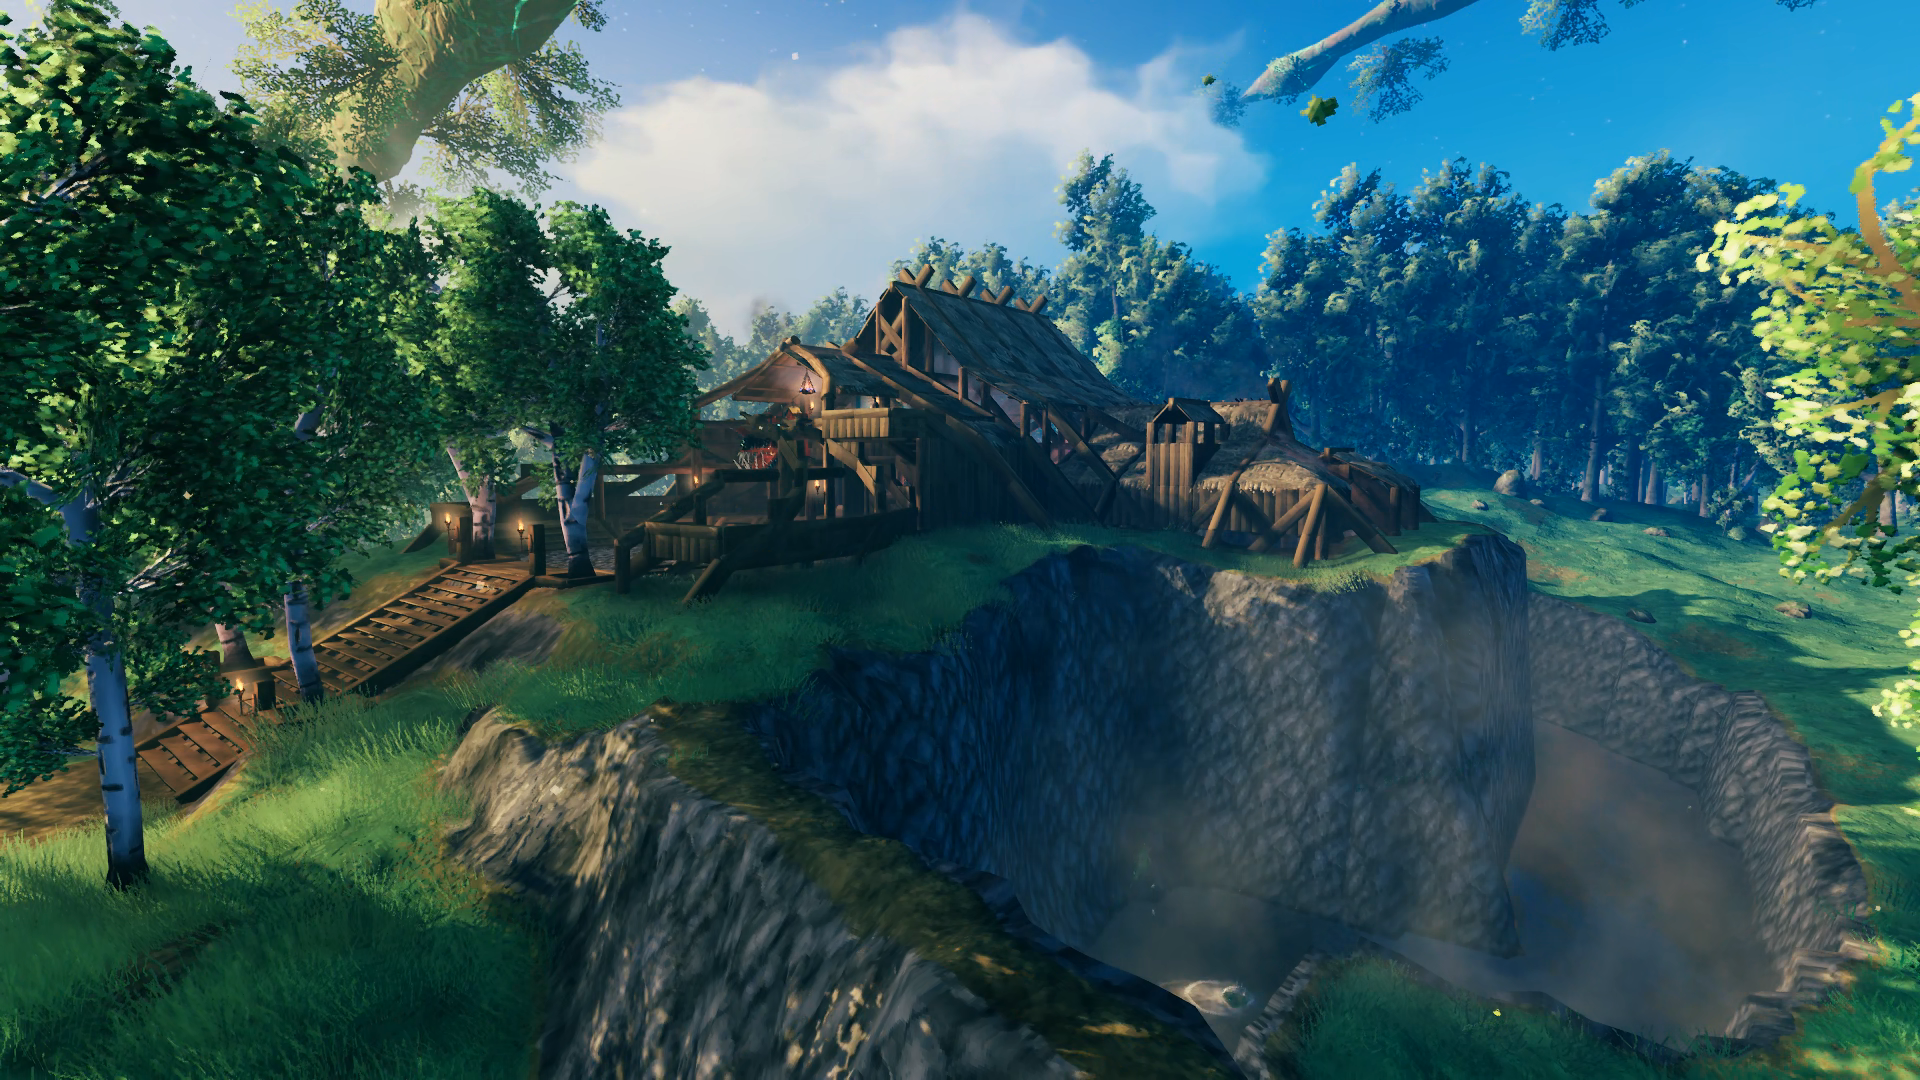
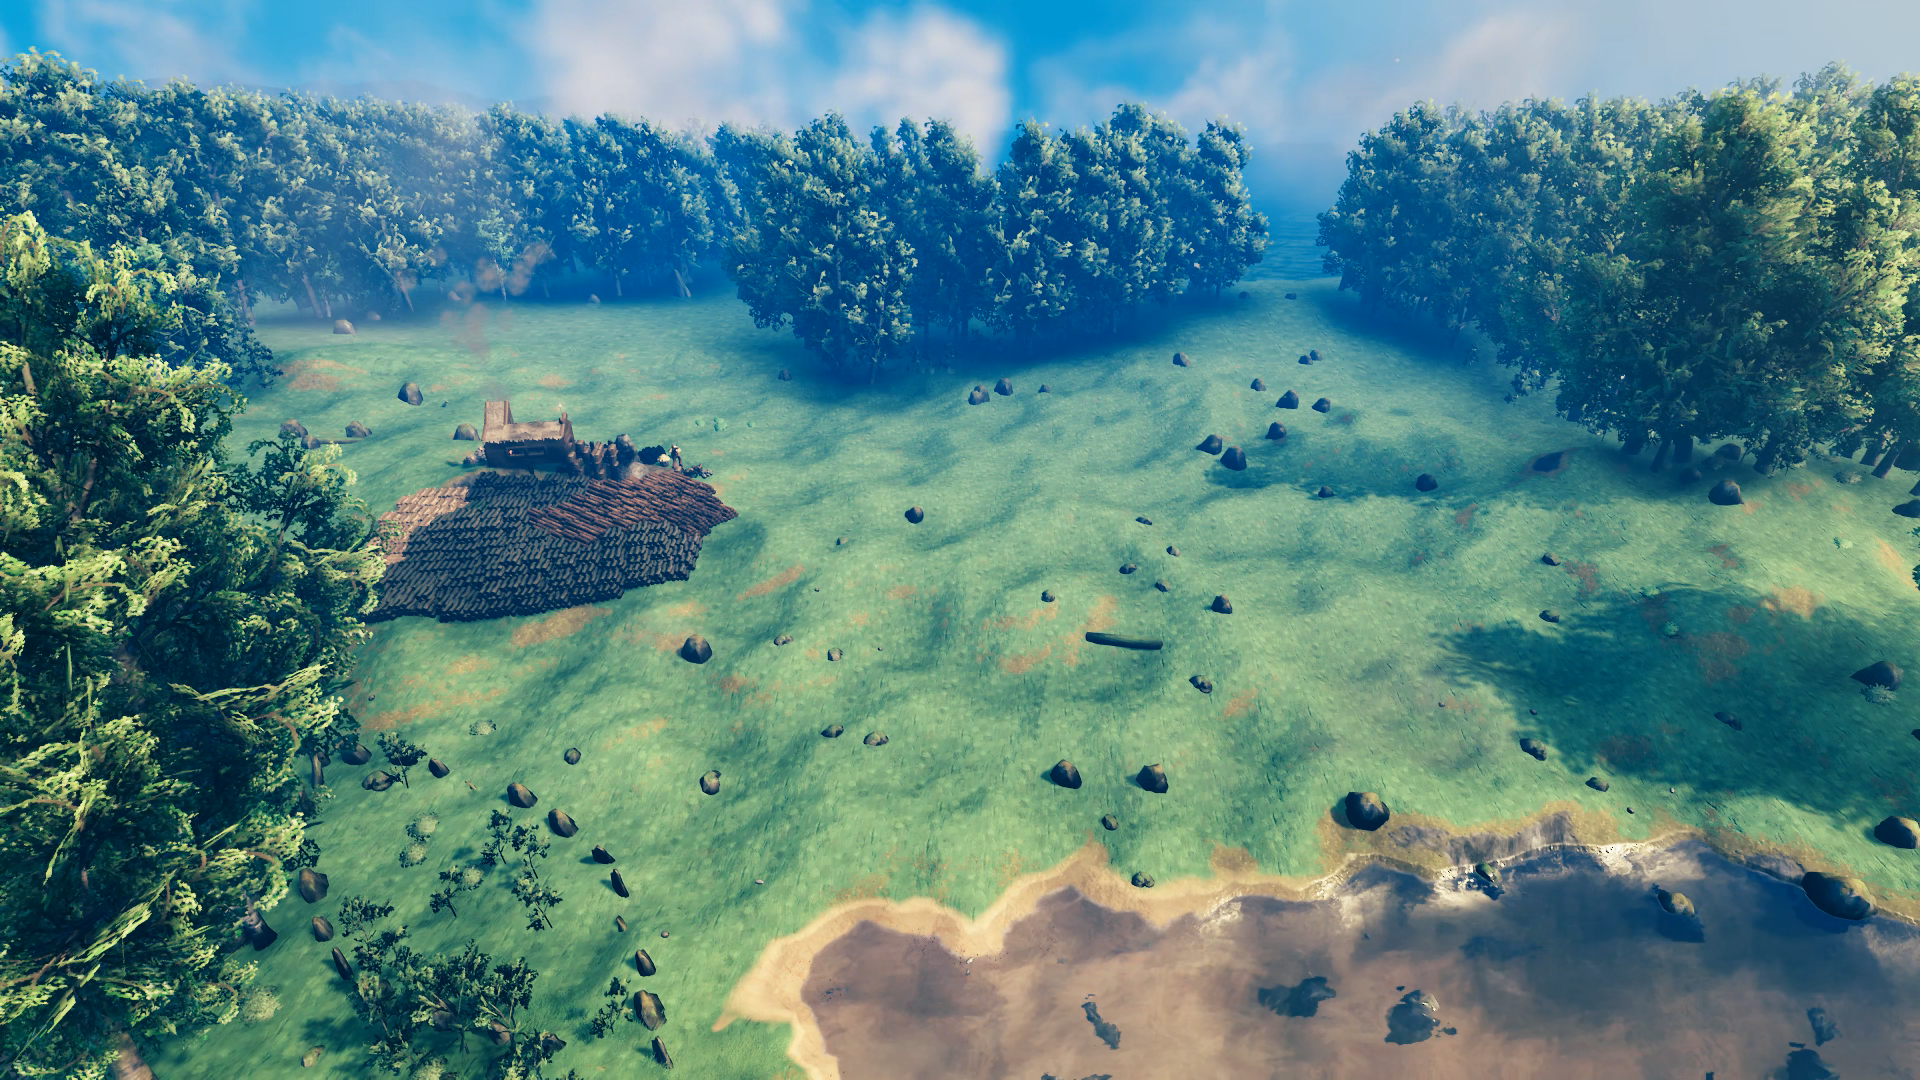
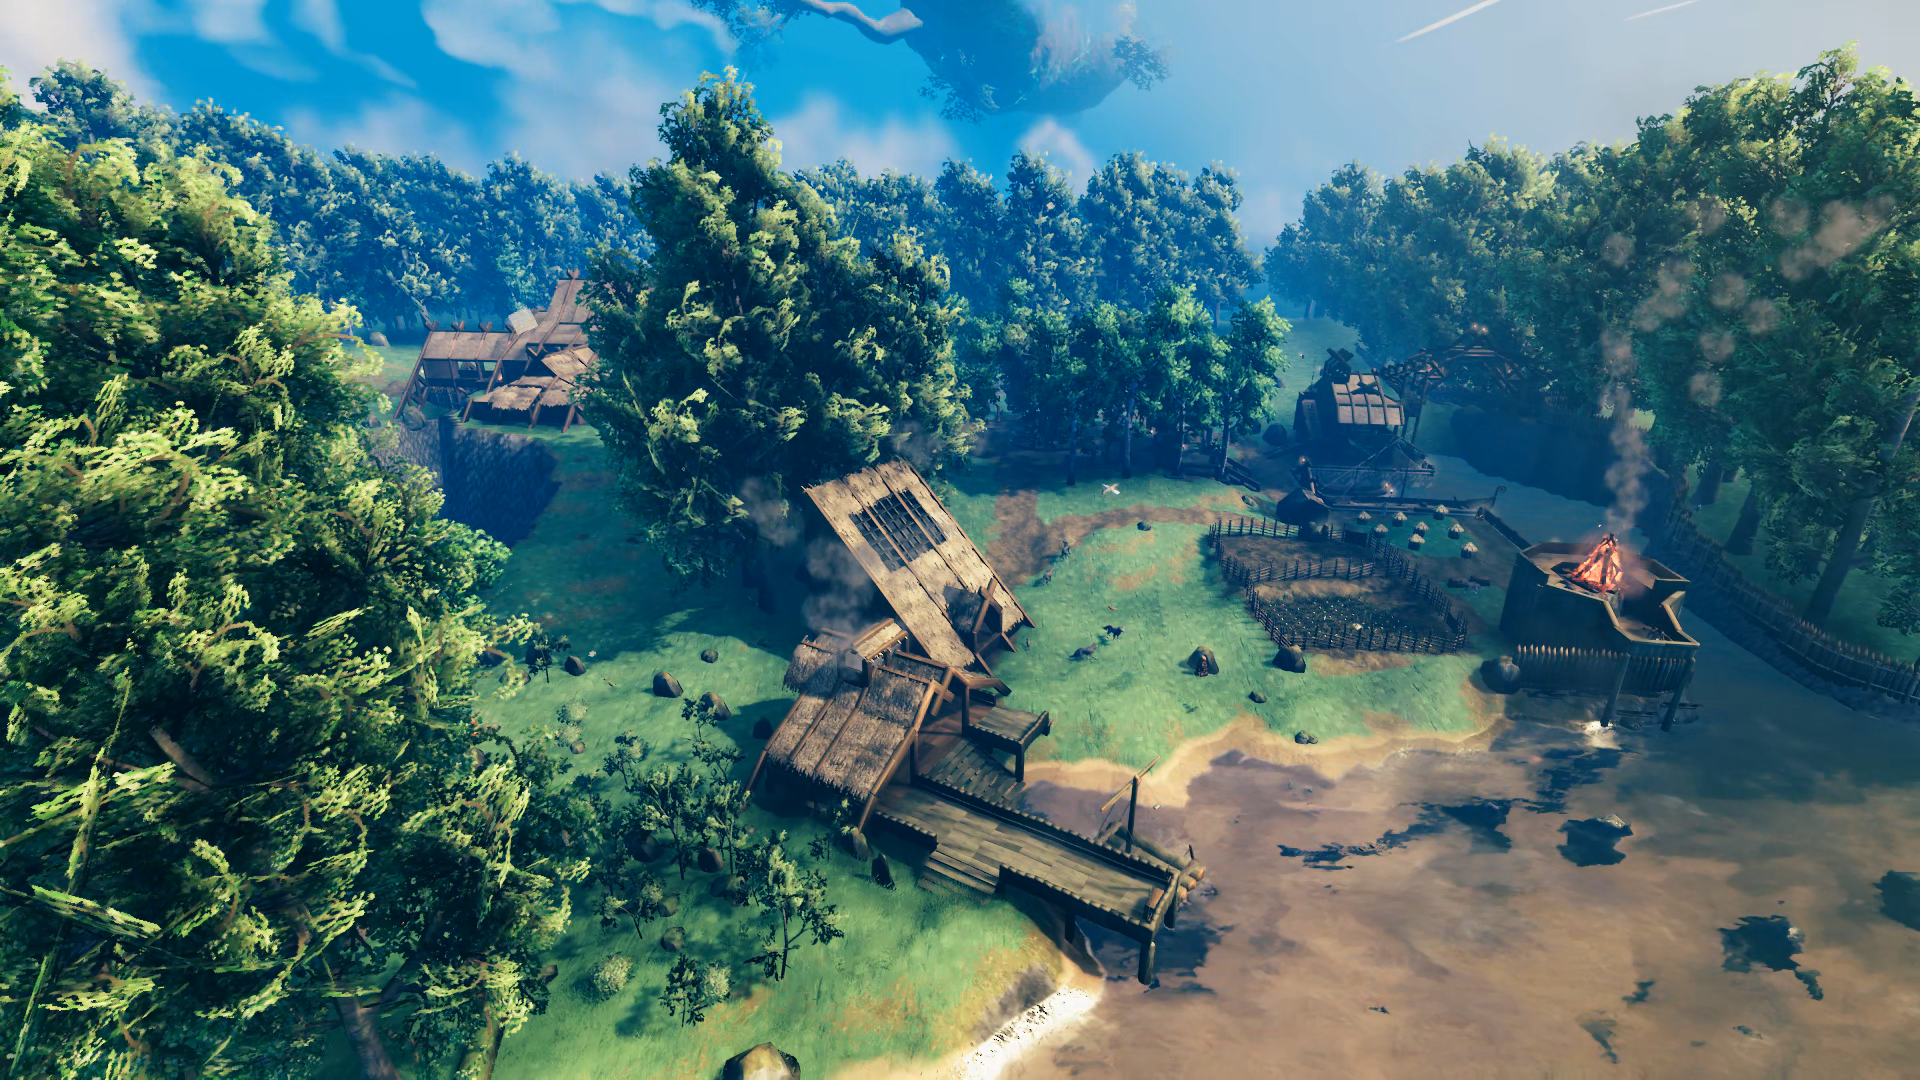
This is my second play through of Valheim after “beating” the game back in 2021 with three other friends – progressing up to the defeat of Yagluth, which was the final major boss at the time (it even only had placeholder drops when you killed it). Now I’ve returned to solo my way through it on normal difficulty without mods – mainly because I’m playing through GeForceNOW (I’ll include a brief review of the service at the end). Here is a look at the first rendition of Hellholm:
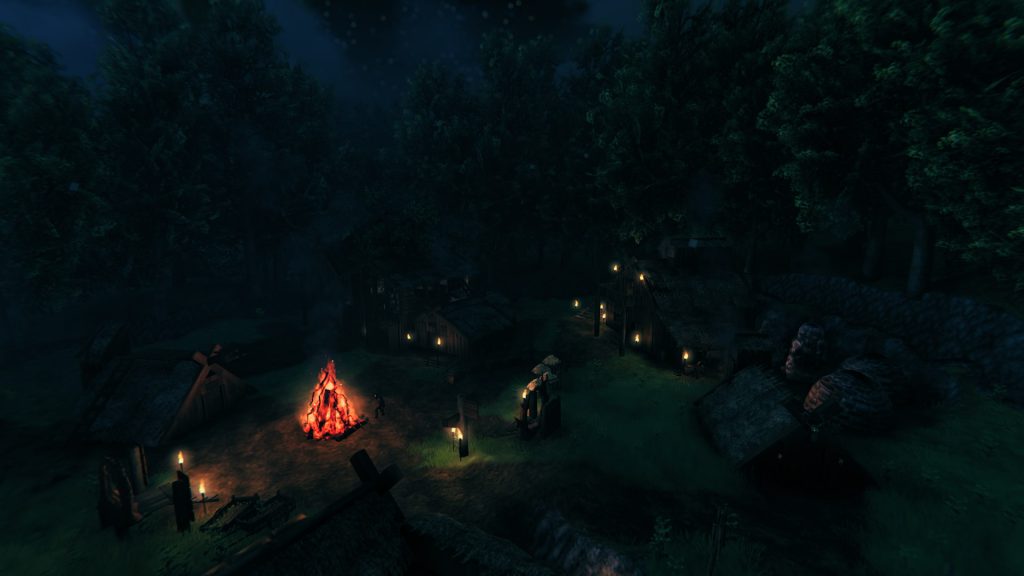
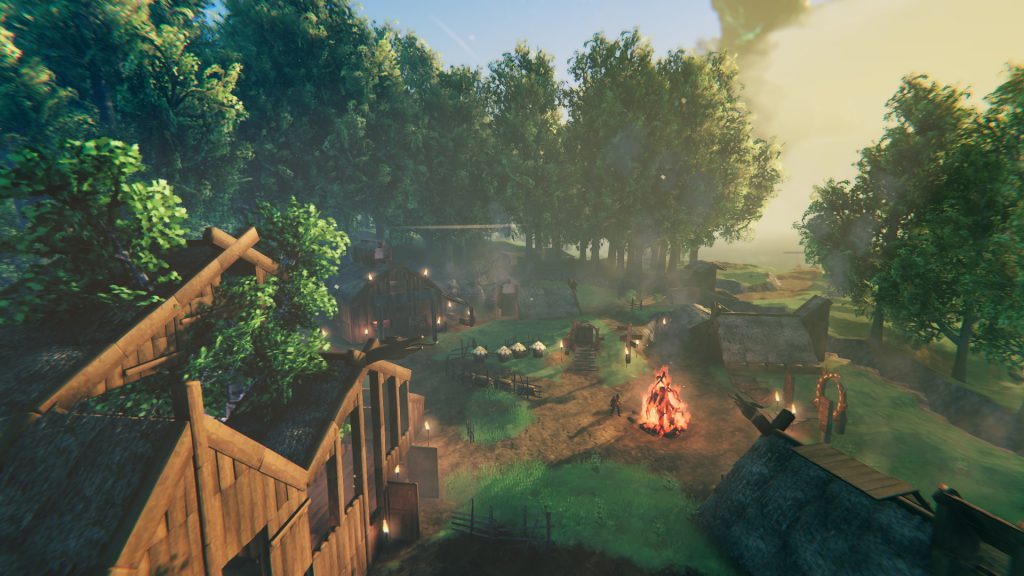
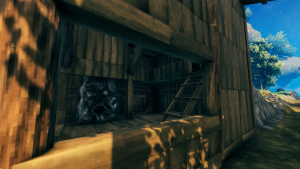
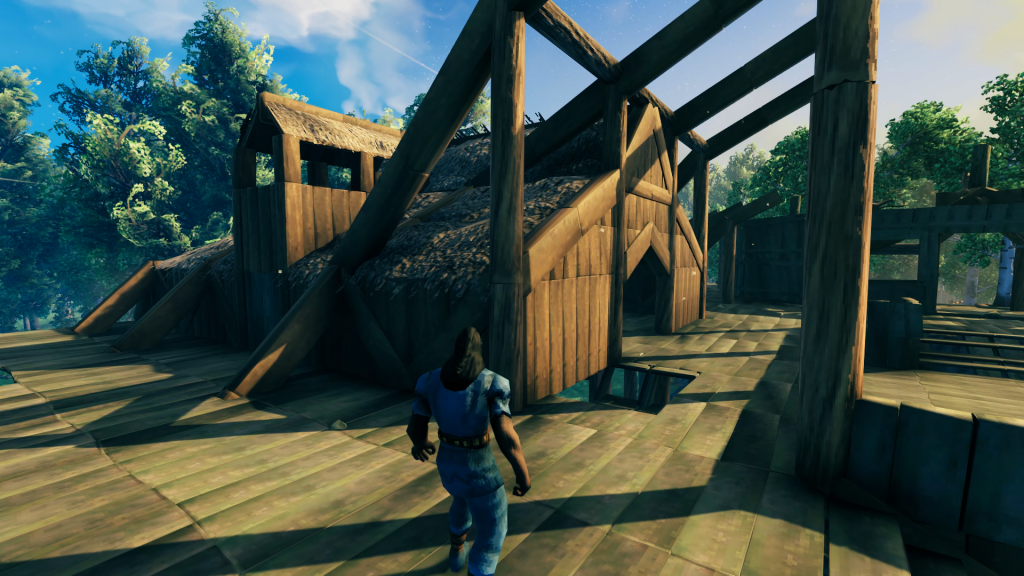
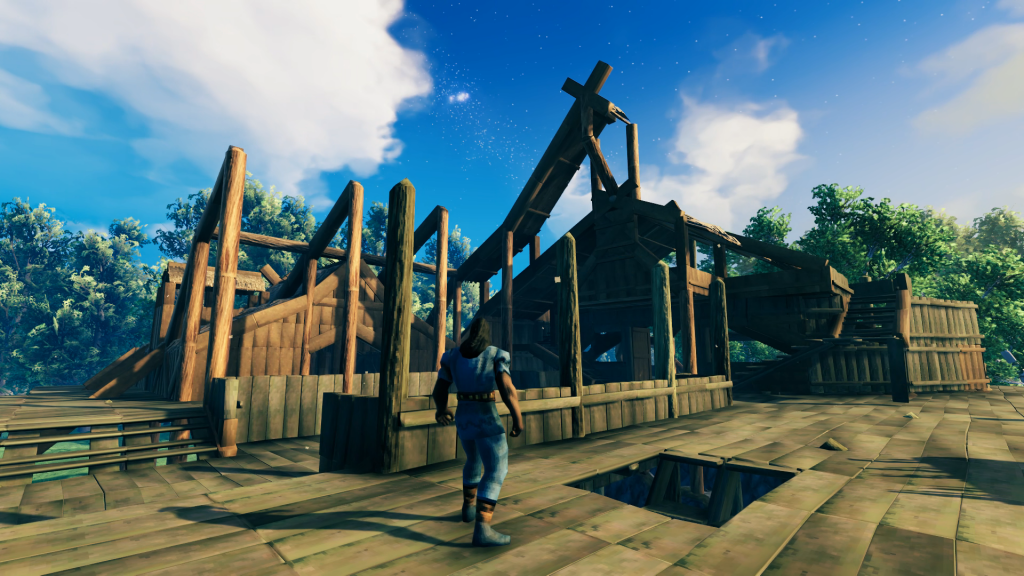
This was more of a communal build and base, and the Grand Hall that I constructed (the barn-like building to the upper-right of the first image and upper-left of the second) never really equaled the image I was carrying in my head. So, this time I decided I was going to do it right and could focus more time on building rather than keeping busy out in the world with friends that want to push forward the game progression.

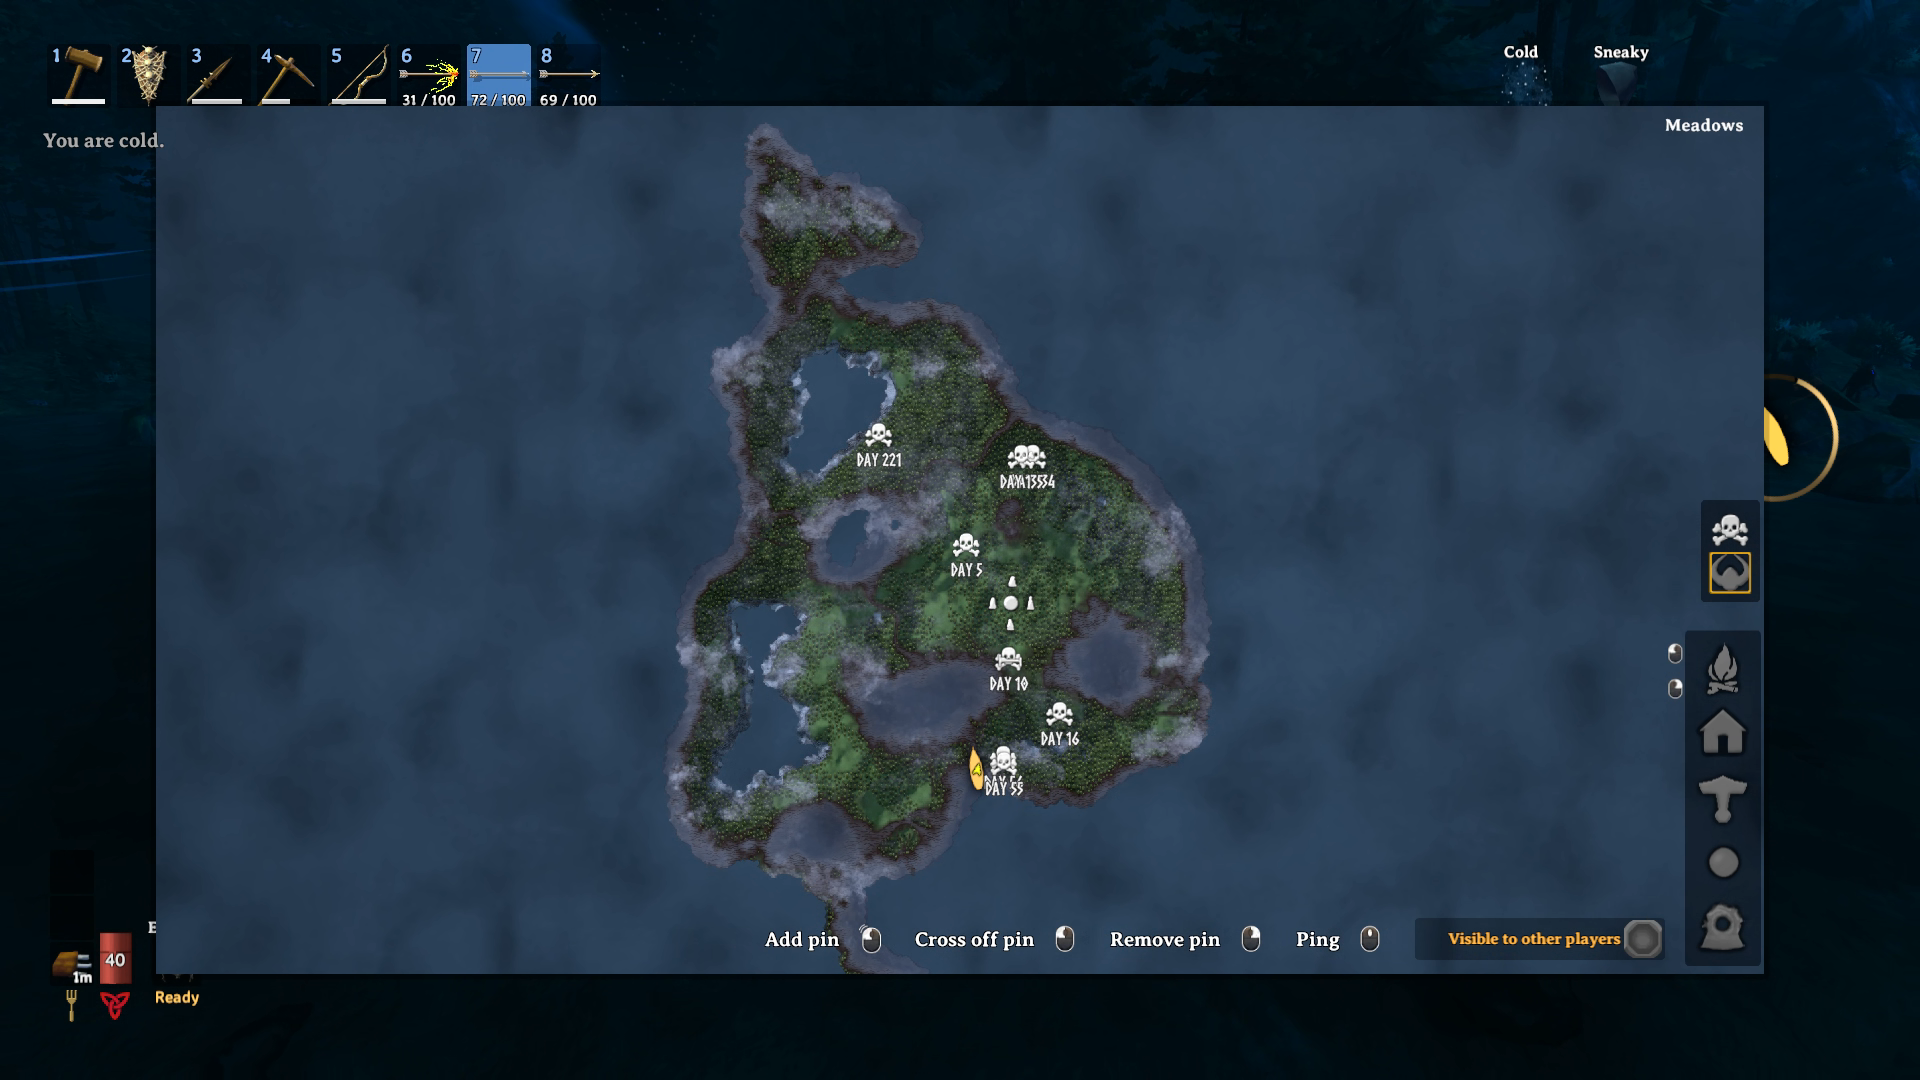
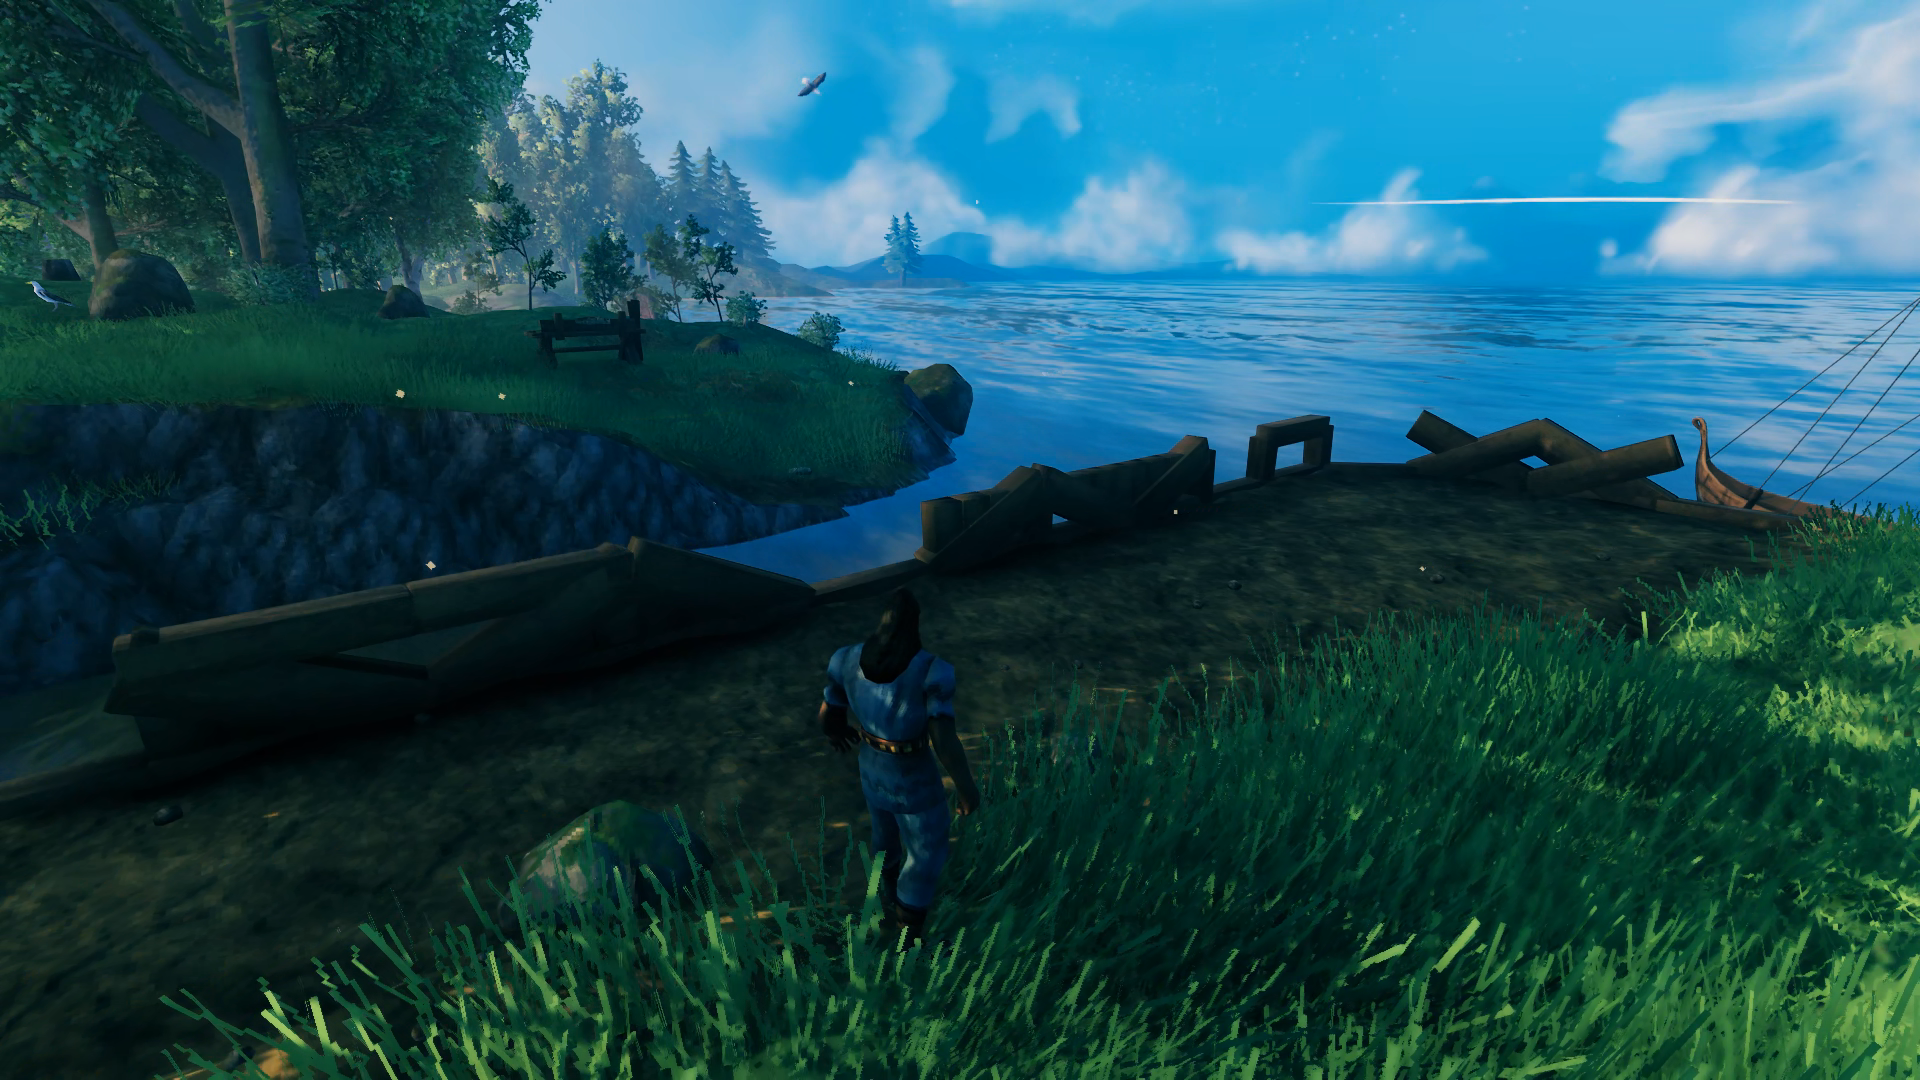
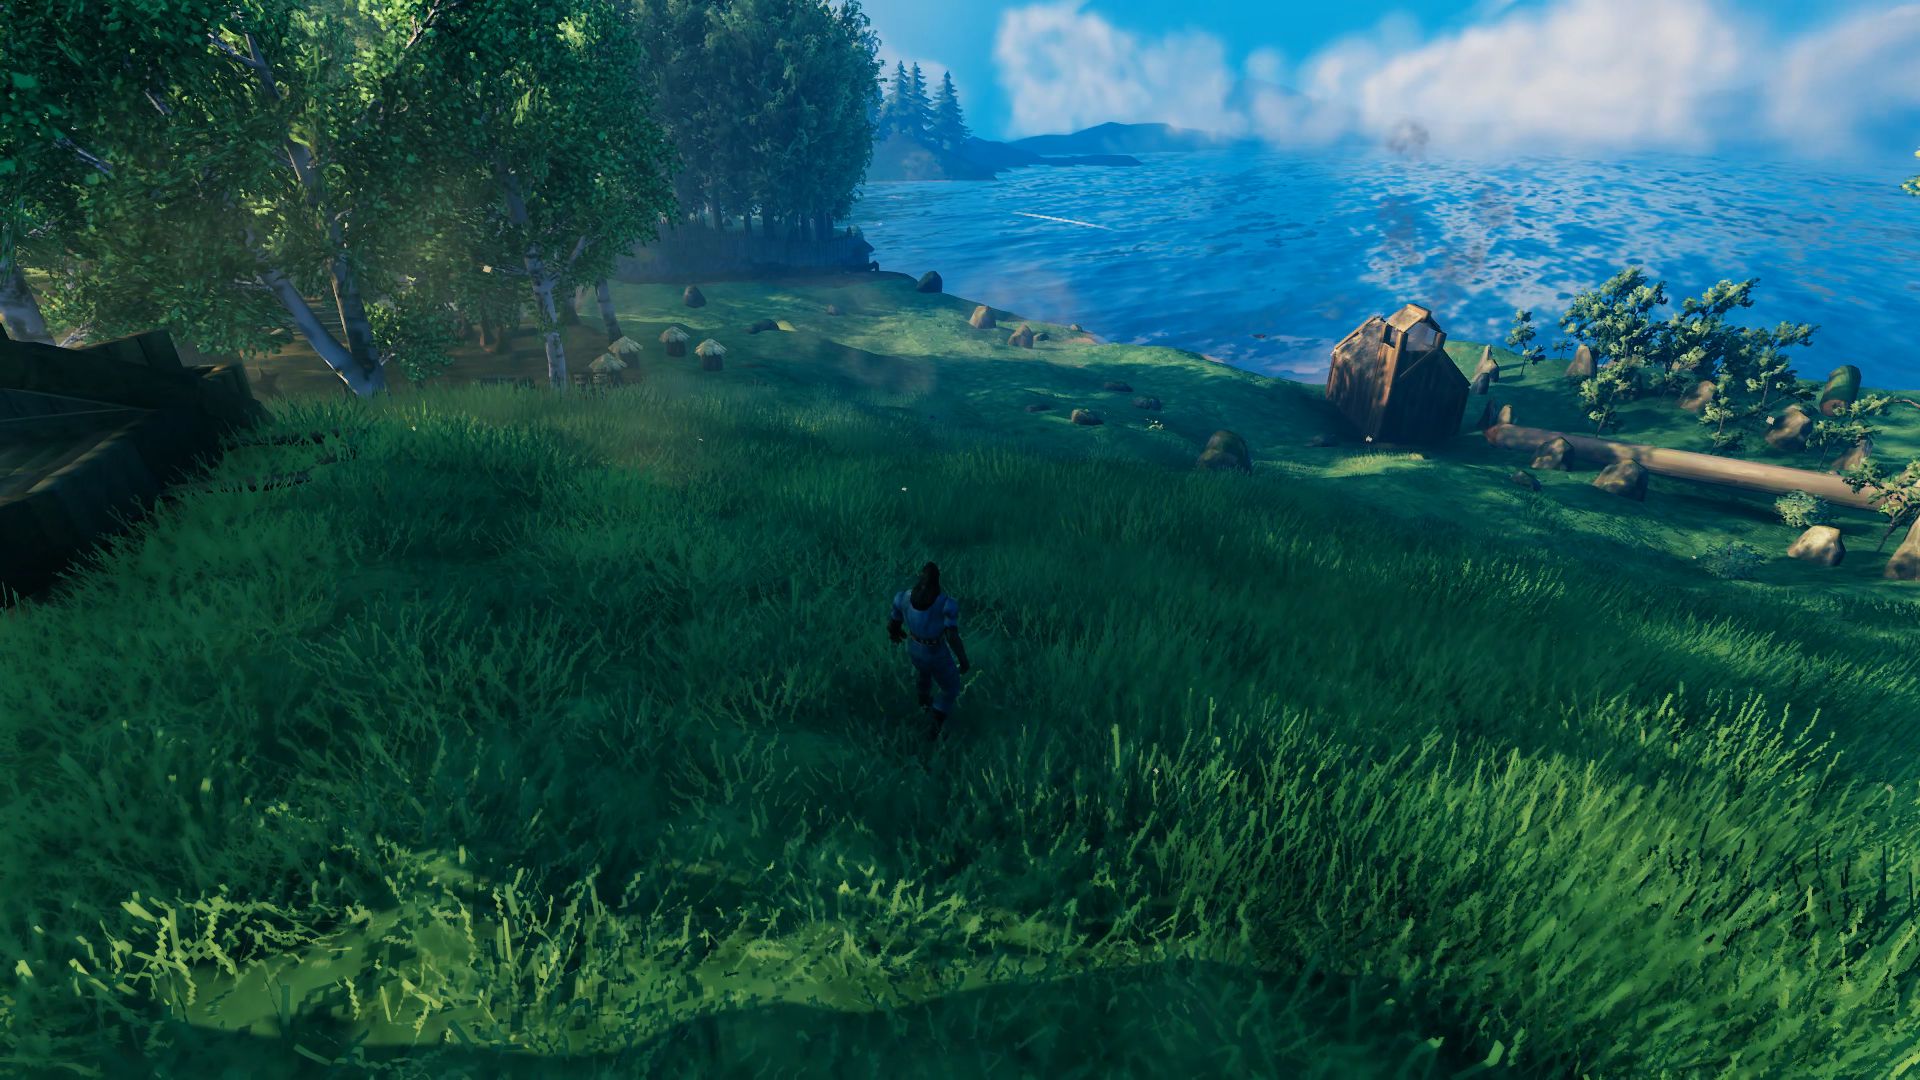
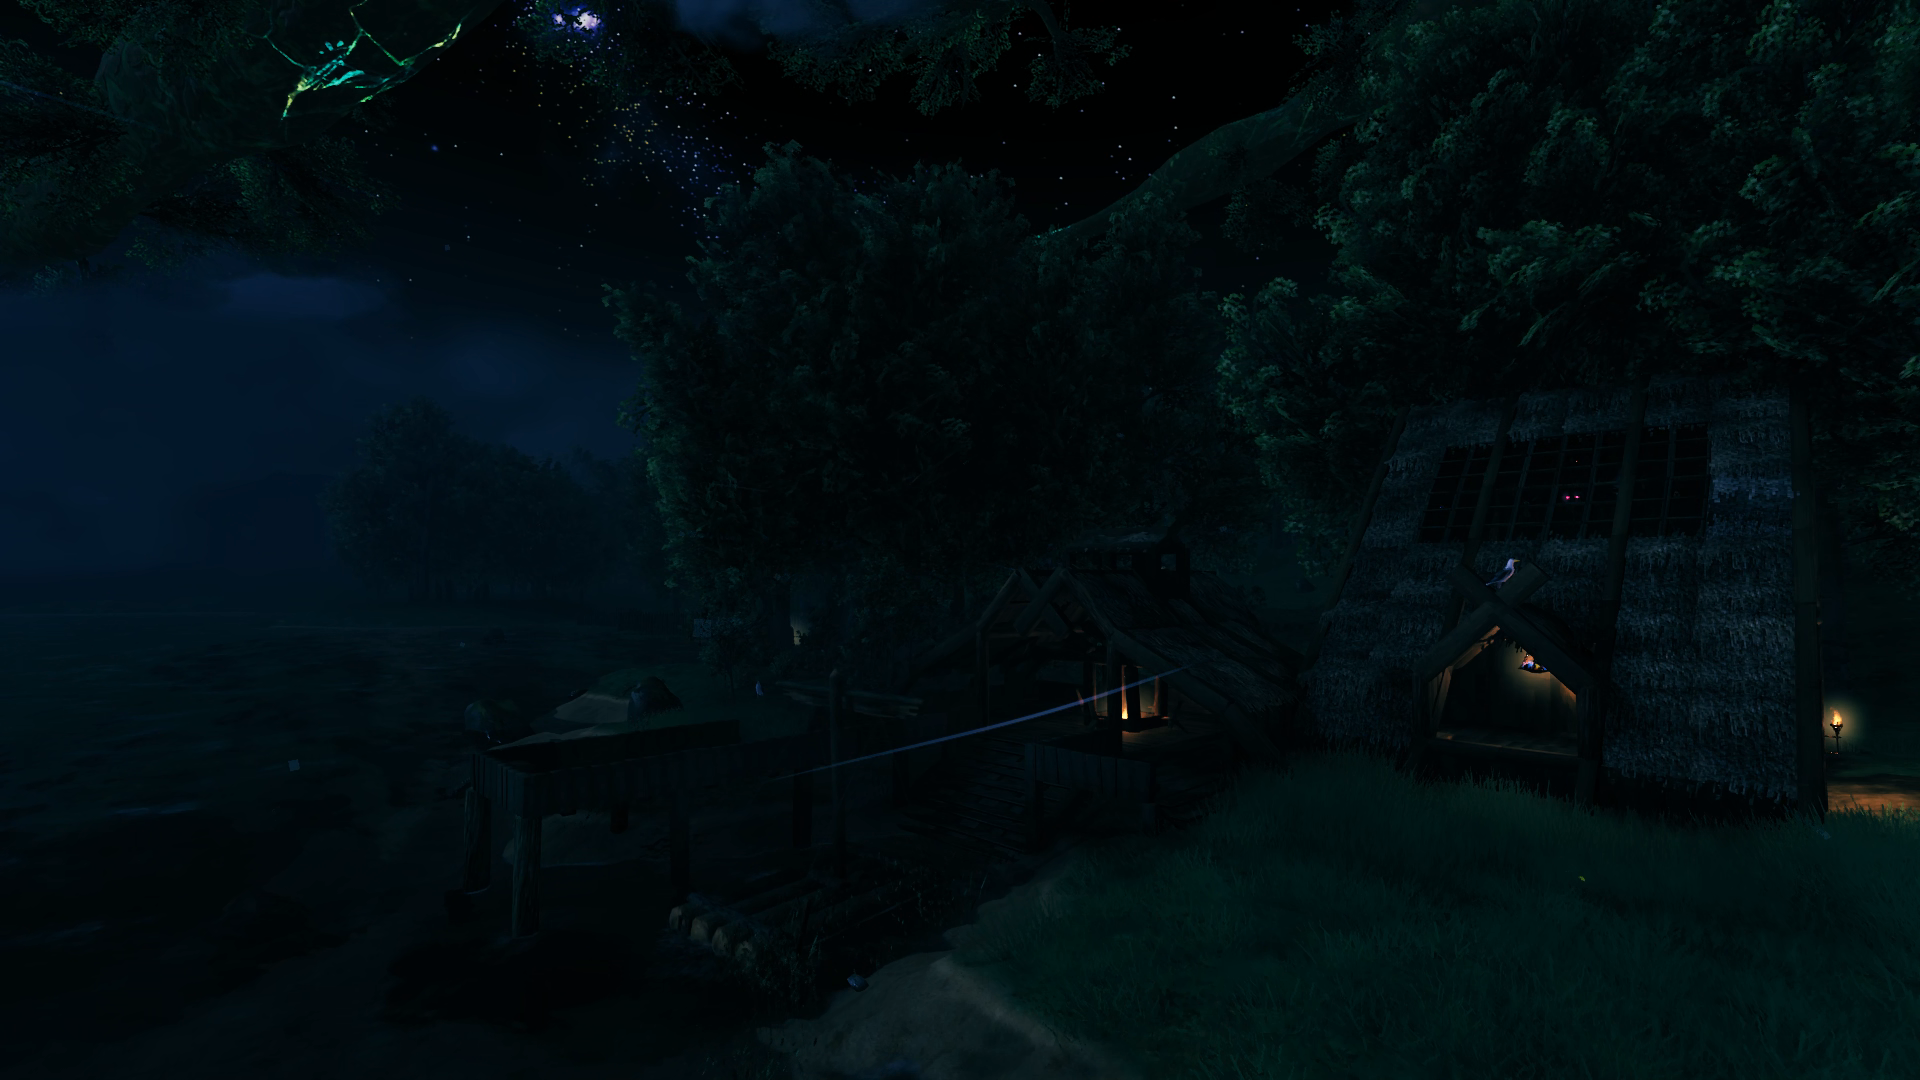
The first thing I did was explore the entirety of my starting landmass out to the point where I had to use a boat to reach the opposite shore. Random fact: at the time of this writing I have died 16 times and my longest living streak is 109 days. No deaths occurred during the building of Hellholm, although one fall left me with only 1HP!! What I discovered was that just south of the world spawn there was an isthmus that provided access to small seas which themselves had generated access to the wider oceans – although I did have to dig a bit of a channel to open up the eastern sea. The meadow in the area was also just perfect for a starter home.
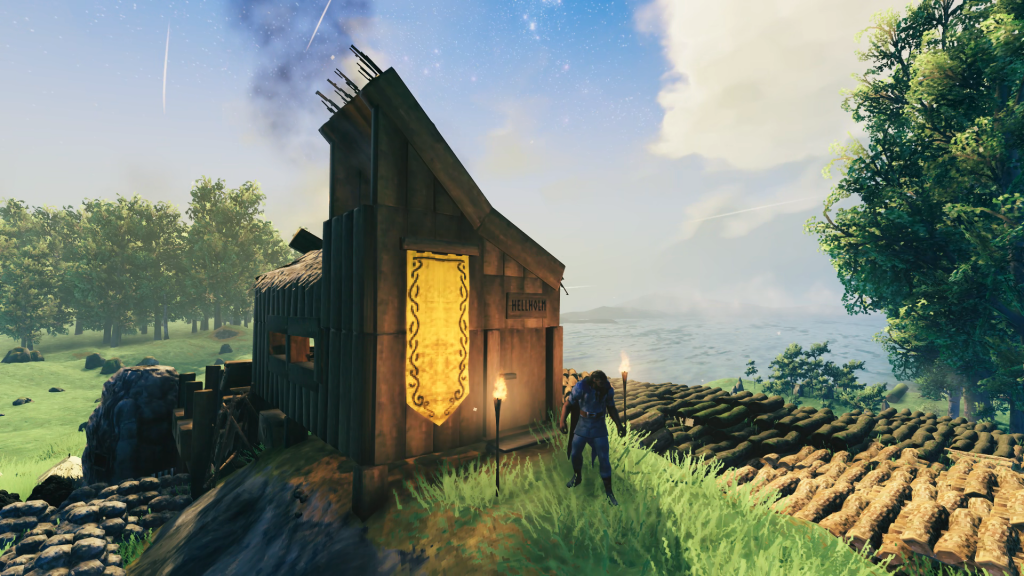
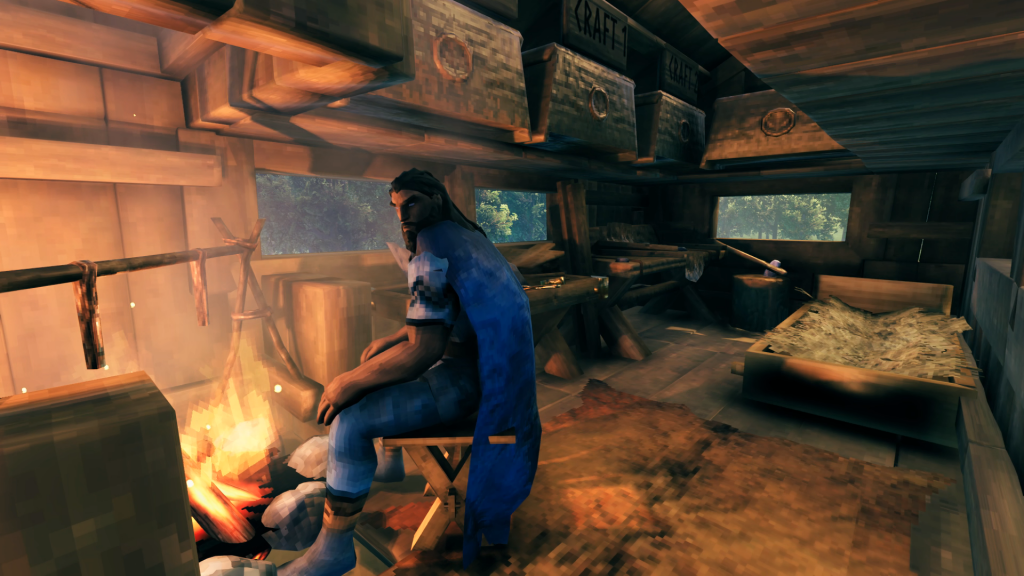

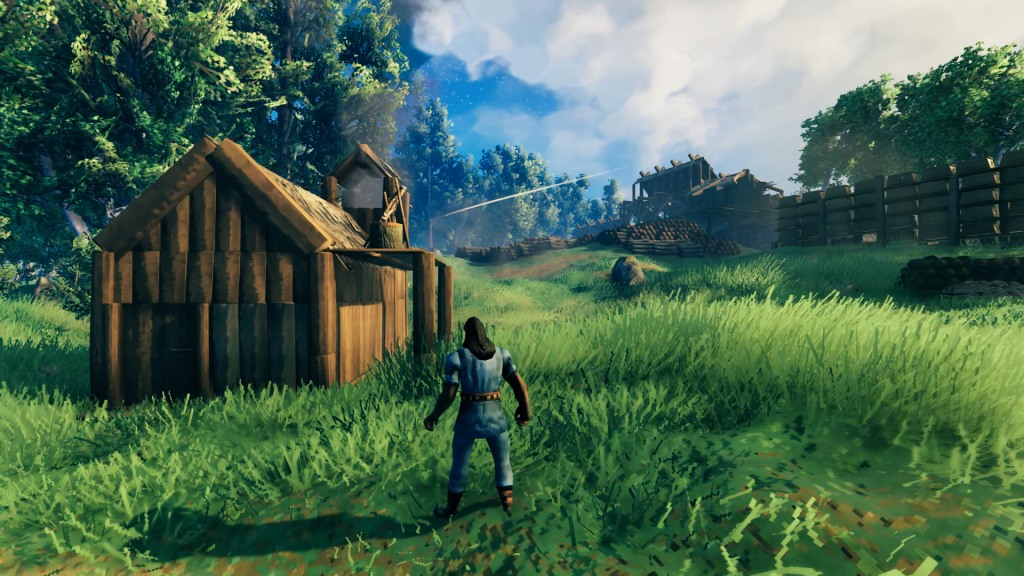
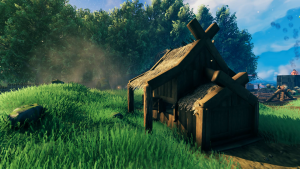
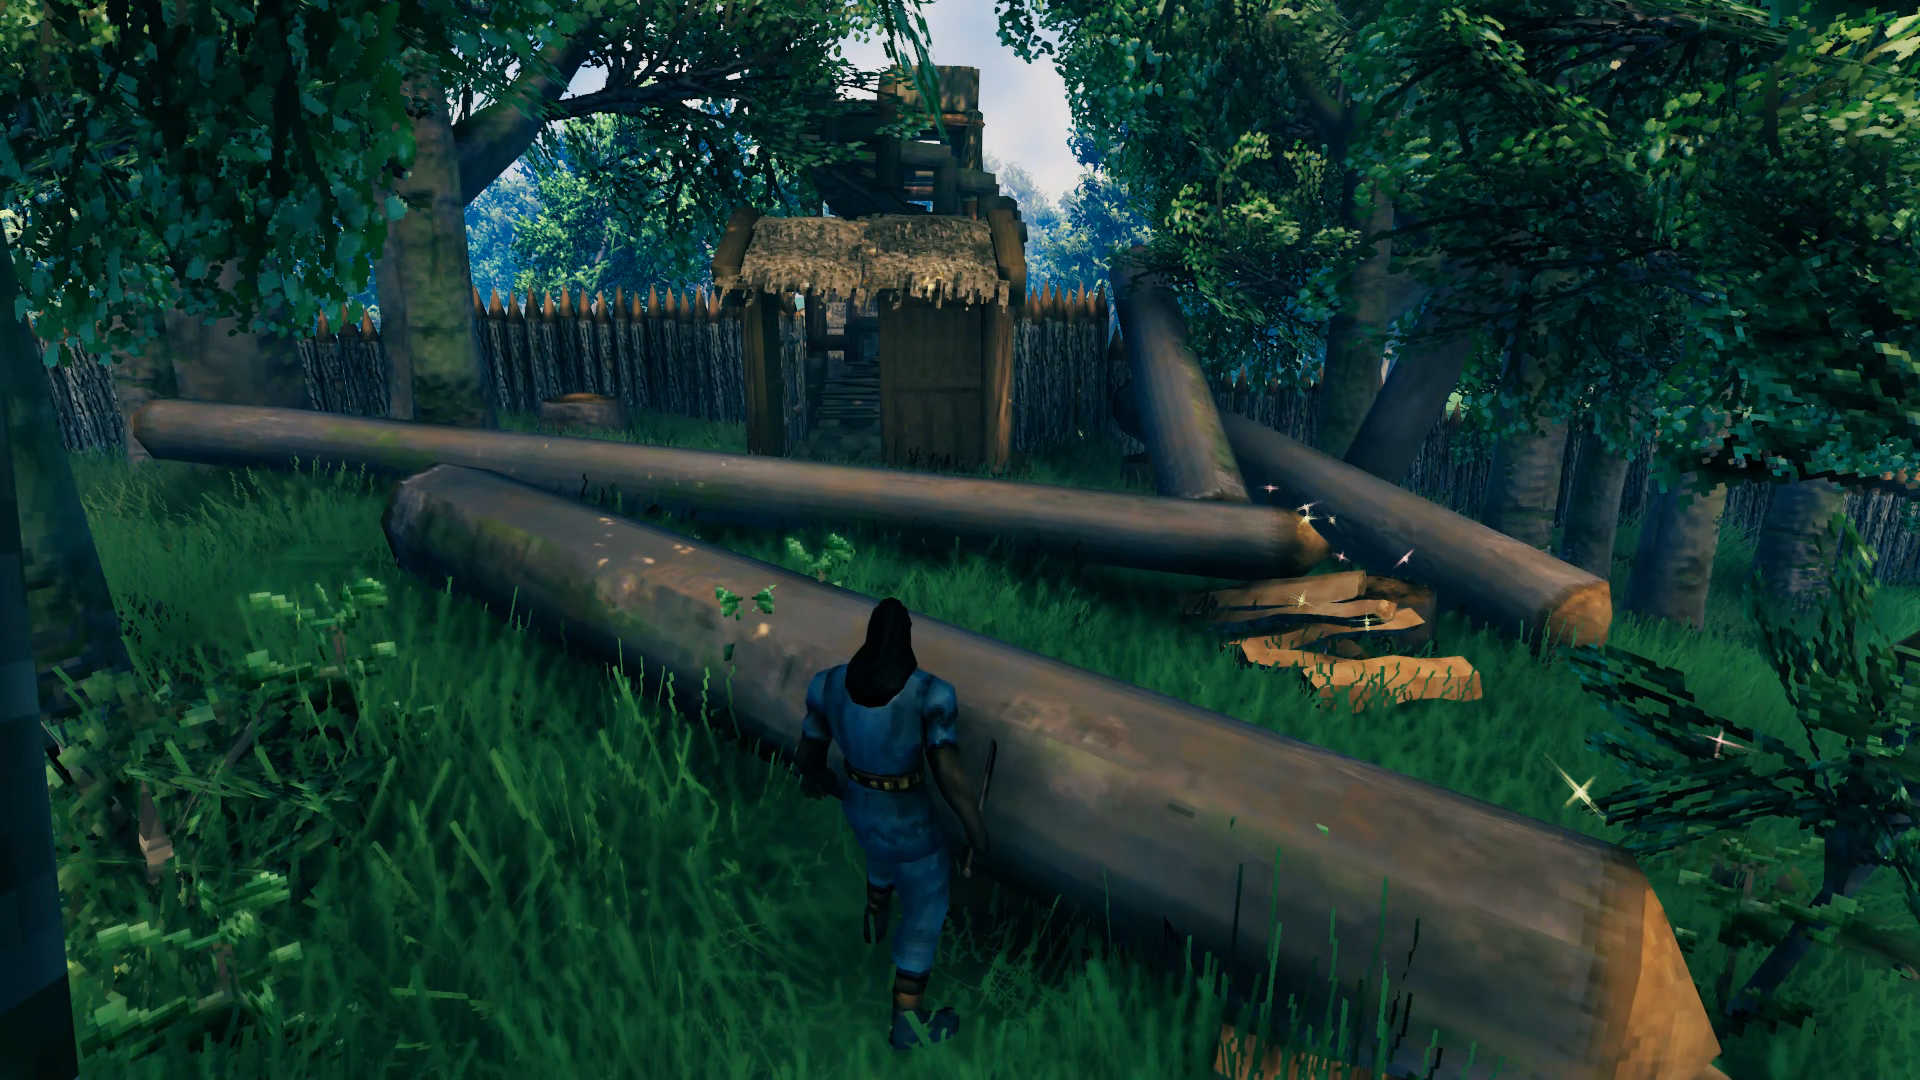
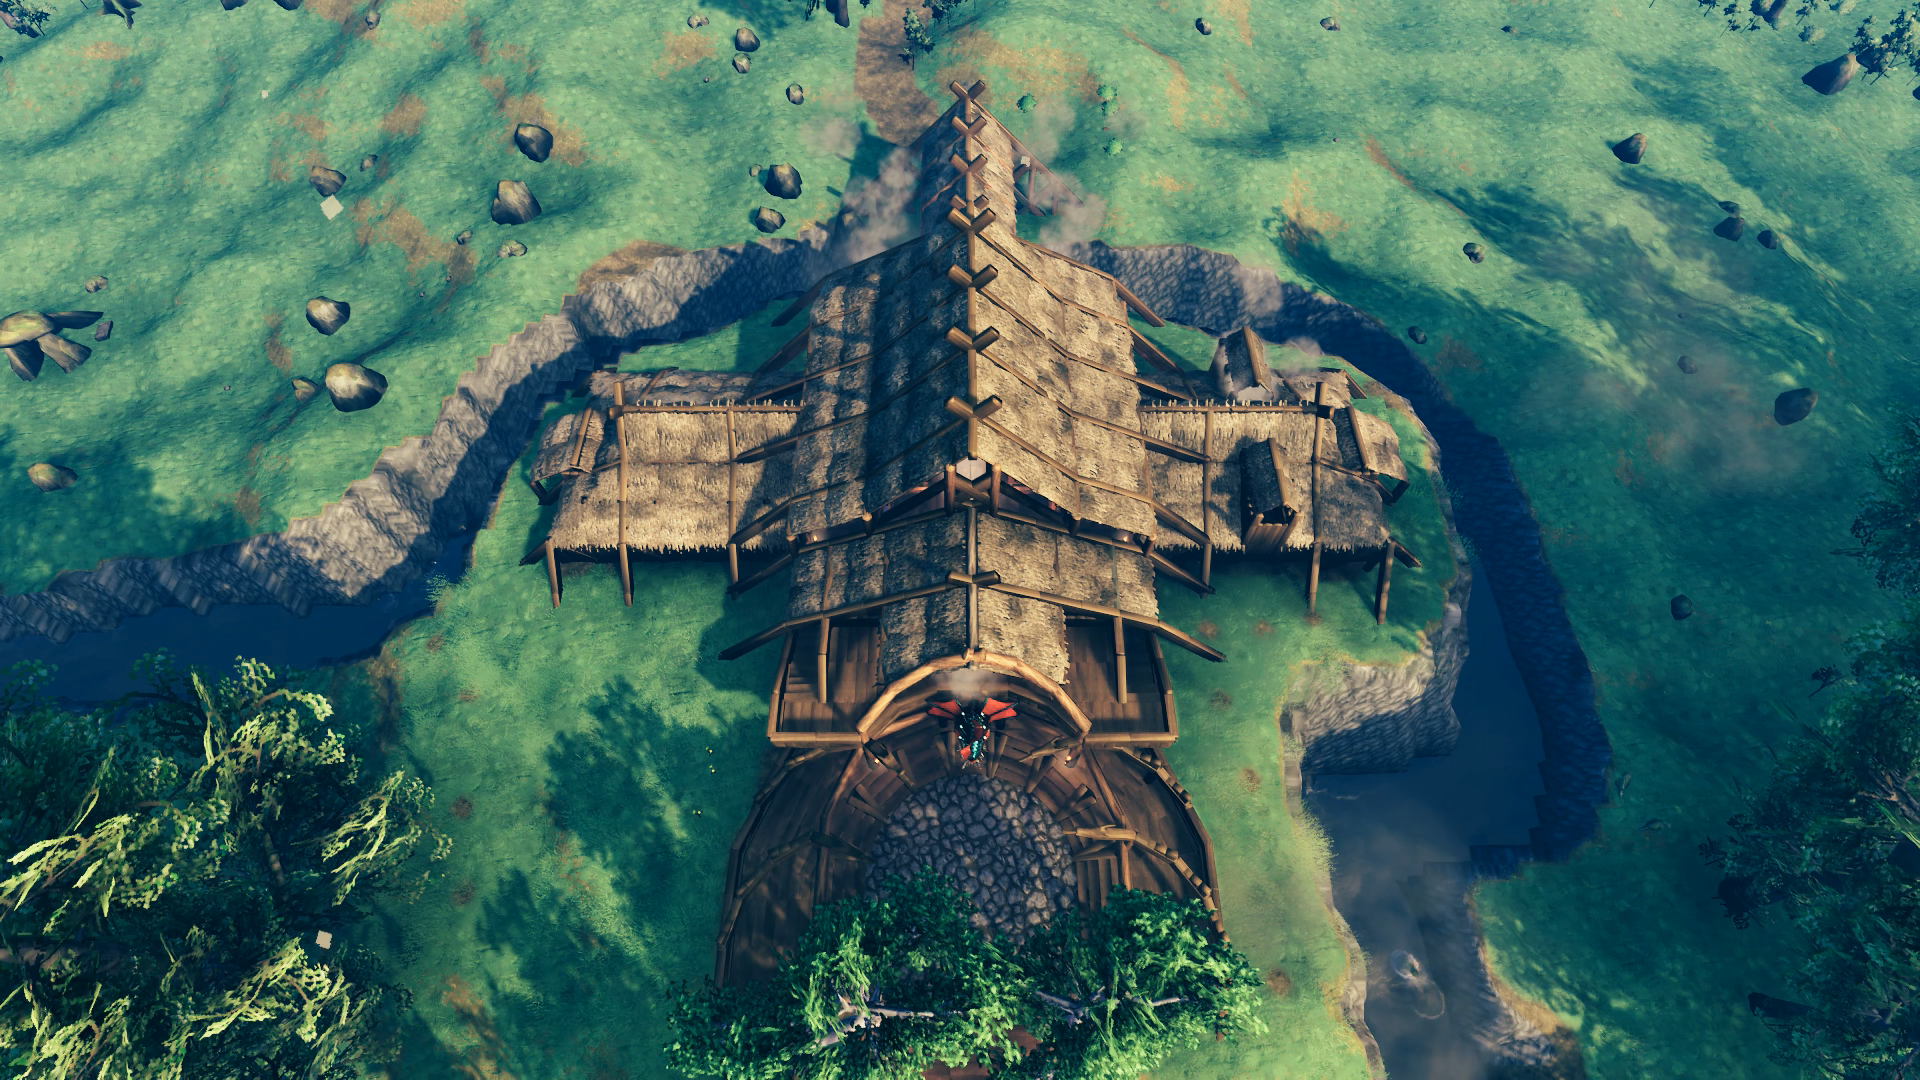
It was built off a natural cleft in the hill, as I did not yet have access to a hoe, that only allowed enemies to approach the door. I didn’t get hit with any raids until defeating Eikthyr, so the greydwarves that descended upon this little house were easy to beat back – I just waited inside until the raid was over, repairing the door as needed and then most of them would de-aggro and wander off so I could come out and kill the rest. They would often do some damage to the surrounding resources but that was a quick fix. So while I was fully exploring the starting landmass I was meticulously collecting everything I could along the way to amass all this:
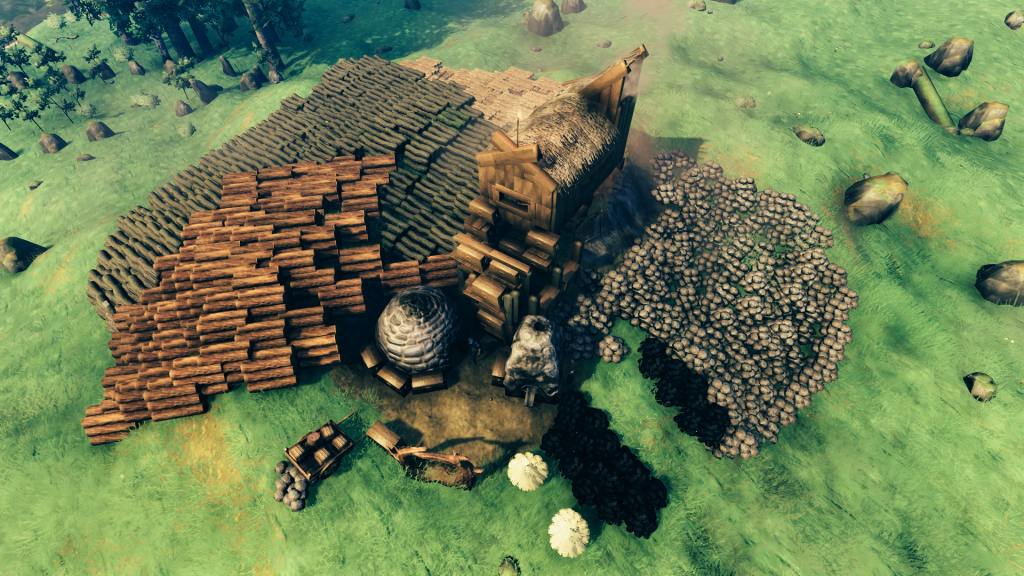
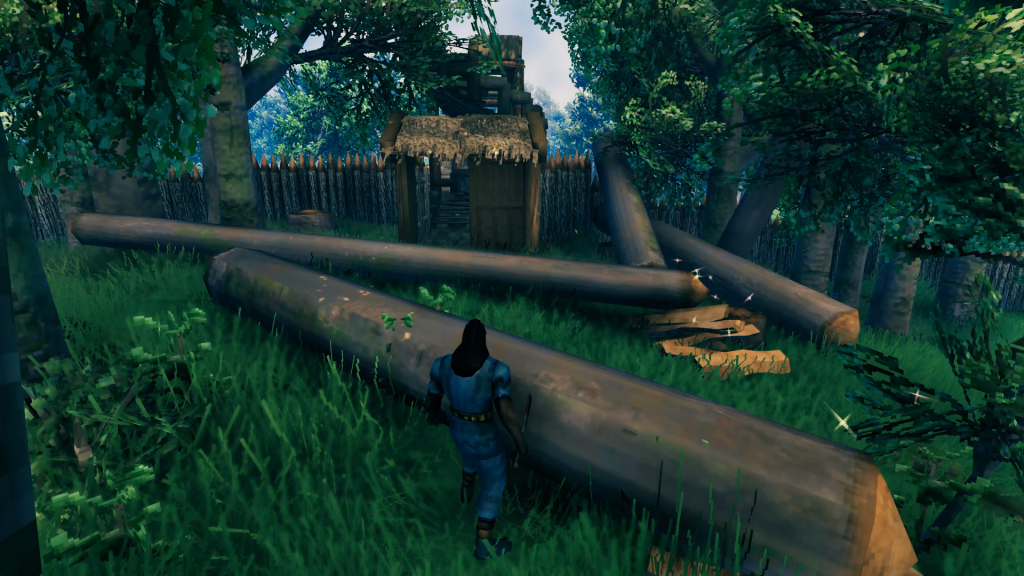
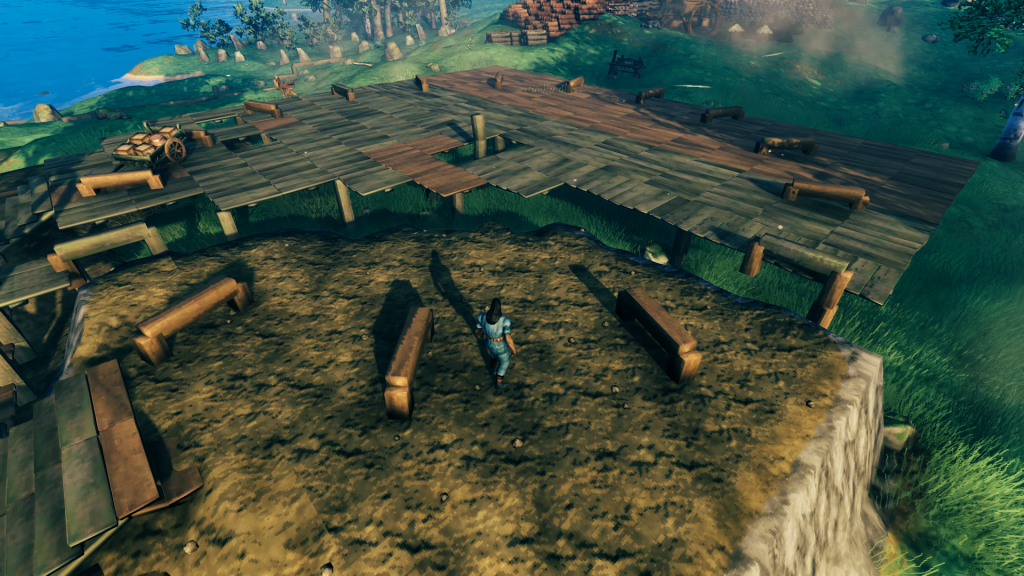
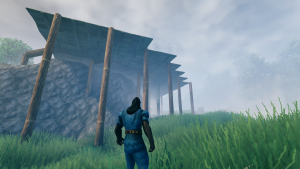
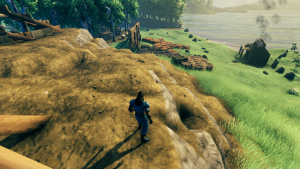
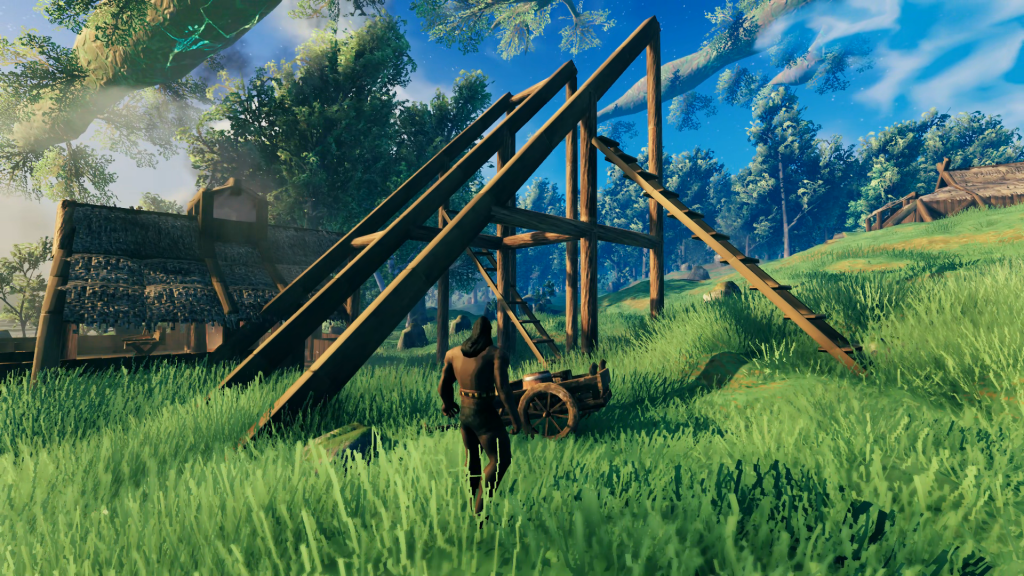
I was ready by now to go after the Elder but I knew then I would have to deal with troll raids so at this point I decided to start construction of the base I had always imagined. I wanted to make use of the entire generated clearing that was available to me:
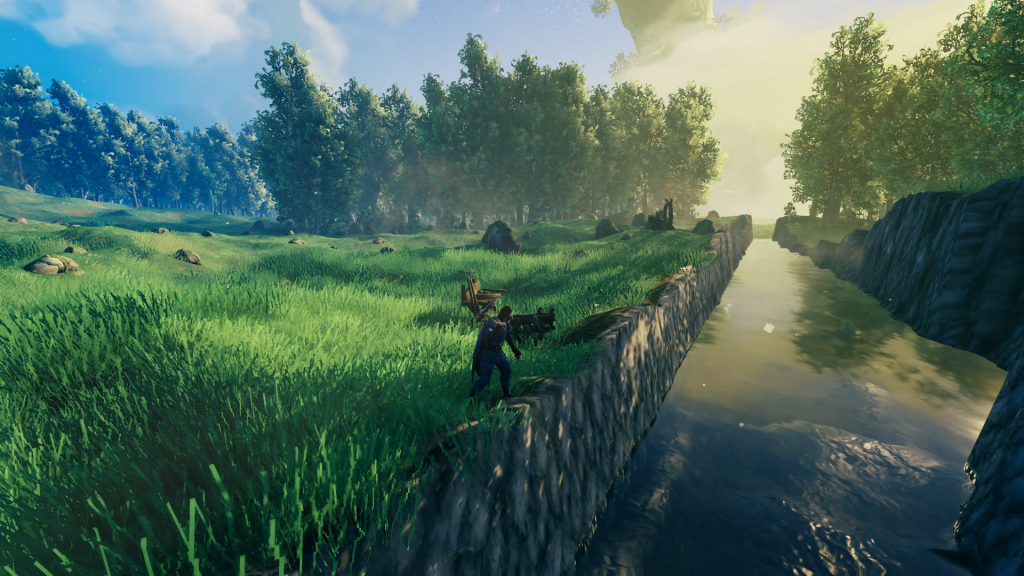
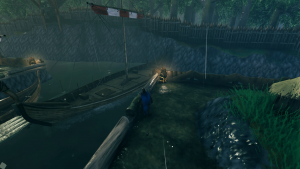
 There was a natural break in the trees to the eastern sea and so I decided to make that the entry point of a canal that I hoped I would be able to dig from one shore to another so that I would have a centrally-accessible location for smelting copper, tin, iron and silver ore brought in by boat. I probably should have placed wood beams to use to guide me in my digging but I didn’t think of that and just went at it with the pick axe:
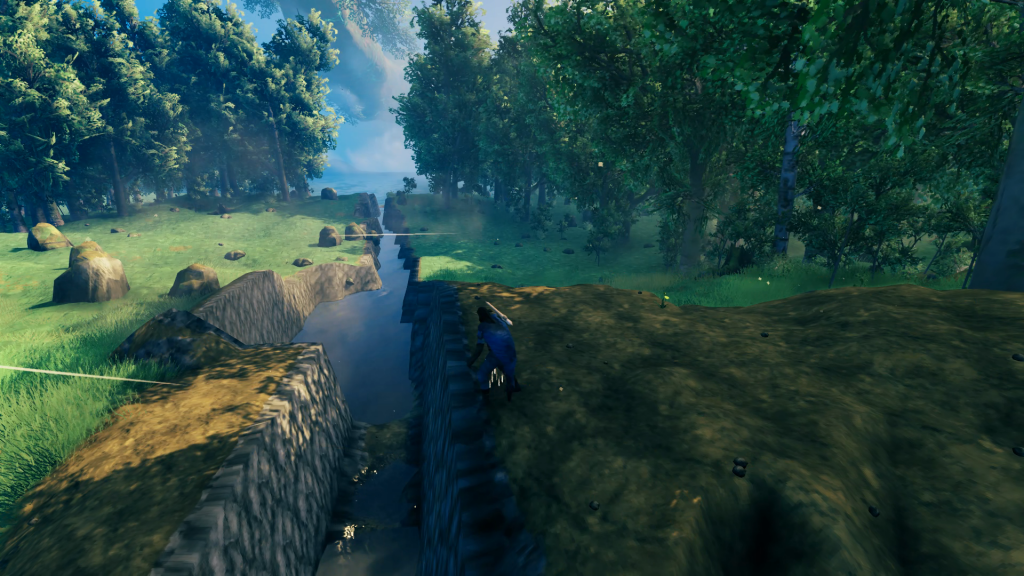
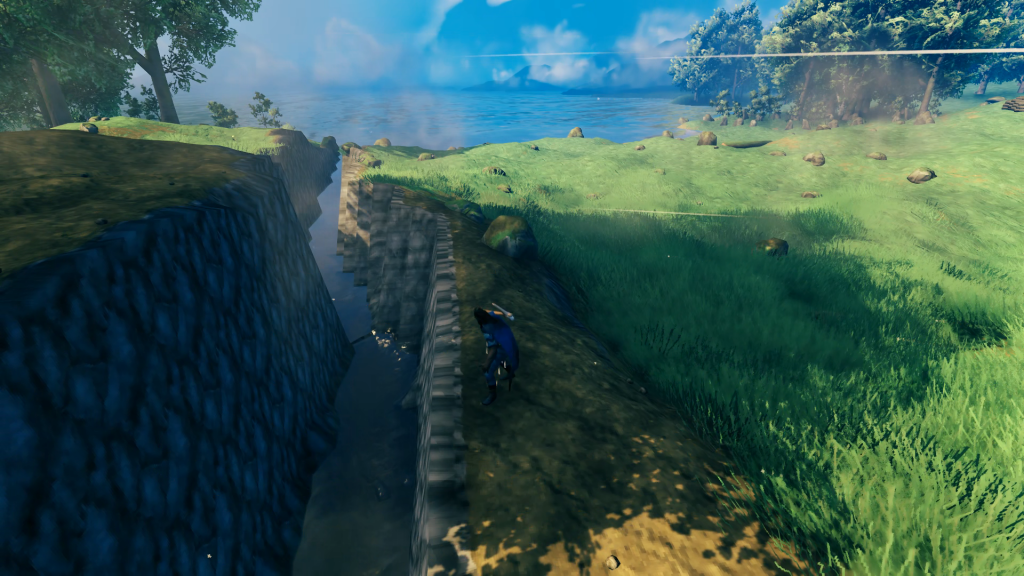
Breakthrough! After successfully connecting both seas I had the first major part of my base built and now I just had to refine it. First I chiseled out a razor-straight edge along the side of the canal that would be a part of my base. I then used the hoe and pick axe to raise up/chip away the terrain on the opposite side to make it appear more “natural” while remaining a sharp cliff enemies couldn’t navigate down. Next I terraformed the base-side ground to be level along the entire length of the canal to form a waterfront promenade. Finally I used some beams to measure out the width of the Longship because I could not yet build one, and did some additional widening of the canal to ensure it would fit.
Next was choosing the railing that would line the promenade. I worked up a few designs (did not research any inspiration online) and decided the second from the left was the most aesthetically pleasing to my eye. I didn’t think of it at the time but the use of these build pieces also means the railing would not take weather damage. Bonus!
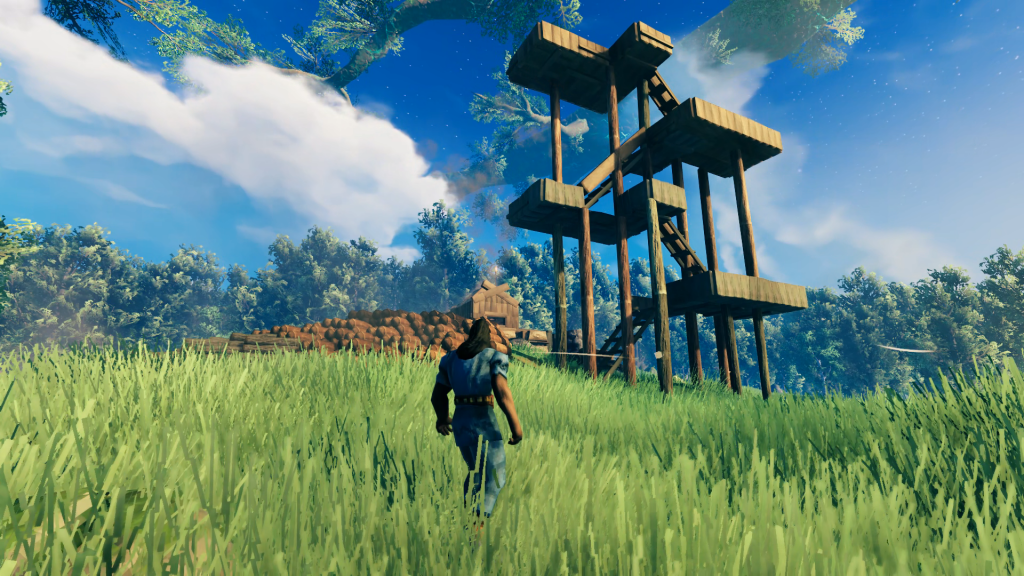
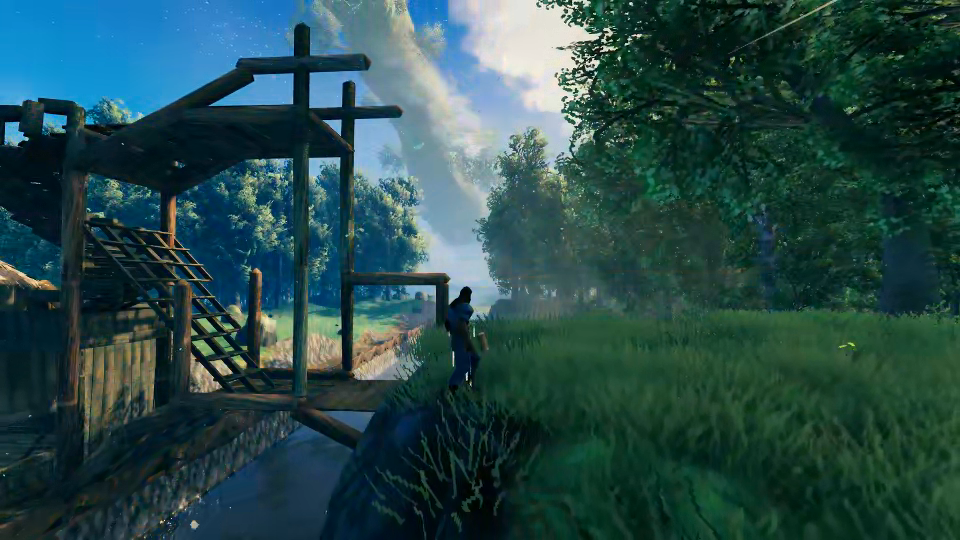
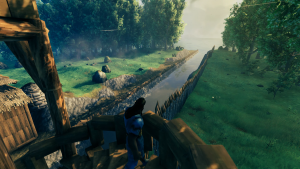
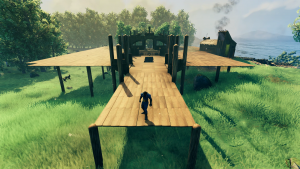
 I took a momentary break from the canal to build a tall wooden tower in order to get an idea of just how high the core wood beams would let me go. I made it 5 stories above the ground, which was pretty good – I thought I could only make it 3-4 but I stopped playing right before the Hearth and Home update that made a lot of changes to the build system. So I was excited that the Grand Hall could be as grand as I imagined it this time. The view from the top gave me a good look at the canal I built with its promenade railed in.

The canal was now complete enough to figure out where I would place the harbor. It wouldn’t be in the middle of the canal because that would not be in the middle of the generated clearing. I lined it up visually with the clearing center and then used beams to measure out an area that would accommodate a Karve, Longship and dock in between. Instead of making the harbor long enough to fit an entire Longship, I had a turning basin cut into the opposite cliff to give the ships room to maneuver before/after leaving the dock. I was so focused I forgot to take in-progress images but this was the initial result for the harbor:
Hard to see but at the end of the dock are ladders leading down into the water for an easy out if I fall in. The entire bottom of the canal and harbor is leveled with the hoe to be just deep enough to wade in, so the boats don’t bottom out but I also don’t have to swim around. Although the dock looks like it’s placed in the center, it’s actually just a bit offset as the empty slip is a little wider to hold the Longship eventually. Although the railing prevents a cart from being pulled up the stairs, the dock is short enough and the holds are at the front so that you can encumber yourself that distance easily to load a cart up on the promenade.
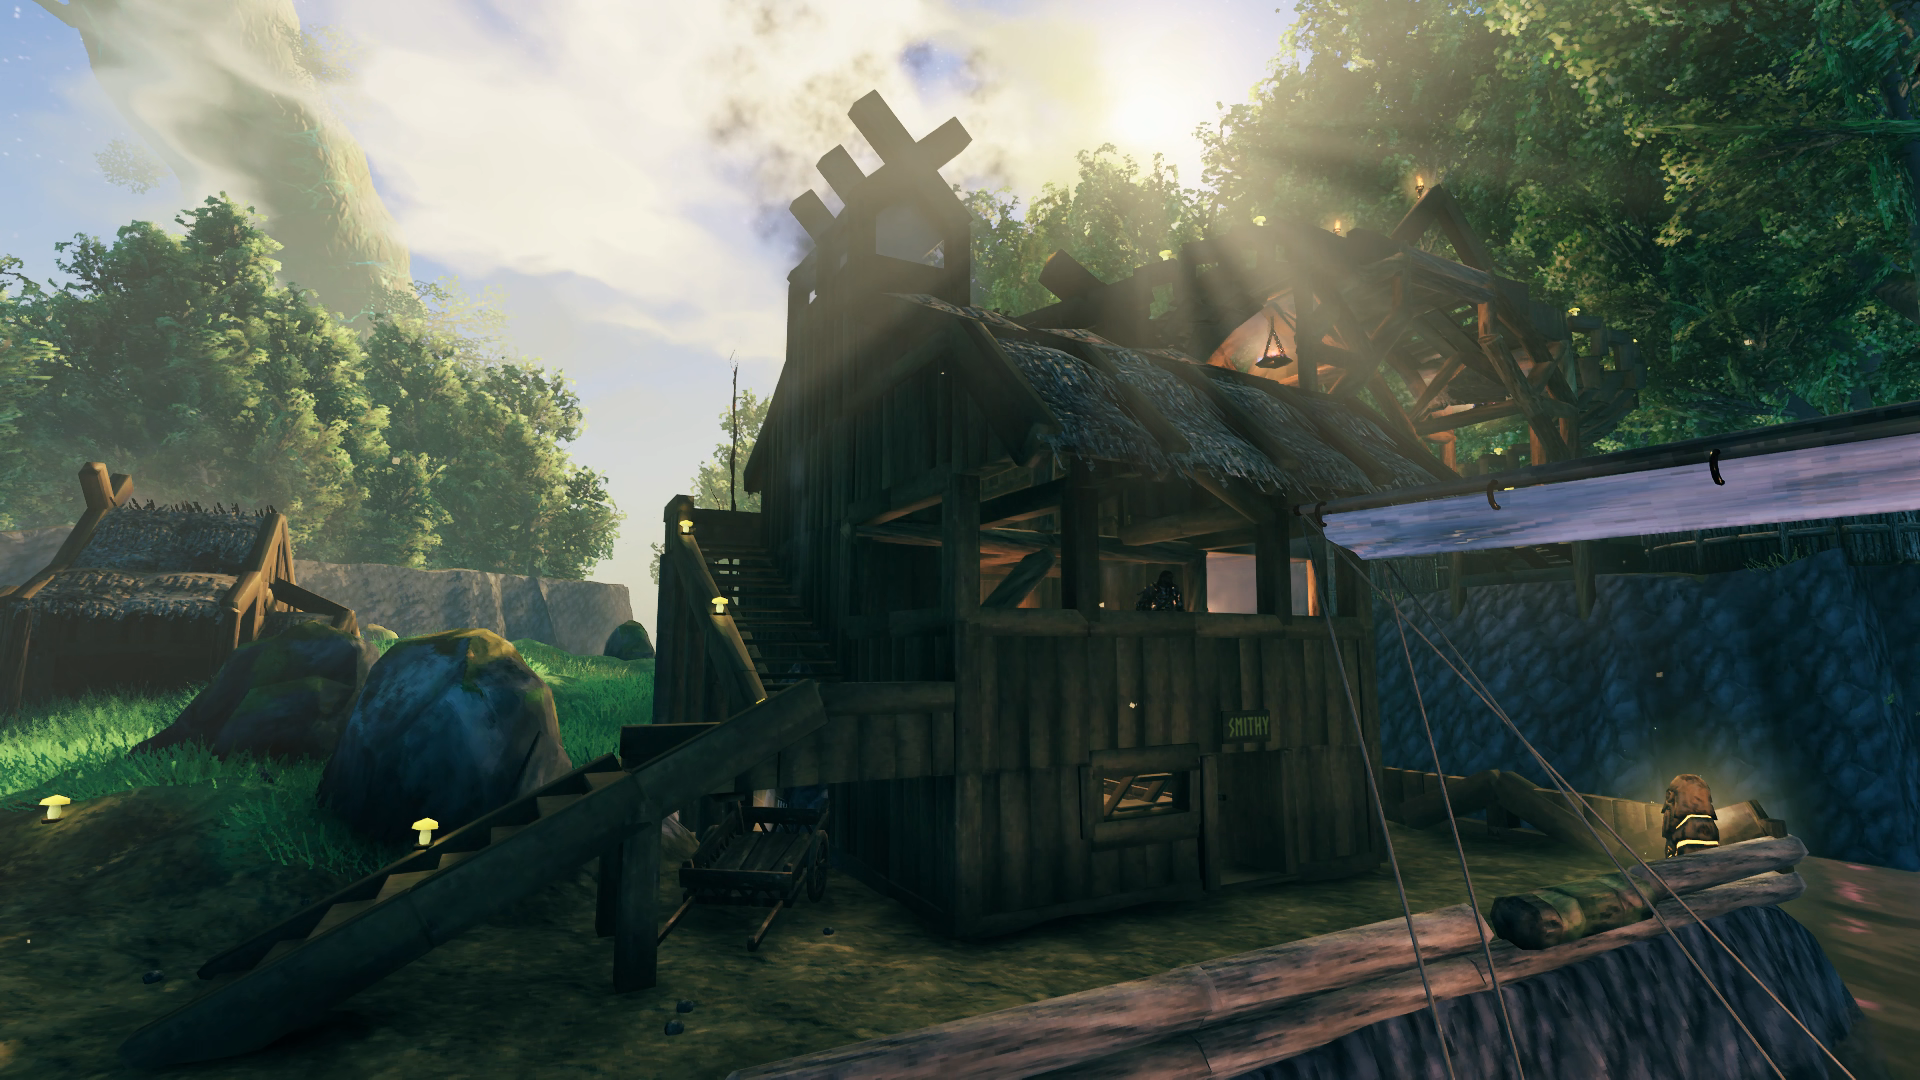
I was on a roll that day I built the harbor and I went straight for the Smithy next and failed again to take any in-progress photos. Here was the initial version I was pleased with:
 Okay yea that was a lot of progress 😝and a bridge! With spiral stairs! But we’ll get to that. For the Smithy, the idea was to have it right next to the dock so I wouldn’t have to haul ore any further than necessary to get it processed. You can do a full Longship load in one trip – encumber on the dock from the boat to a cart on the promenade, wheel the cart to the Smithy door, and encumber inside to a chest (works the other way too). Minimal stamina required. I was quite pleased with being able to integrate both the Smelter and Kiln into the building, and although the chimney for the smelter was easy enough the rest of the roof went through two iterations before I found a design I was satisfied with.


When I laid out the foundation I used what I estimated would be enough space, knowing that I wanted to save room out in the clearing for a pasture. I knew that there would be numerous upgrades to the Forge that would have to be placed in close proximity to it, and I just hoped I wouldn’t have to do any sort of major redesign as my ability to craft those items came about. The portal would eventually link up to one in the workshop of the Grand Hall, which would hold my fully-upgraded Workbench and make it simple to transport the majority of crafting materials from one to another to build things. I thought about making a flume for the coal to run down, but it would have taken up too much room. Initially some of the coal was falling into the small gap between the terrain and the building but I was able to construct small floor pieces into the Kiln to keep the coal atop the second floor.
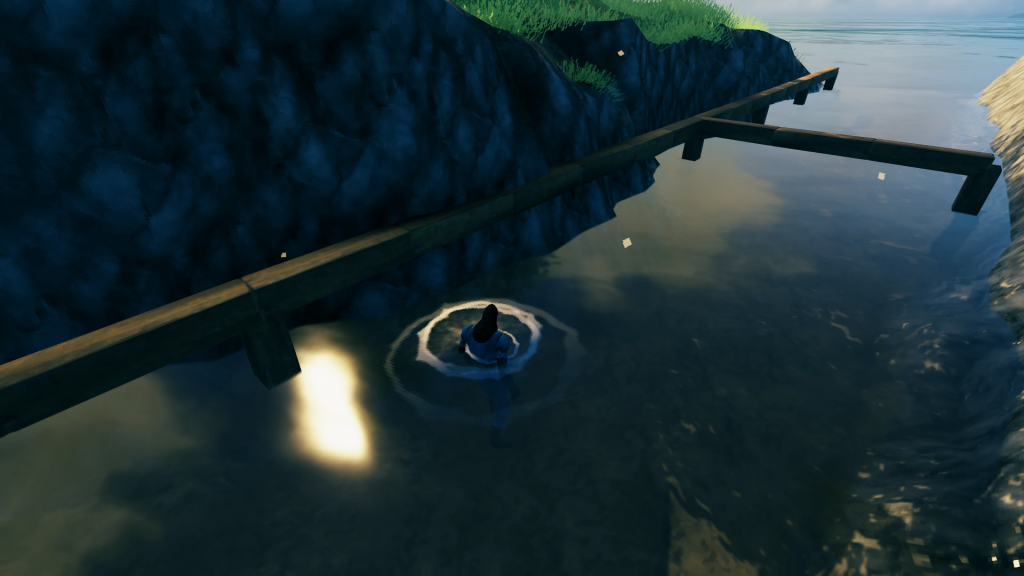
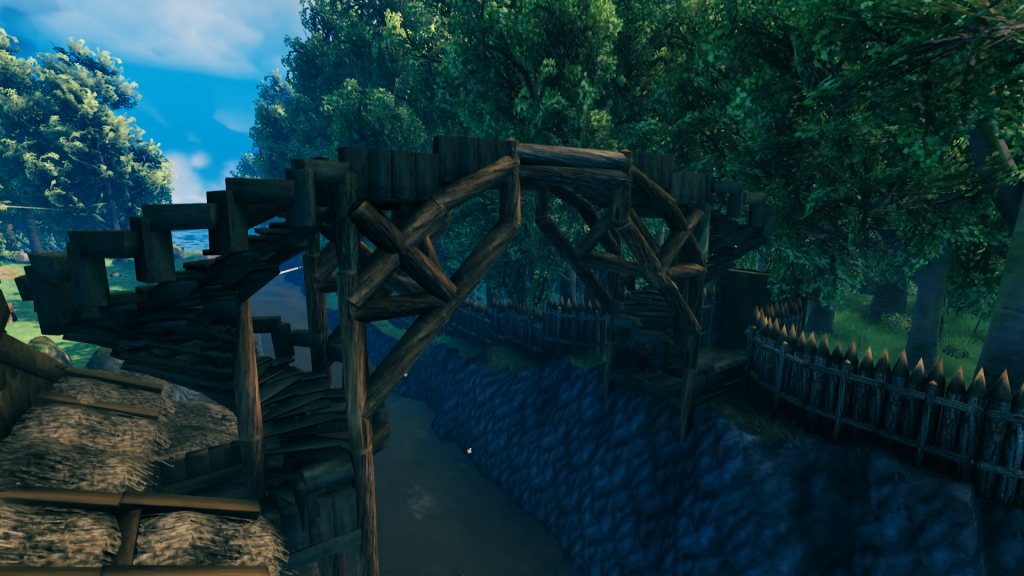
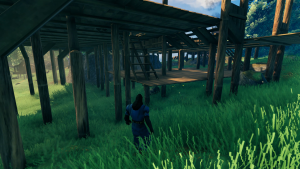
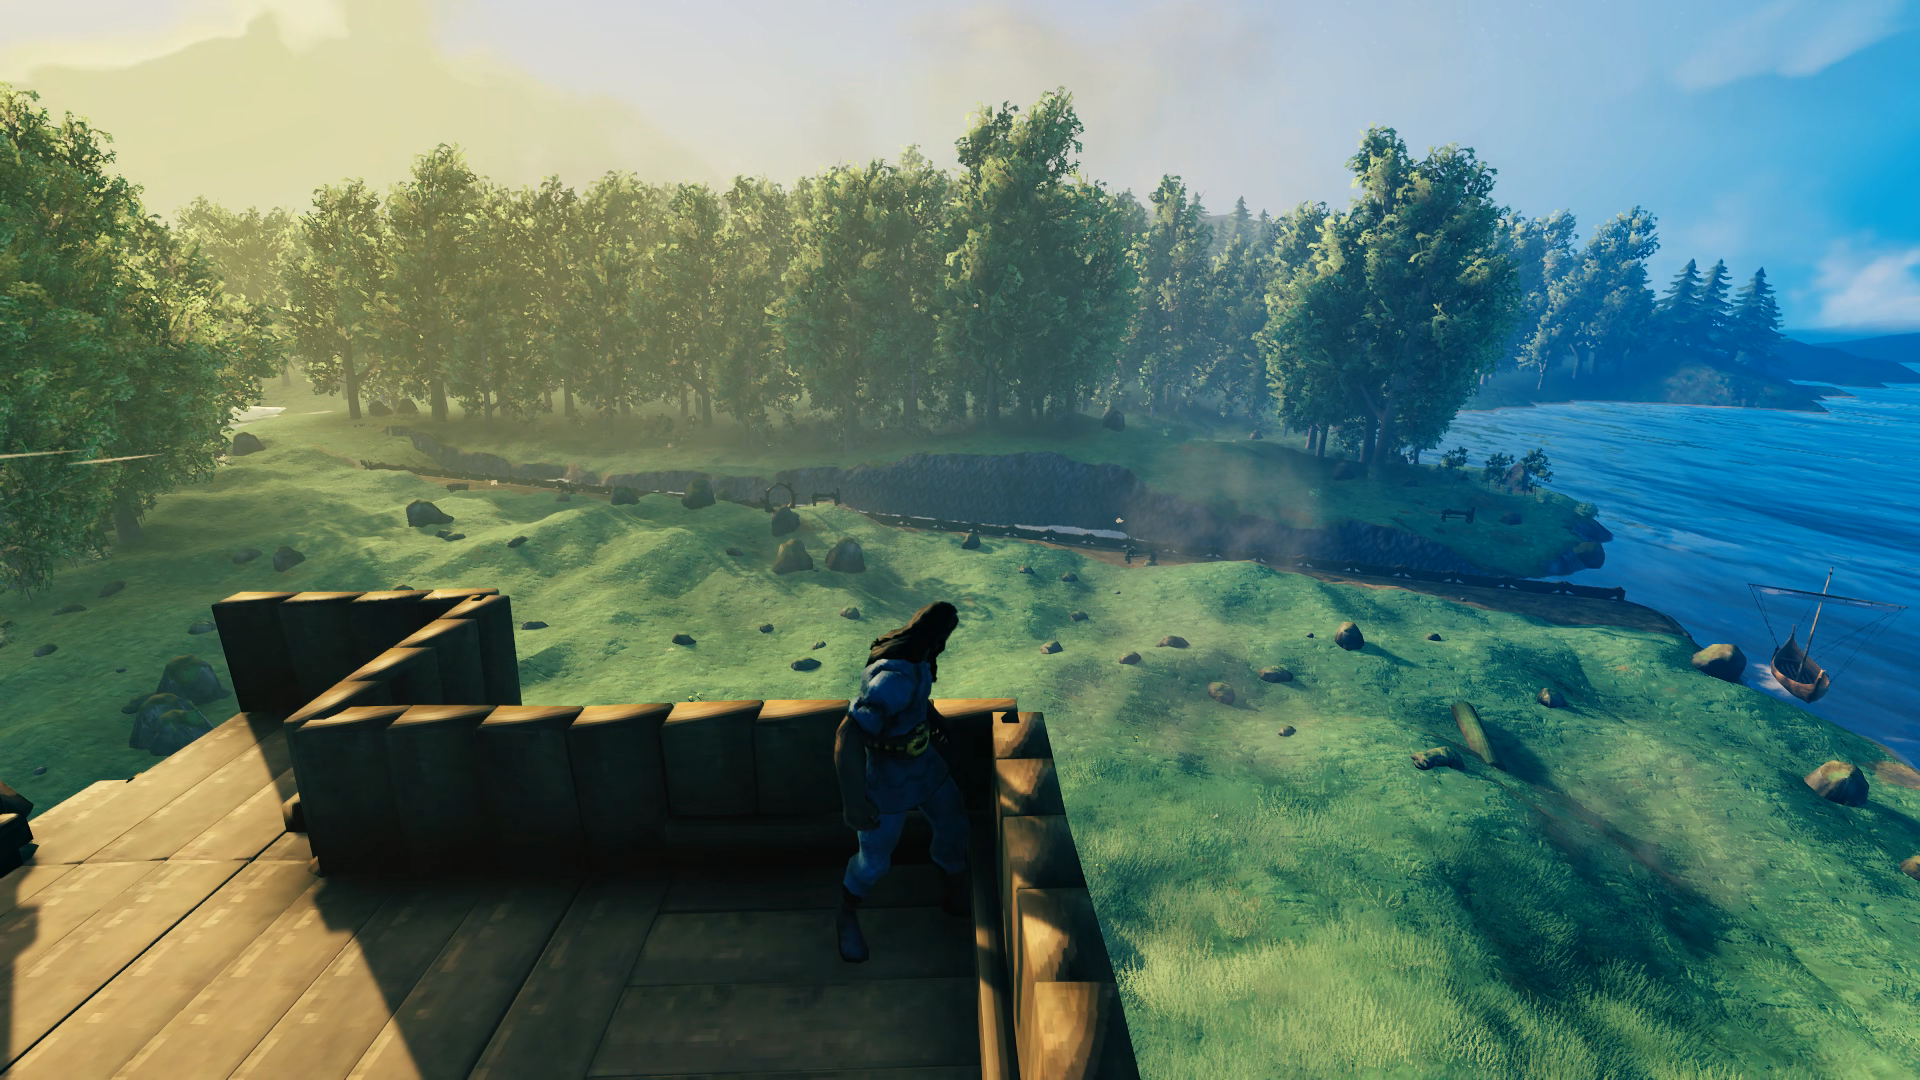
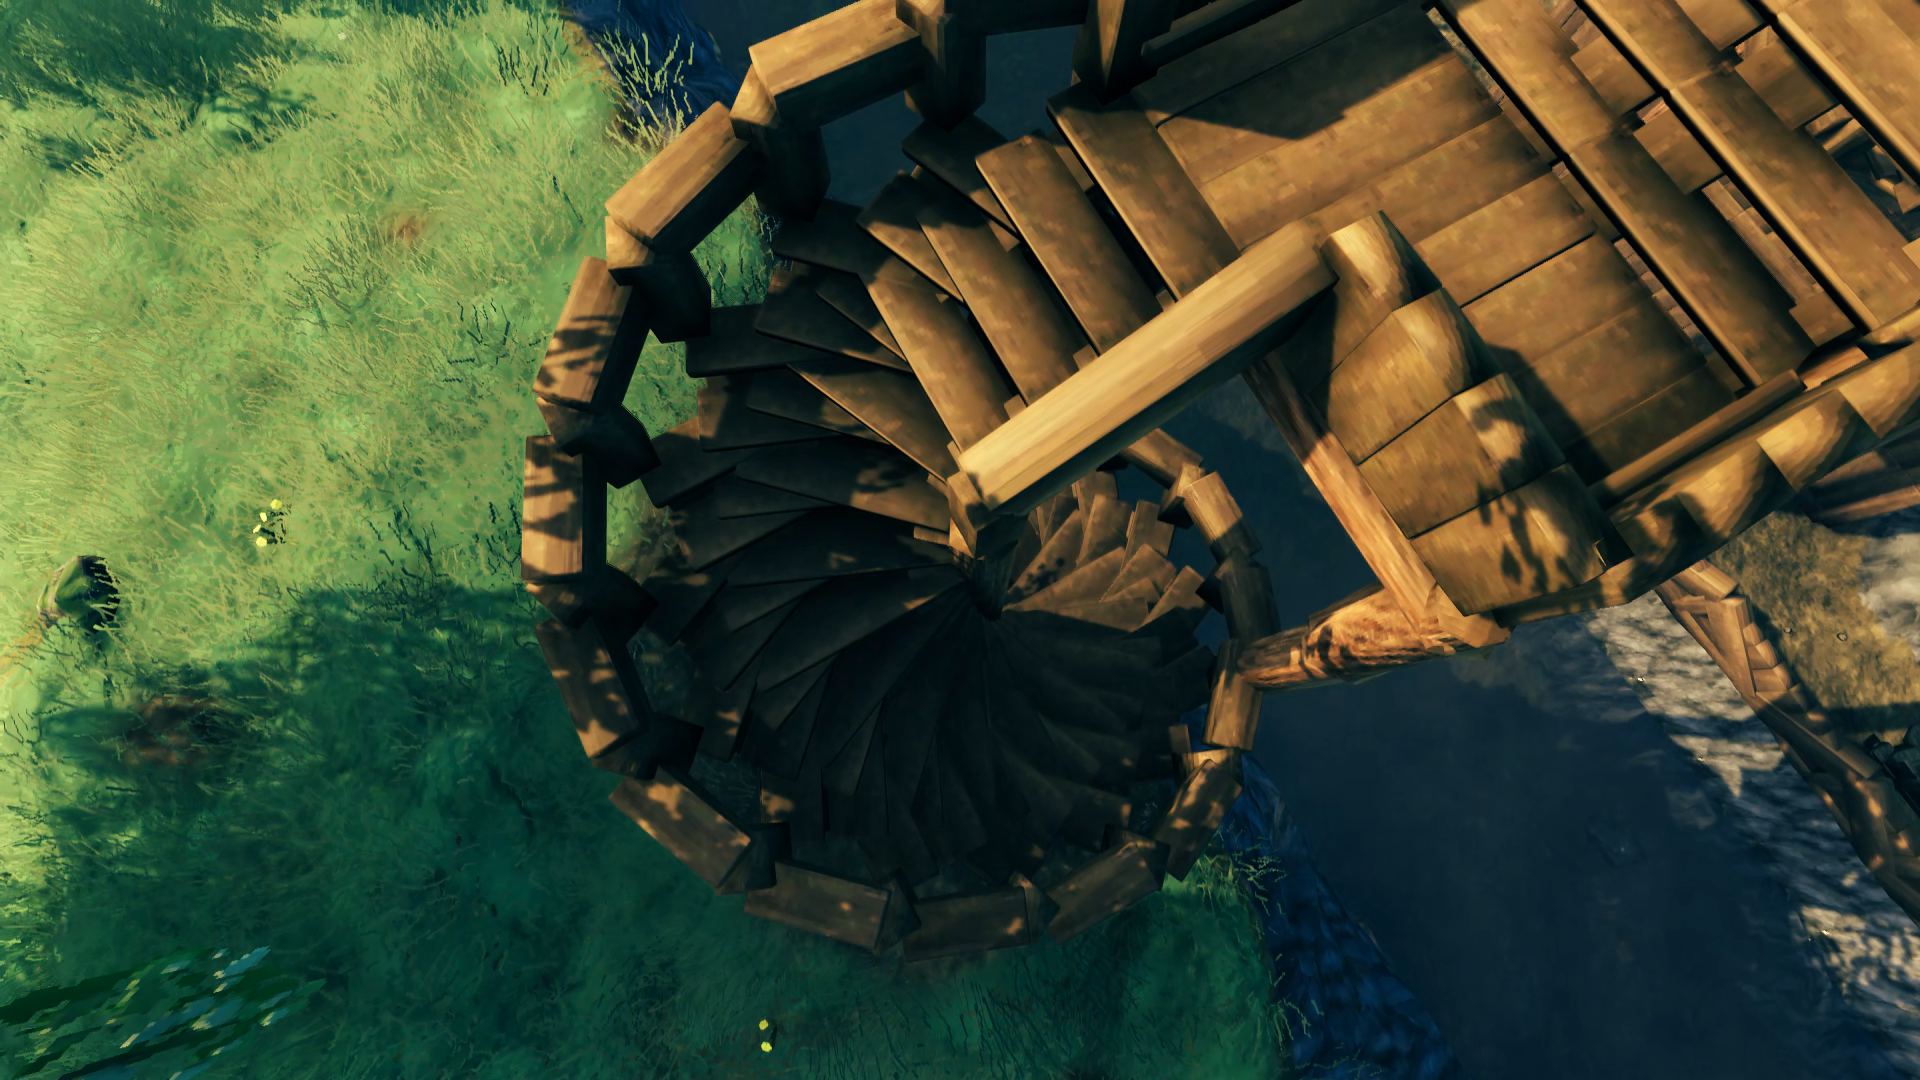
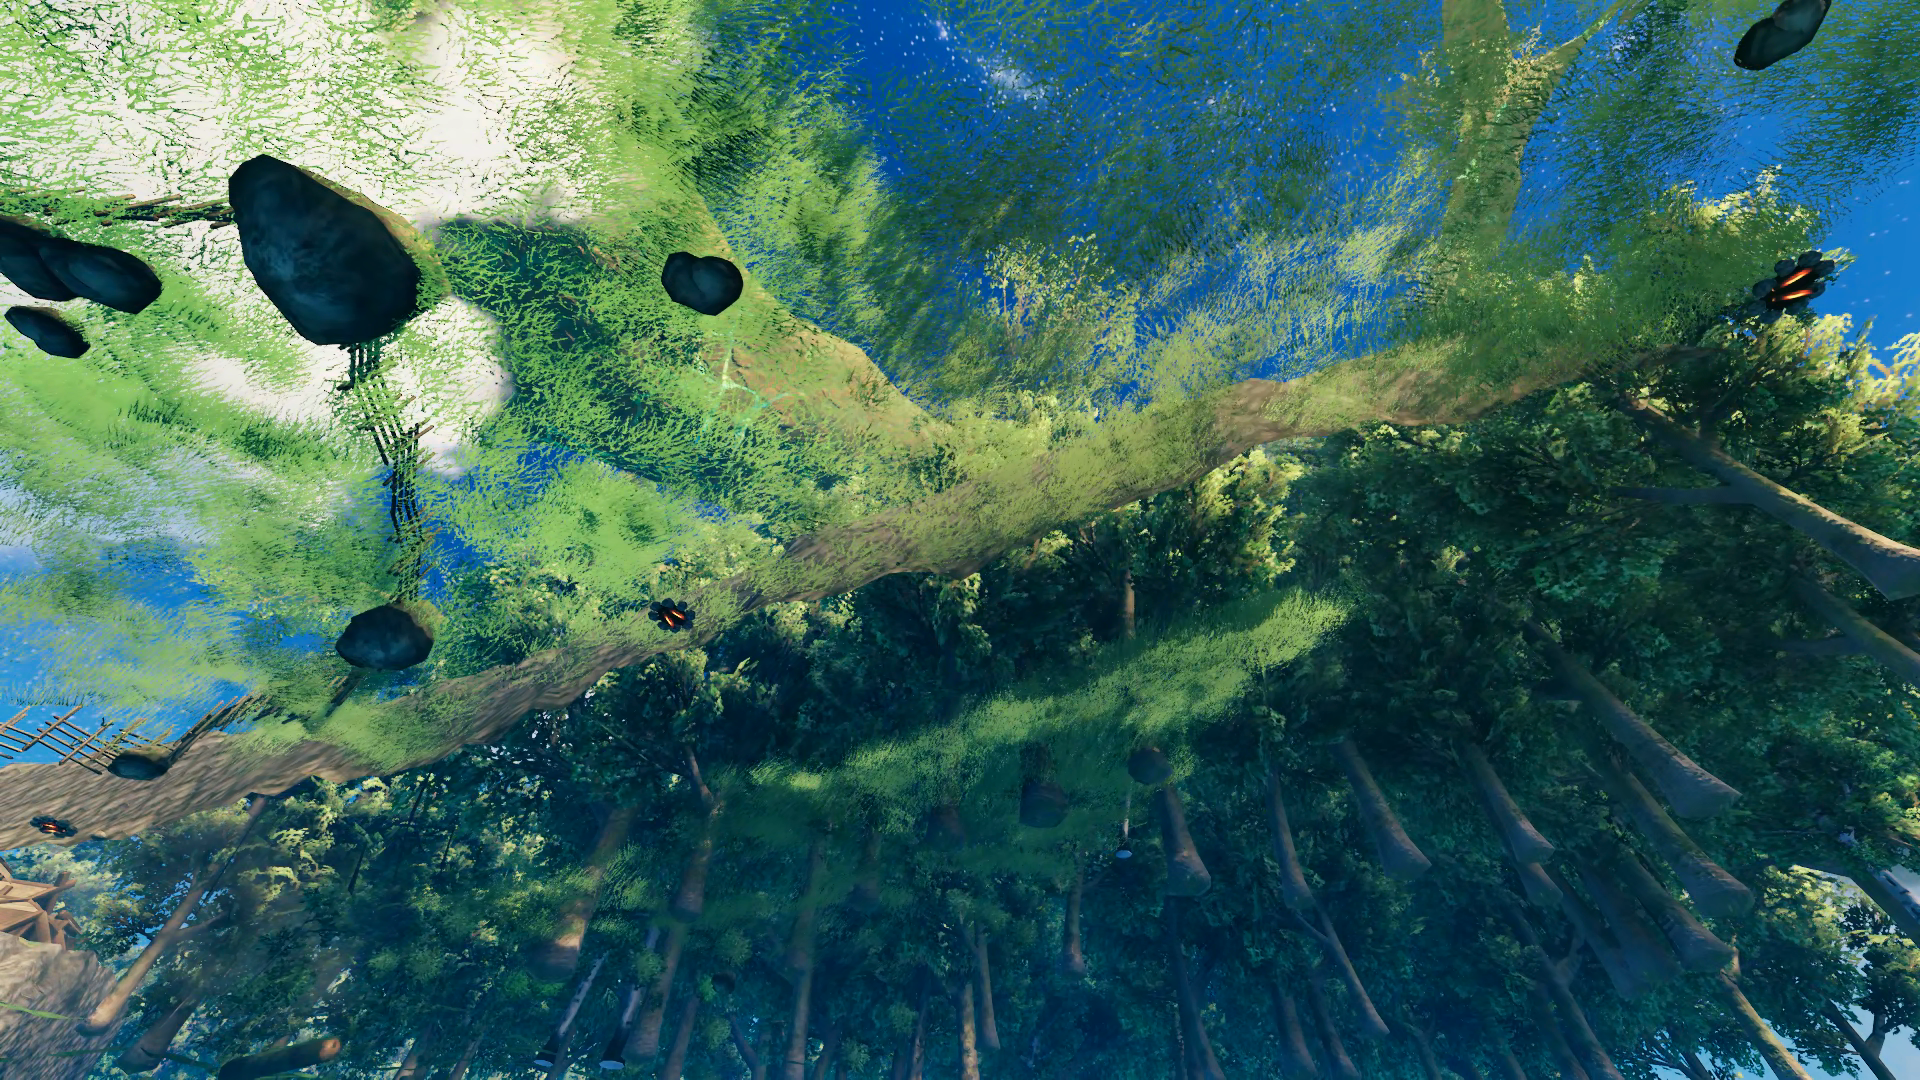
 I do have one in-progress shot of me building the bridge across the canal, which I measured to be high enough to allow the Longship to sail underneath it. I built the span across the bottom first to test the structural integrity of the design before building across at height. I’m standing on the generated terrain on this side of the canal – no terraforming done other than cutting into it from the base to form the canal. Turns out it was the perfect height for the stairs to do a complete spiral back down to the ground!
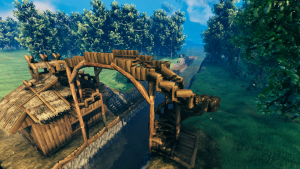

The design of the spiral stair was something I challenged myself to figure out. I had learned from basic build videos that you can stack horizontal beams in a ring around a vertical beam but I didn’t research anything beyond that. My initial attempt at putting the stairs on the beams meant that you either had to sprint to overcome the bump or hop your way up the staircase, which I didn’t like. I then figured out how to place the stairs using the beam attachment in a way that I could demolish the beams without affecting the integrity of the stairs. This meant I could now walk up the stairs, but only on the outer half, I still had to sprint to climb the inner half. That’s the main reason why I built the railing so that you can walk against it to travel up and down the stairs without sprinting (wolves can traverse up and down them as well). The bridge ended up being 4m taller than necessary to accommodate the mast of the Longship and I couldn’t build anything higher than a railing on top of it, but I didn’t want to sacrifice the full spiral of the staircase to make it any lower.
With easier access to this portion of the clearing, I began constructing some basic defenses. I considered putting up sharp stakes along my stake wall but decided not to waste the resources as anything that could break through this wall couldn’t make it down the cliff. They are basically there to prevent enemies with bows from being able to take potshots into an area of my base with a lot of exposure. I then planted a host of Beech trees to fill in the gap, hoping that they would soak up some of the damage from a troll swinging a log.
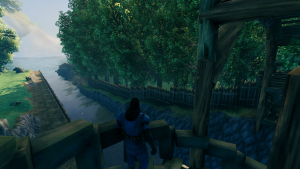
I did end up with one tree sticking its branches close enough over the spiral stair that it was blocking my camera view while climbing and descending, so I chopped it down. But I planted the trees all so close together that I ended up with a bit of a domino effect that knocked over like 4 more that I had to then chop up, in the process knocking down 2 more and had to replant all but the one I initially wanted to cut down. I’m sure you can relate.
 Since this would be the rear entrance to the base, I just built a small gate house at the bottom of the stairs.
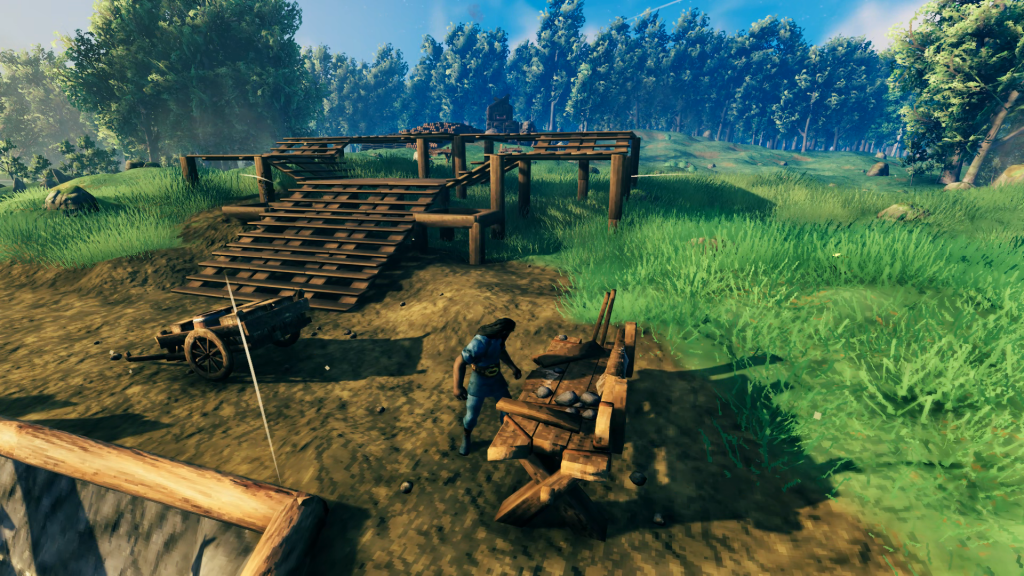 The “bottom” of the base was now complete enough to begin building “up” from the lower-level to the mid-level, which would hold the portal hub. I started with the wooden staircase that would rise five levels, split around the middle to wrap around a future portal platform. To the sides you case see squared-off beams that would define the location of future birch trees. Once the wooden elements were in place I raised the ground up to match. I considered removing the wood floors for bare earth but decided to keep the flooring for better continuity from staircase to staircase.
 As I was building up the mid-level I planted an oak tree in the field down by the water, which you can see in the background. Not the tree, I already chopped it down, but the wooden beams used to measure how far the canopy extended. This let me place a center post marking the tree planting location in the mid-level and extend out radials in all directions (they are now shortened at the distance I plan to place the portals). The center post was aligned with the middle of the three-wide stairway using an X roof beam piece’s center snap point when placed across the middle stairway. Once I had the circumference of the portal hub established I was able to raise the ground up to match, this time removing the wooden flooring afterwards.
 With the portal hub fully built up, I could start getting an idea of how high the upper-level that hosts the great hall would be, placing another five stairs this time with them all ascending straight up. Meanwhile I have my birch trees and oak tree planted and waiting for them to grow. Thankfully the game now allows you to rotate them, but from the sapling it’s not possible to tell how that will turn out since you can still end up with one of a few different types of birch tree and they can also be tall or short. So I had to chop down and replant them several times, I would say about 6-8 times all told before they all grew in the way I wanted, with similar heights and good orientation of the branches. The oak tree took three tries to get the rotation right so the drooping branches would fall over the pathways exiting the portal hub and not in front of any of the portals themselves.
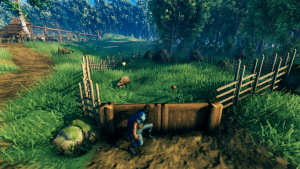
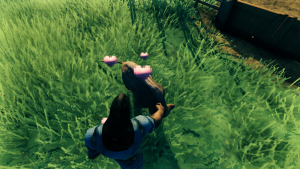
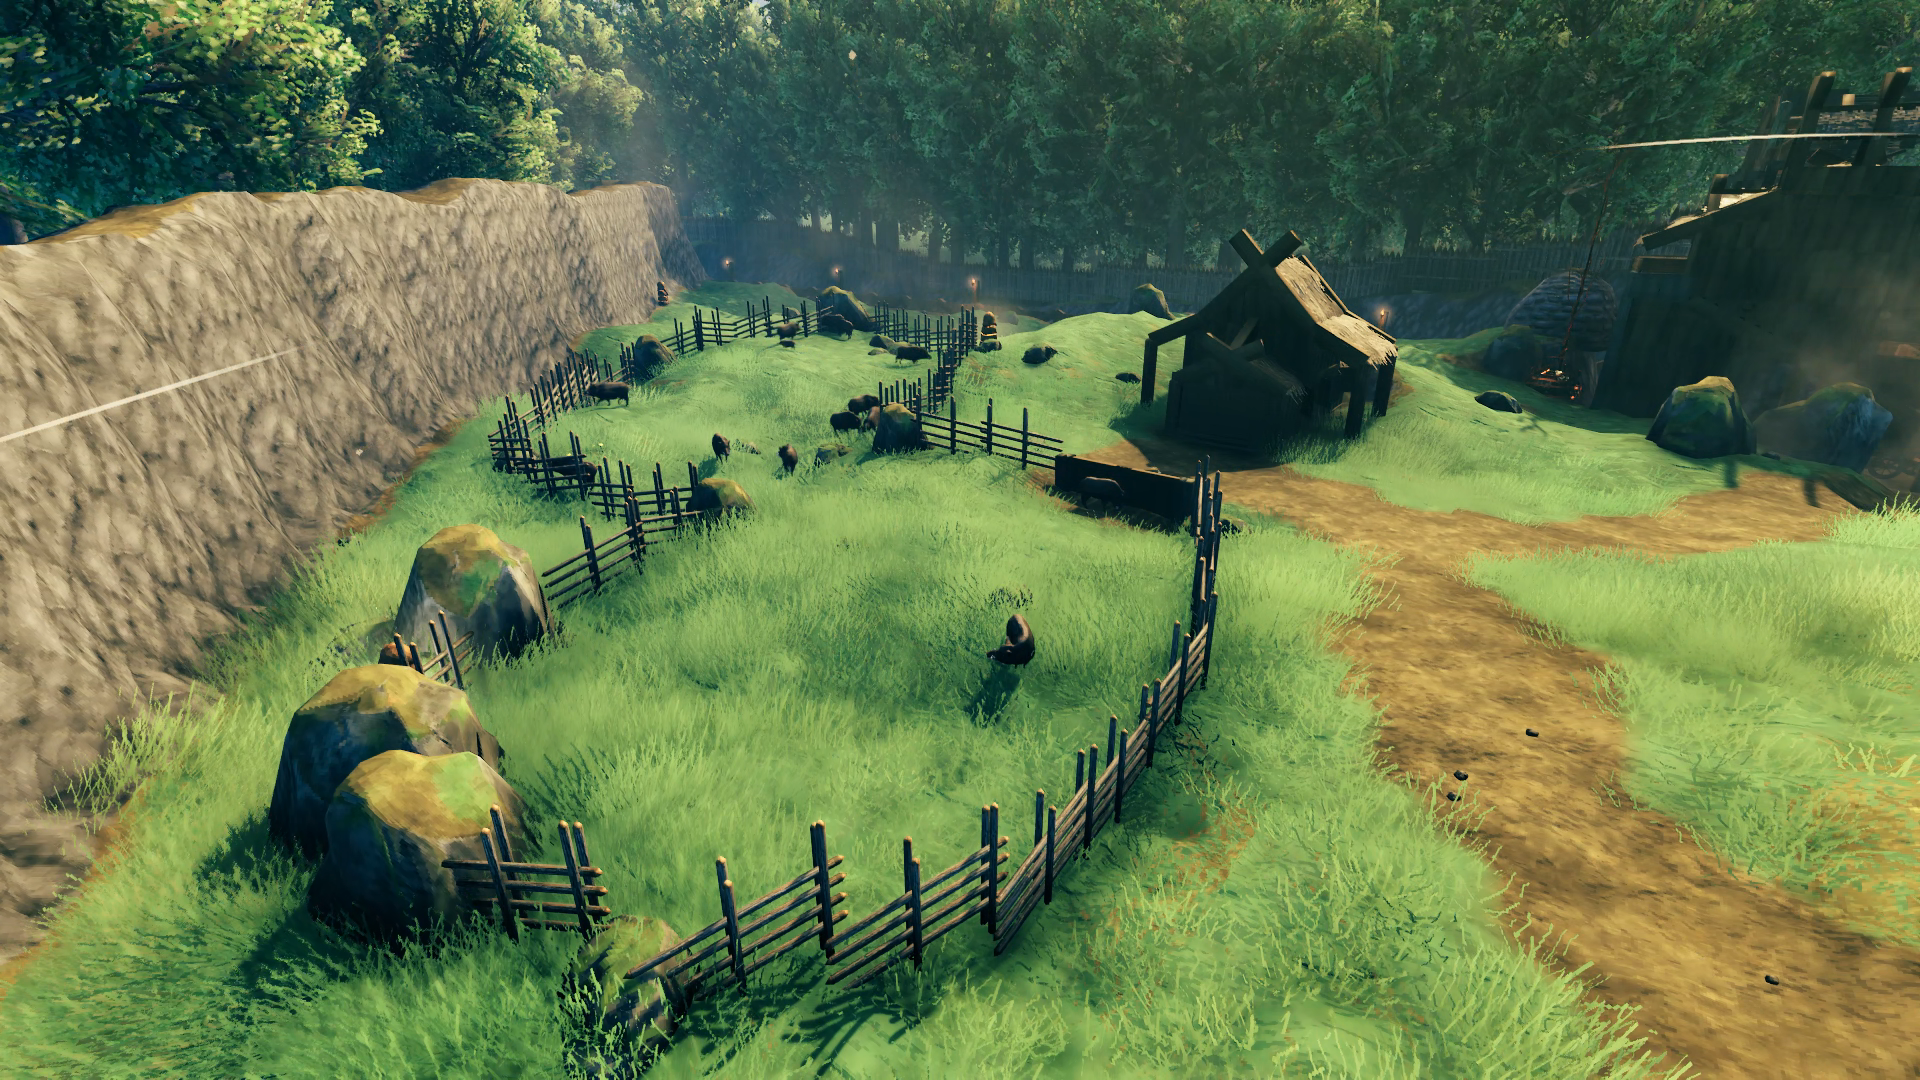
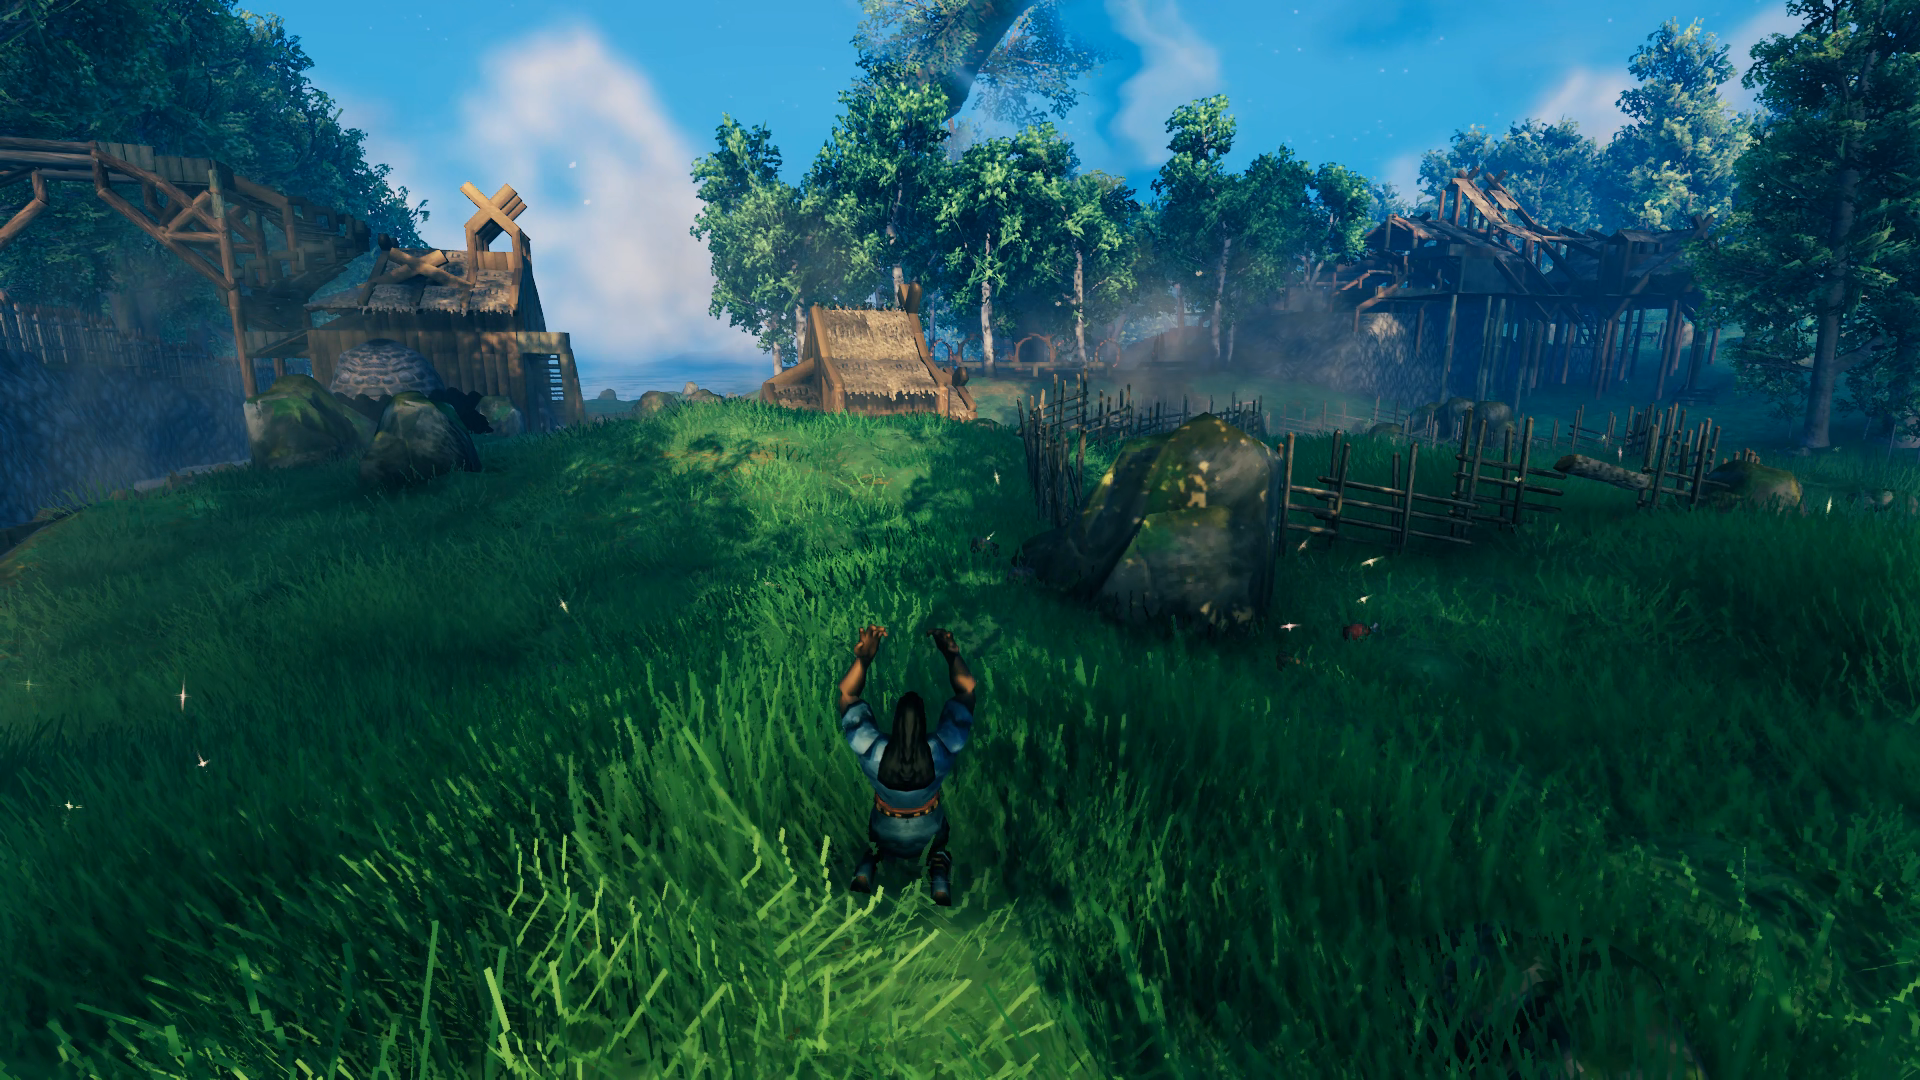
While I was waiting for the portal hub trees to grow in and also as I was getting an idea of the elevation difference for the upper-level (log beams in the distance of left photo) I decided to build out my pasture and tame a boar. I had never done taming in my first playthrough and I had to watch a
YouTube video of it since I didn’t find it very intuitive. When I fenced in the pasture area I did it using the existing rocks – I tried to keep as much of the generated elements as possible while building out Hellholm. There were boar at the northern end of the clearing so it was easy to aggro one and have it follow me back to the pen. A couple brown mushrooms later and it was all settled in. I followed up with a second one after moving the first into a nearby barn I had also constructed. Then I put them together in the pen to begin breeding.
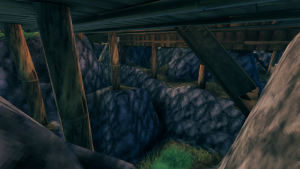
 Although I was mainly focused on the portal hub and grand hall at this point, I couldn’t help but return to the bridge to make the support structure look a bit more “busy”. It doesn’t do anything to improve the overall structural integrity but does look less plain. I stayed away from looking at other build projects as much as possible during construction of the base to keep myself from copying ideas too much, but I had checked out a couple of things and seen some way more impressive bridge undersides so felt compelled to make mine a bit better too.
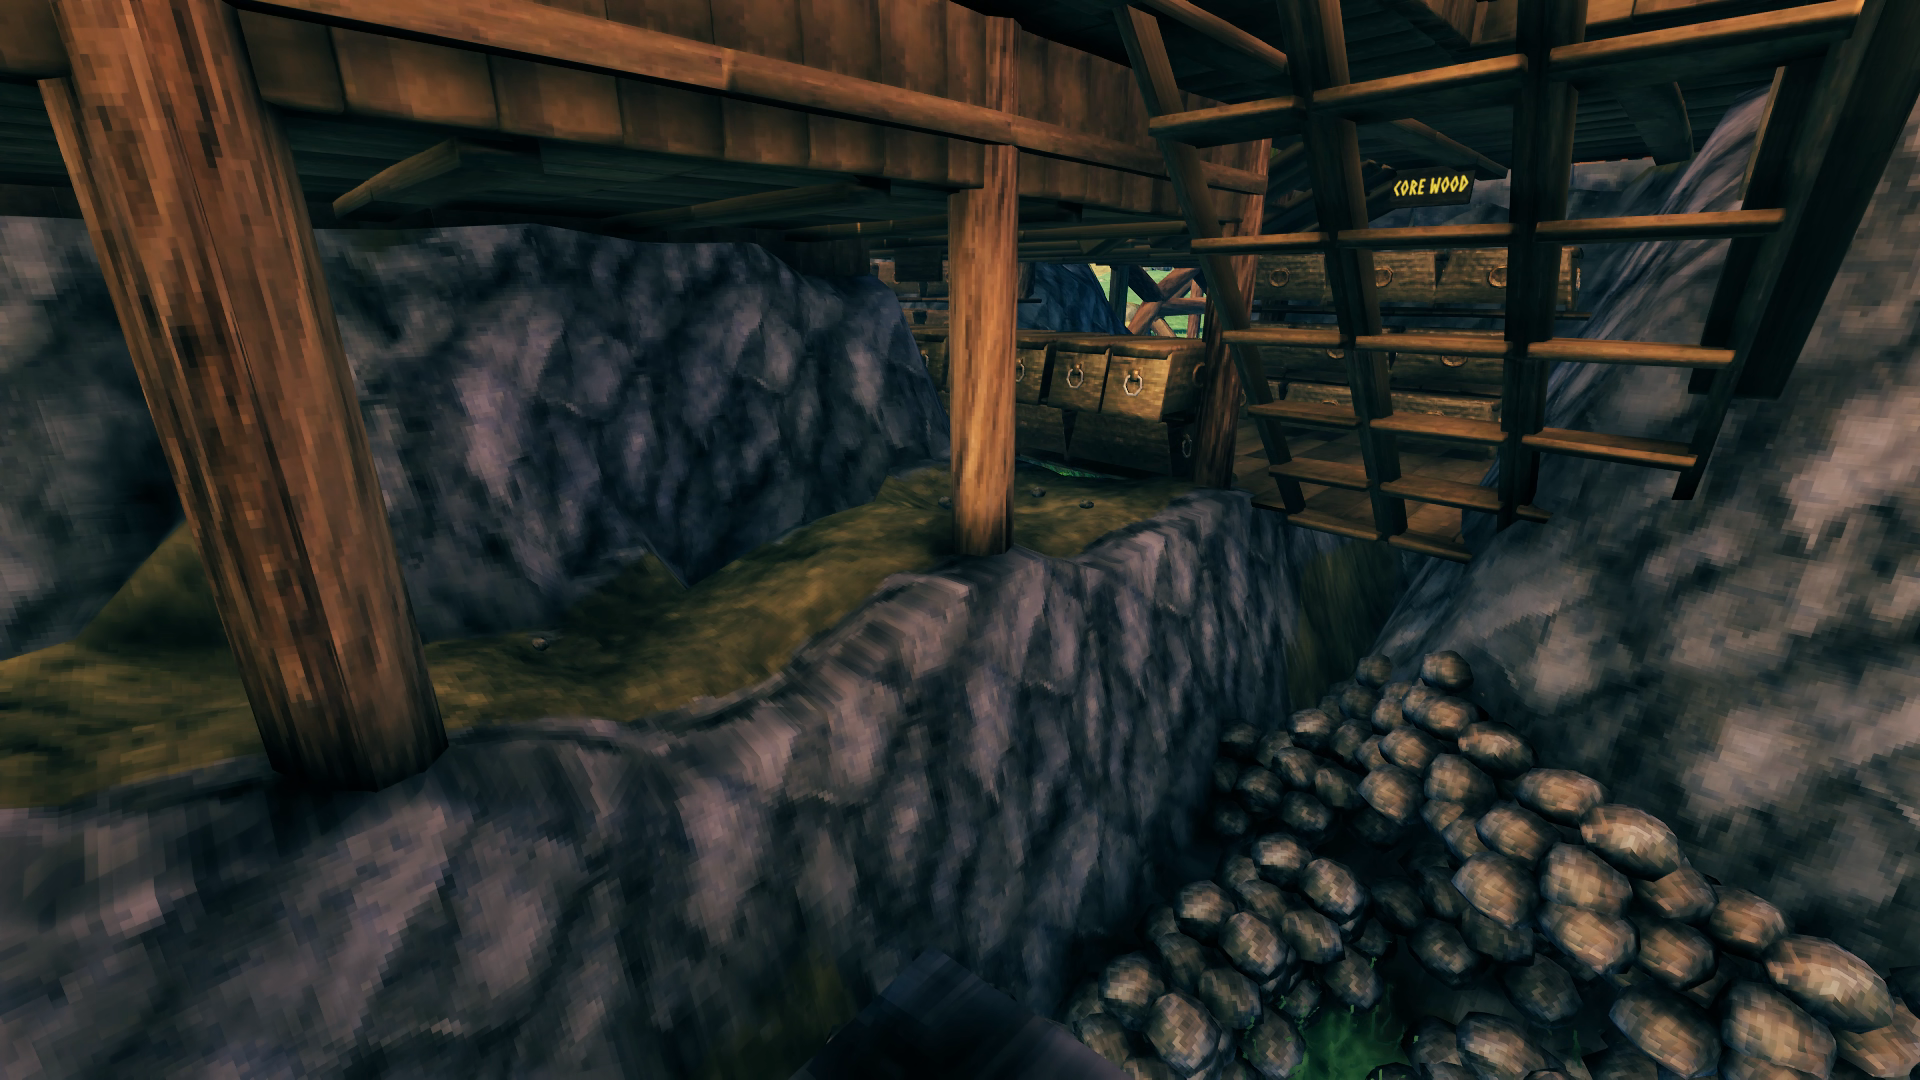
Building the upper-level took a lot of planning because the ground was so much lower than it would eventually have to be. Like with the portal hub, I didn’t want to waste stone resources on raising the ground until I knew how high and where the ground needed to be raised. So I extended the proper ground height with wooden flooring supported by core wood beams. I didn’t have anything about the Grand Hall drawn down anywhere, it was all in my head that I wanted a central open area with a vaulted ceiling around a long fire pit, a wing off to either side for the kitchen and workshop, then a bridge over a defense moat. So I built out the length of the building with this in mind and just made an initial guess as to the size of the wings. Having the entire foundation up on a platform also made it easy to integrate a basement into the design. As I started to build more vertically, I raised the ground only as needed underneath just the columns (and where the fire pits would be located) to save on stone resources.
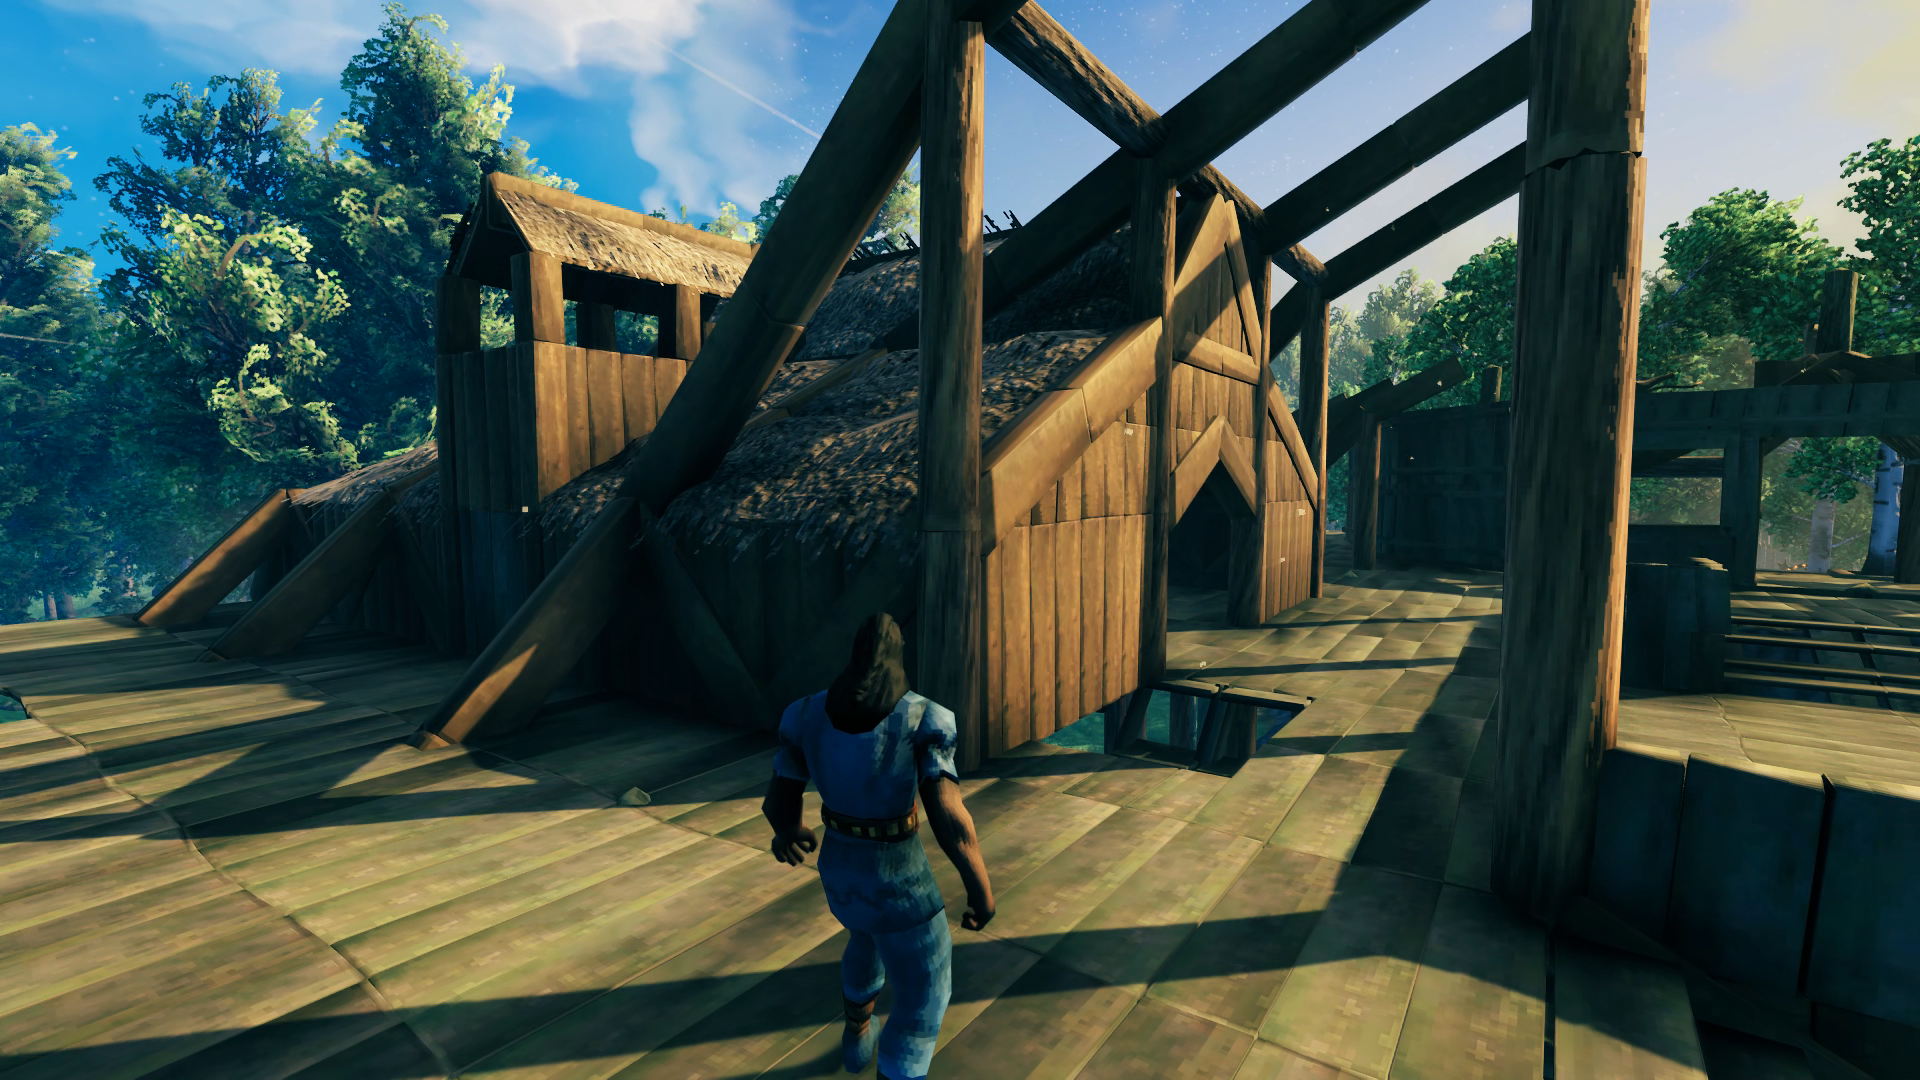
 The wing design came together pretty much in one go, and I was able to come up with a nice-looking way of integrating it with the main hall. Since this would be the kitchen, it includes a chimney for the cooking fires. A second chimney is mirrored on the other side with space below for an eventual Stone Oven to be built. The whole wing minus the chimneys would be mirrored on the opposite side of the hall.
 That final roof X beam way up there is as dark as red as can be when you look at it with the hammer selected! I was able to peak the roof right at the limit of wooden structure height, and was very happy I didn’t have to sacrifice my inset central dining floor, or use more stone to raise the foundation to keep it. I also just prior to this point realized I didn’t have any idea what I was going to do for a bedroom. I realized I had space over the entryway and courtyard so I was able to fit in stairs to an upper floor. Originally I was going to have it opened out to the inner hall but realized that wasn’t very private and instead opened it out to the courtyard with a balcony as well.
 After completing a full half of the Grand Hall, before I could start building down to complete the other half I had to finally tear down my original house, which was in the way. I built a small temp cottage down by the shore where I wasn’t going to be doing any further terraforming. I also had to move all the chests of stuff I had collected as well as reposition all the wood and stone I had built around it. That was a lot of stuff!!

After mirroring the main hall and wing I now knew where I needed to raise the ground around the entire building, not just underneath it. For the side that hosted my gathered resources, this meant they once again had to be moved. This time though I was able to place everything in its permanent storage location in chests in my bedroom, the kitchen, the workshop and the basement. So while it took considerable time to sort all those items out to their proper locations, once it was done it was done. I was then able to terraform a nice gentle slope down towards the shore, making sure there were no steep rocky areas and it was all grass.


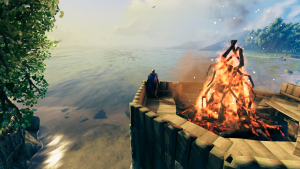
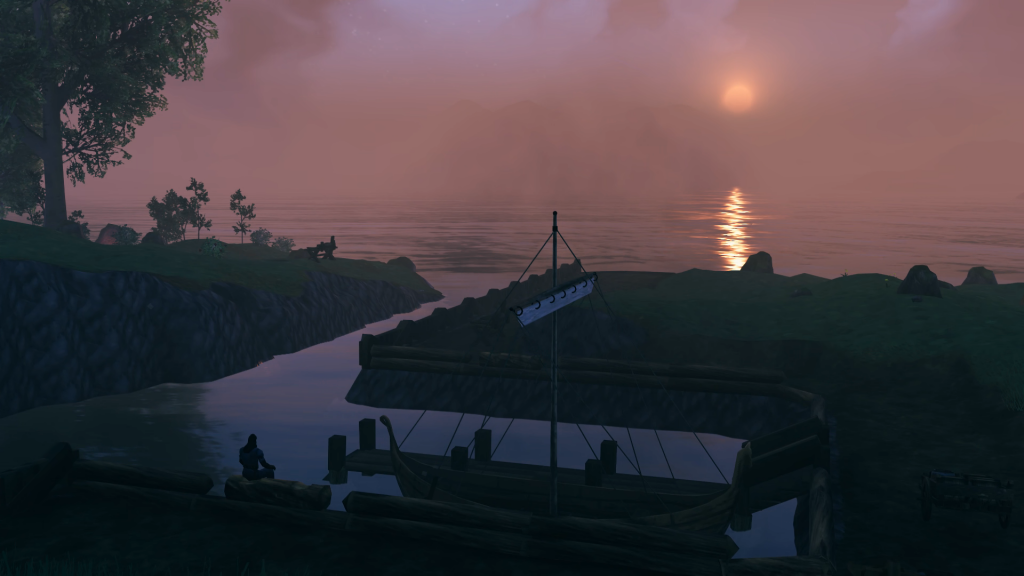
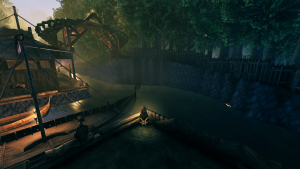
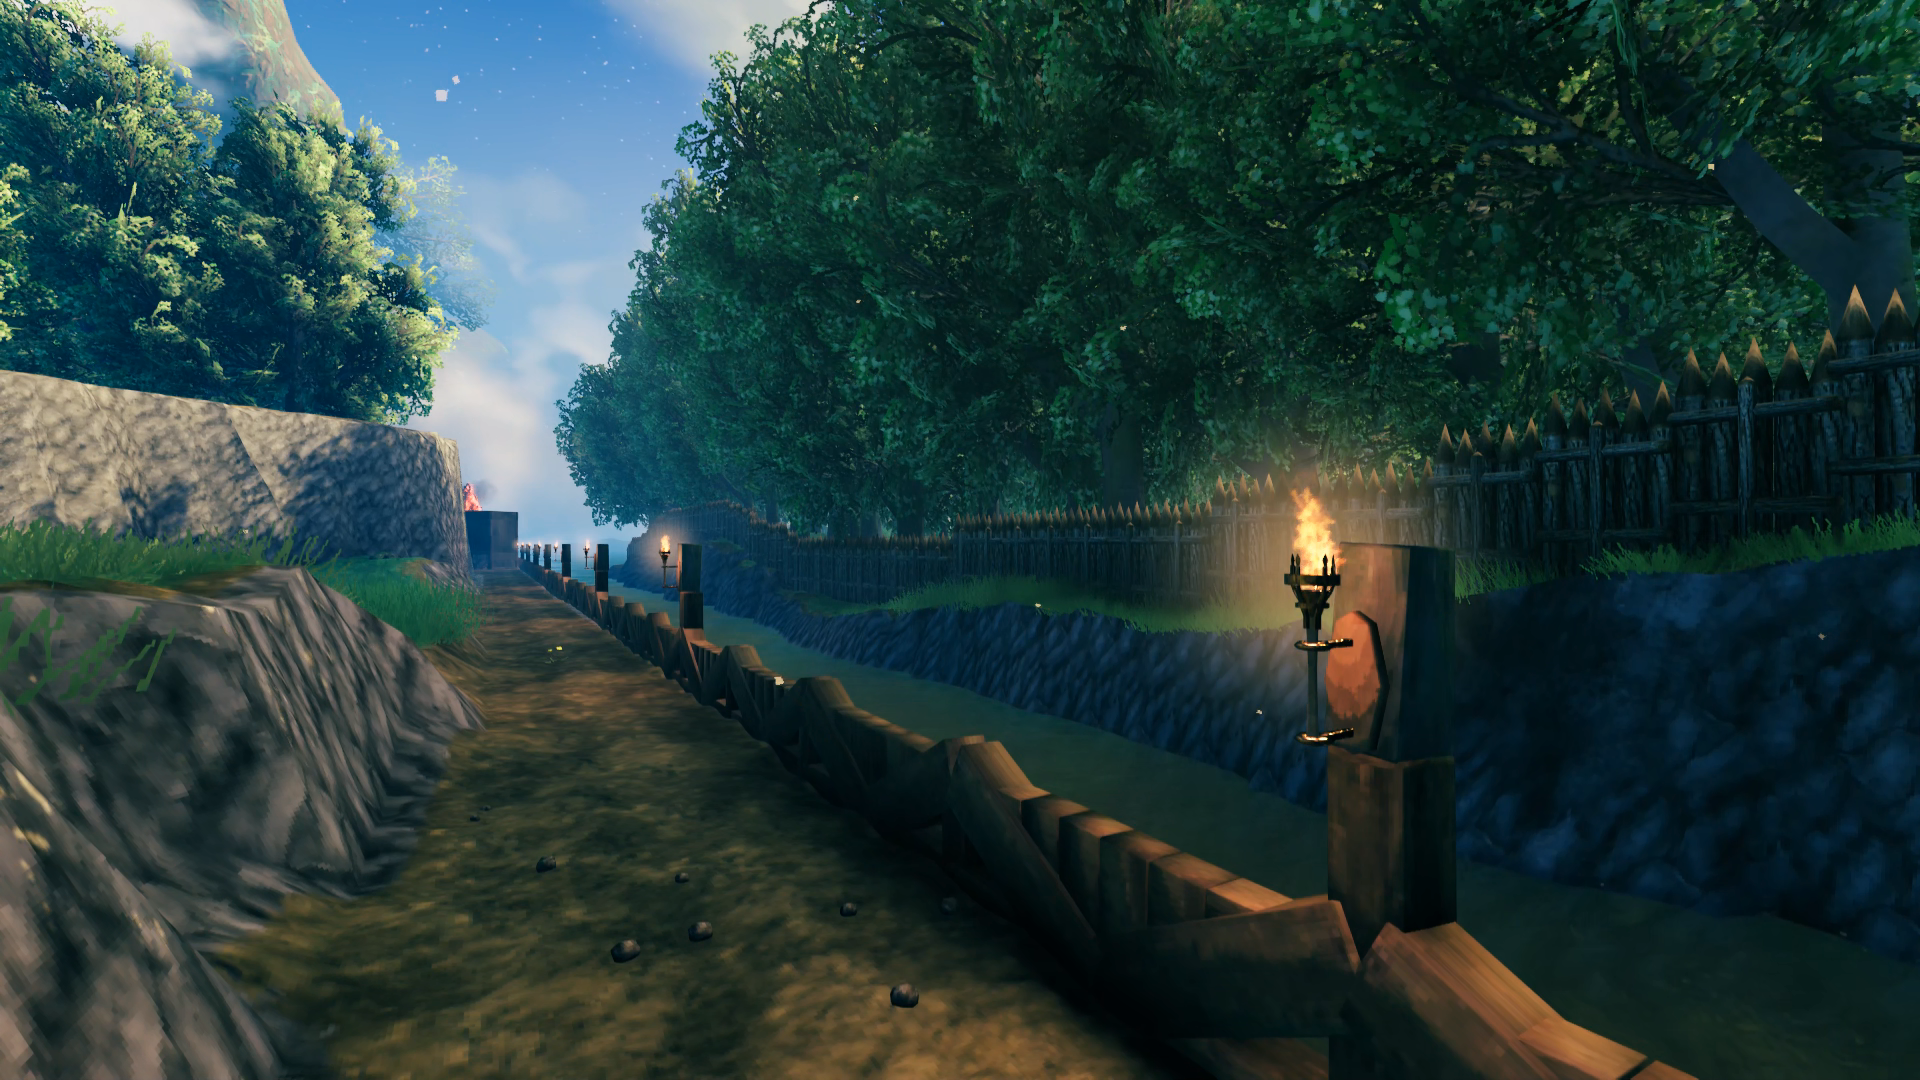
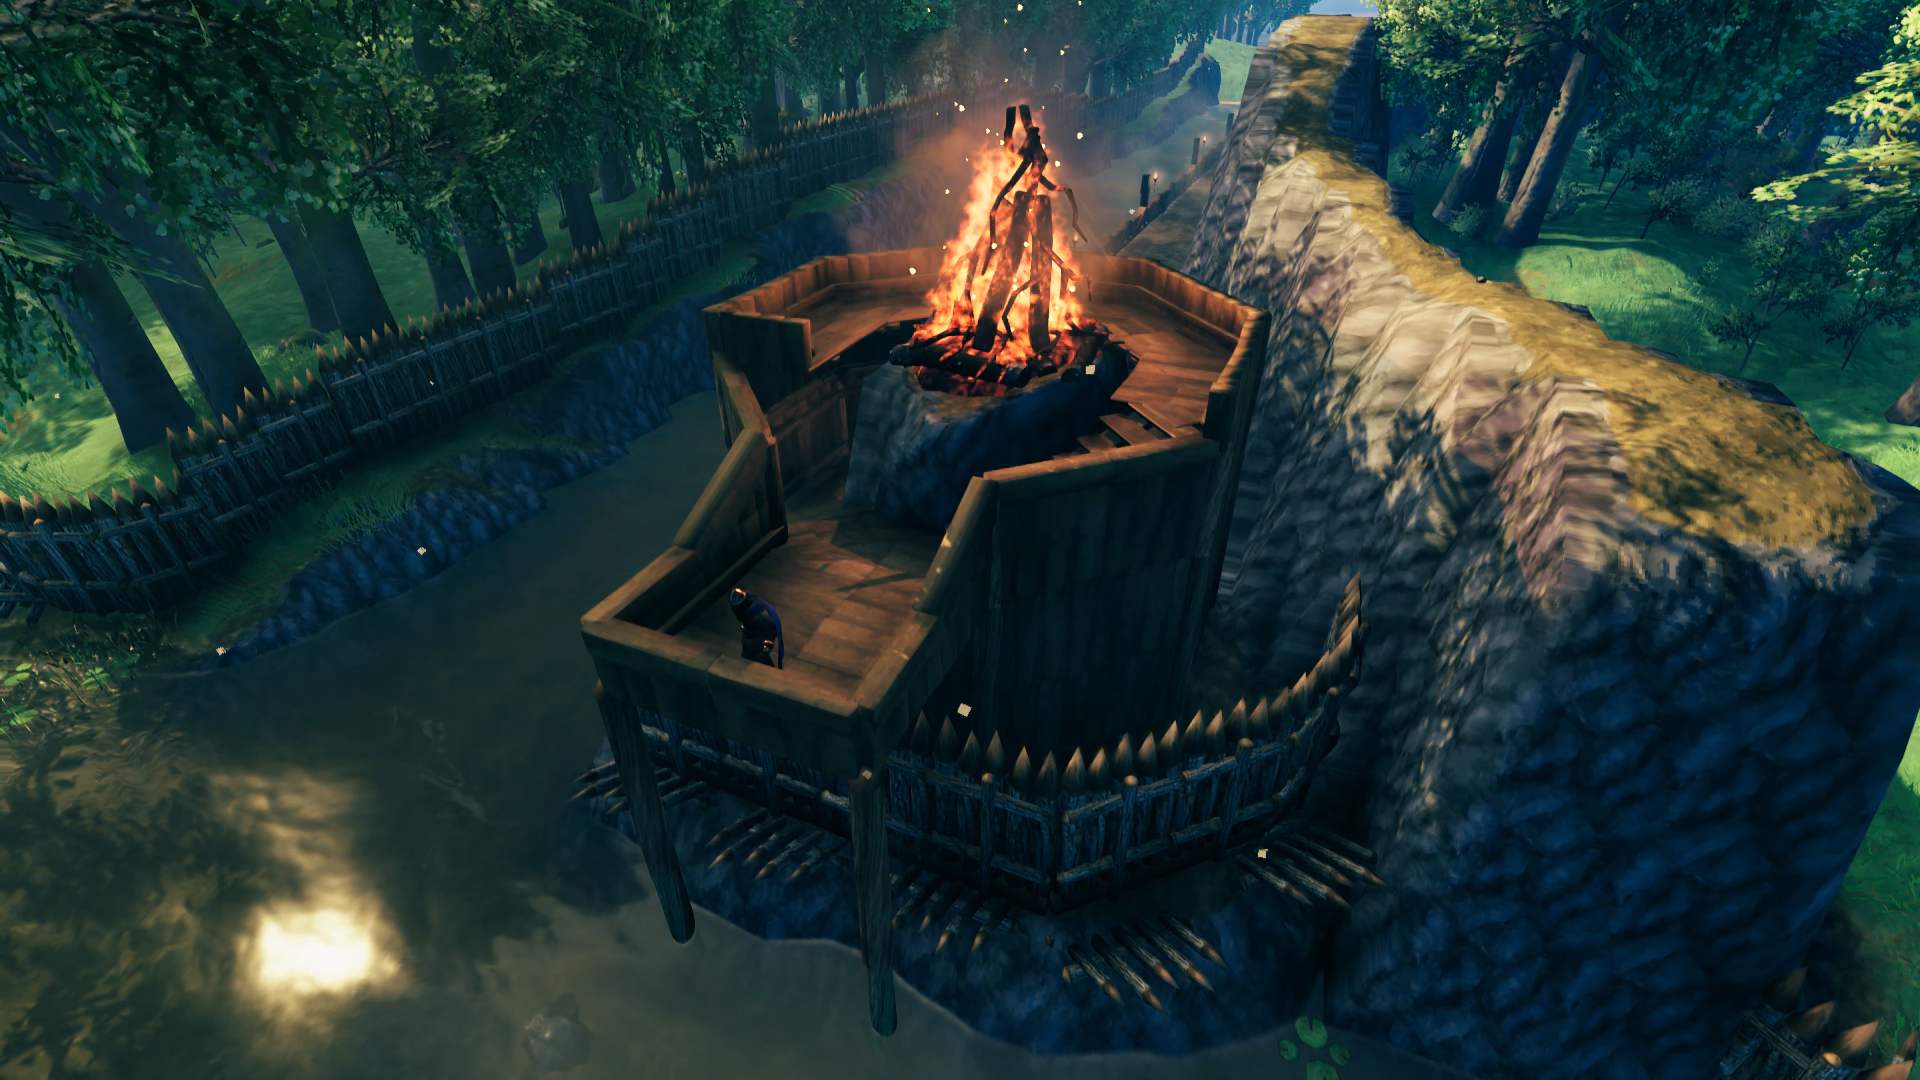
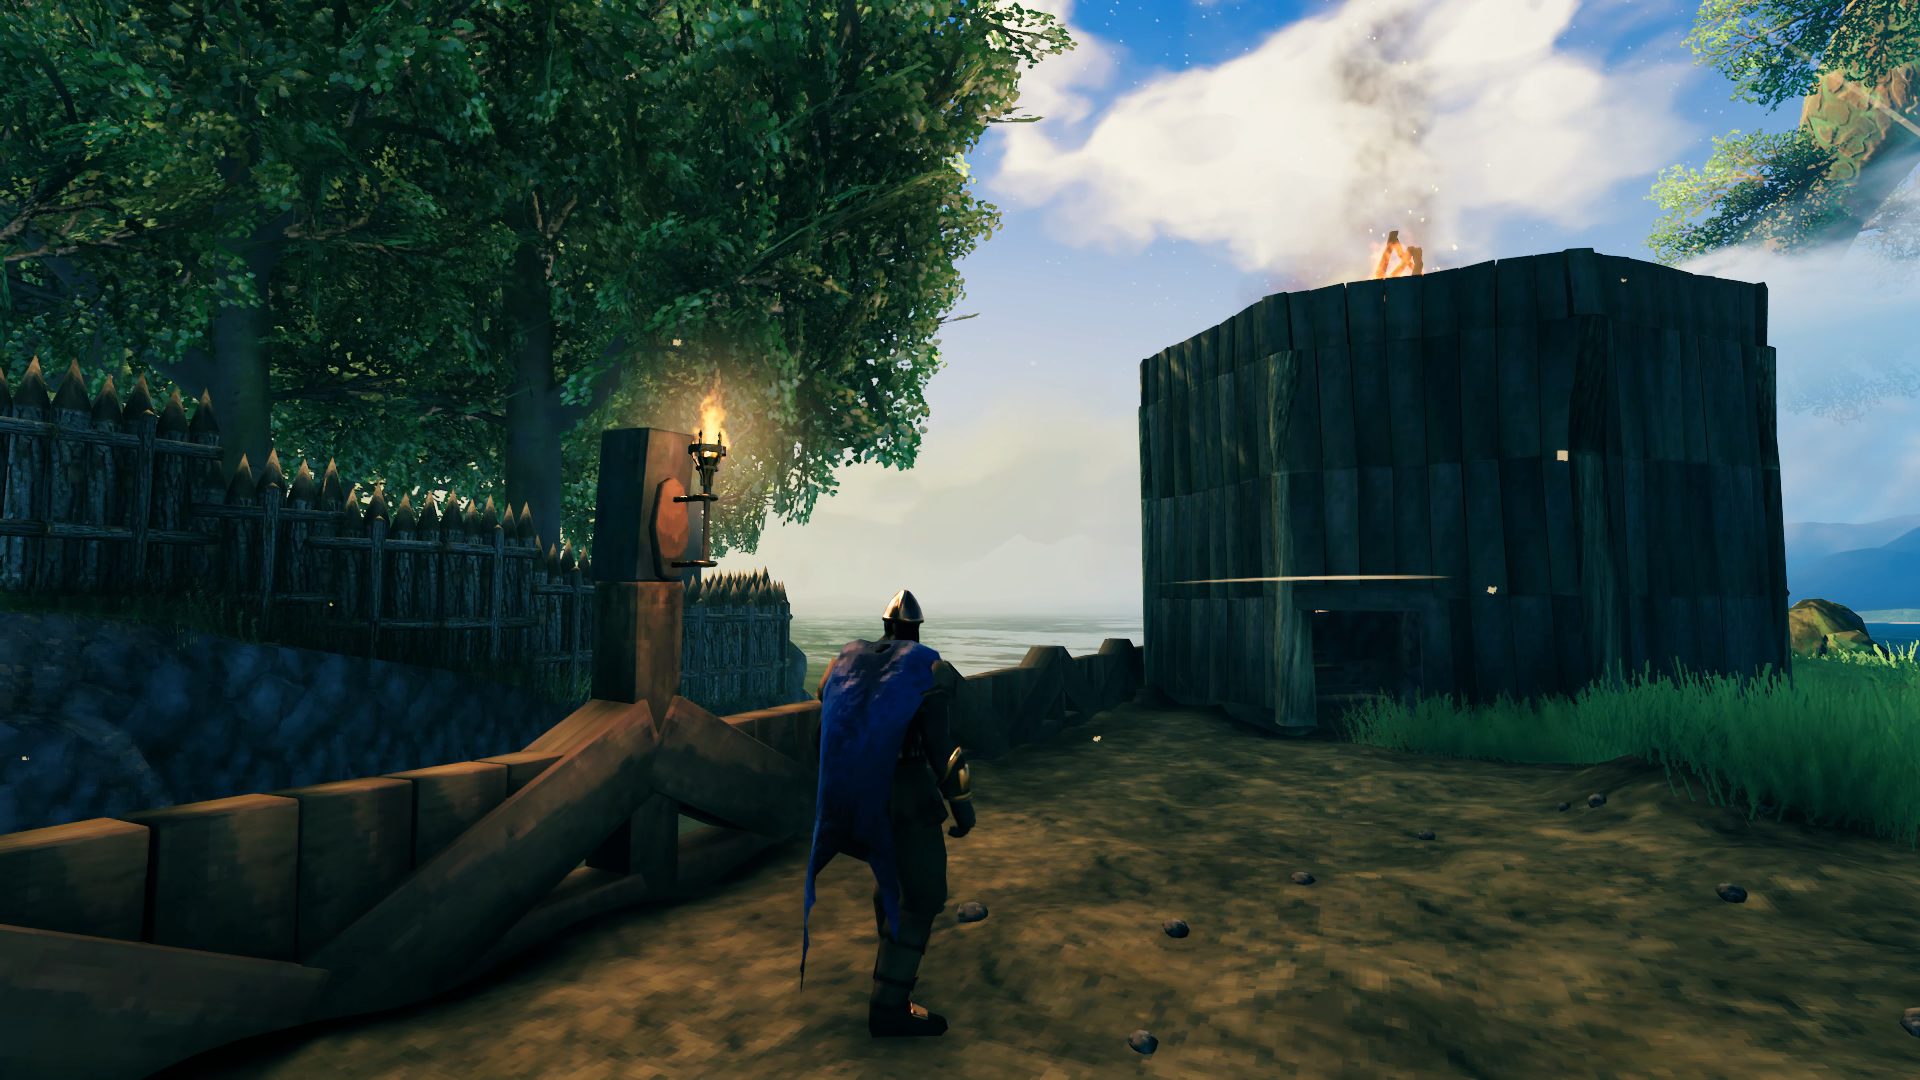
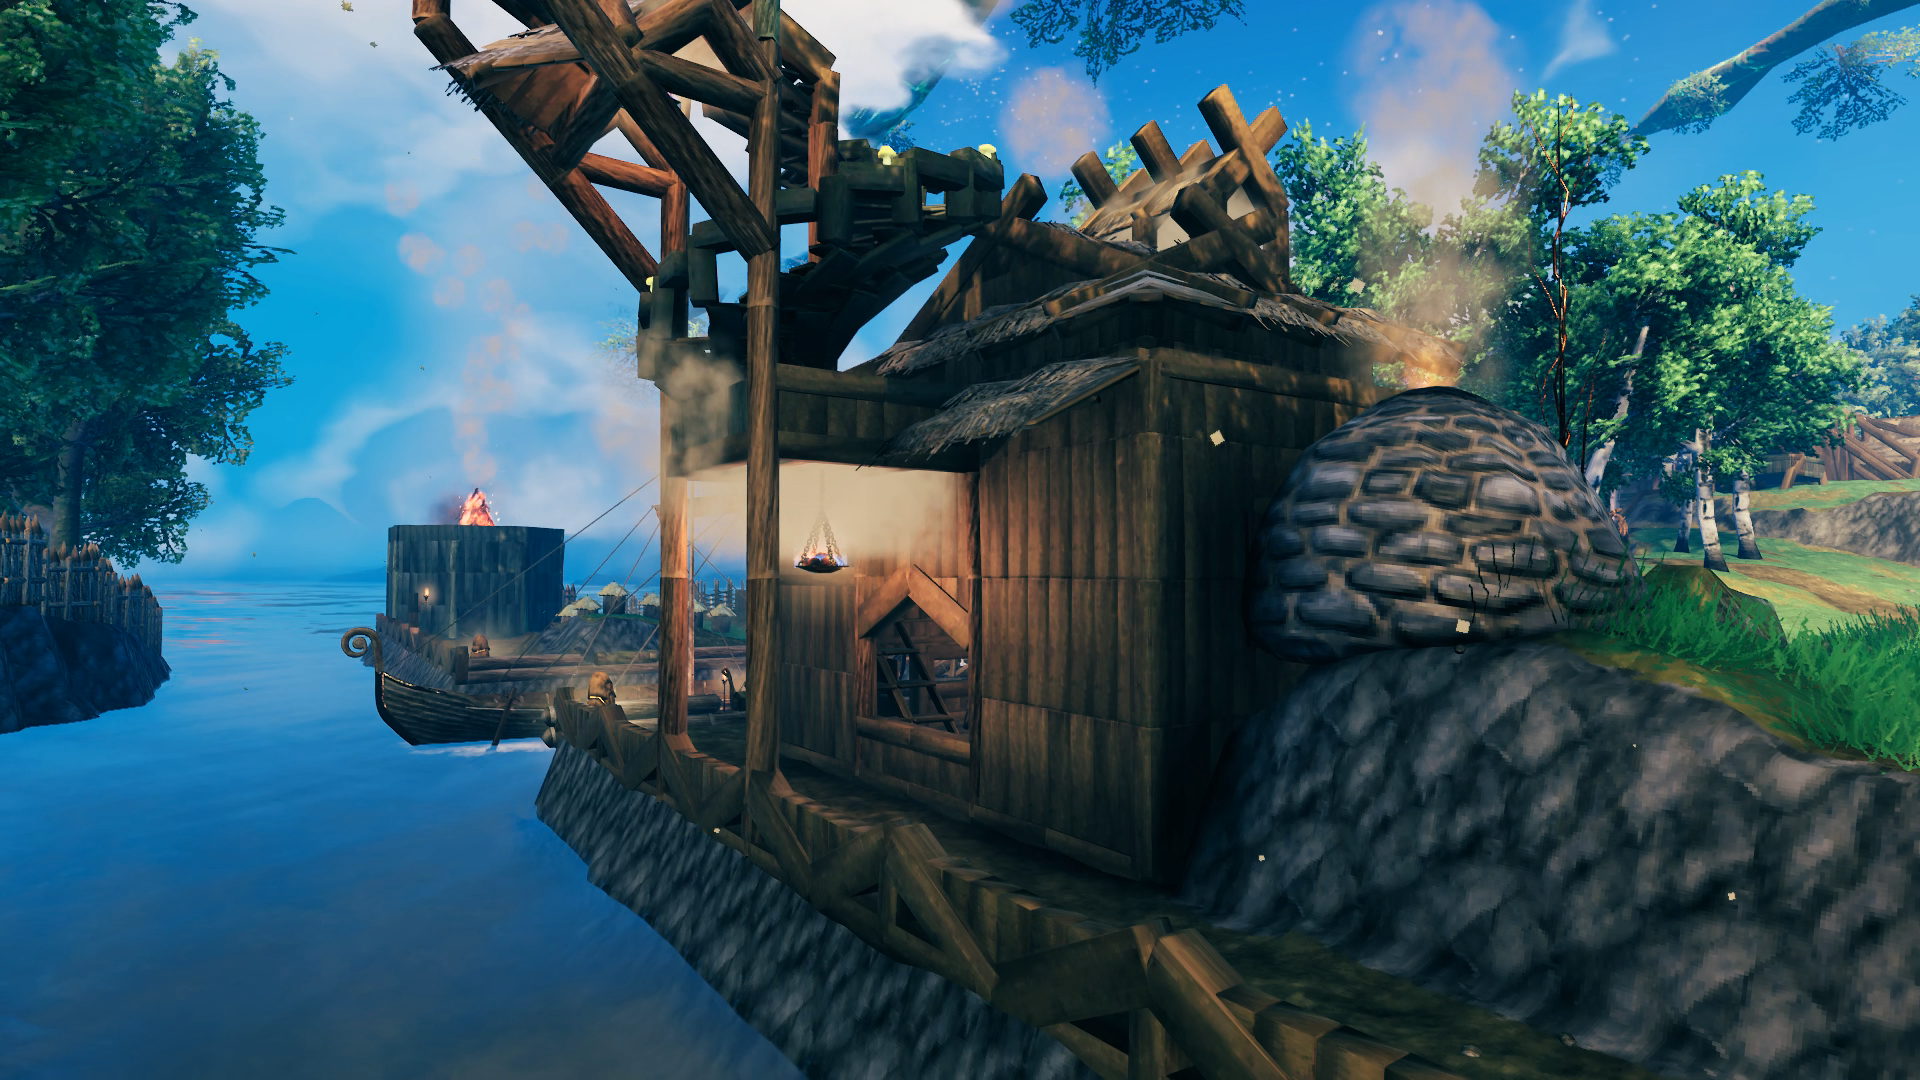
I haven’t been just hanging out in my base building it this entire time. I was making good use of my dock to mine copper/tin and bring it back for refining. I also was exploring the map with the Karve to find the borders of all the Mistlands and came across a coastal Meadow that butted right up against a Swamp. I still haven’t taken on the Elder yet so not quite ready to deal with a Swamp but with it right next to a Meadow I was able to hack down some ancient trees on the border and run away to get the bark needed for a bonfire. So I took some time to light up the canal promenade and build two bonfires on either end to signal the opening of the waterway when I return from a sea voyage. Both structures are identical and I built the one in the second image after finishing that defense wall so I was lucky to have juuuust enough room to squeeze it in there around the raised ground that supports the bonfire.
 With a crypt also near the border of the Meadows I was able to carry out more than enough iron on the Karve to make the nails necessary to construct a Longship with the ancient bark I had also acquired. It fit perfectly in its berth and I had also by this time added some additional details to the dock for the purposes of night lighting. The wards especially make for nice night lights where I didn’t feel it looked right to place more sconces. They are also a functional aspect of the base’s defenses in stopping raids from spawning inside the walls. Another slight modification shown here is an extension to the lower level of the staircase to allow me to park a cart under there when it’s not being used to carry ore to/from the ships.


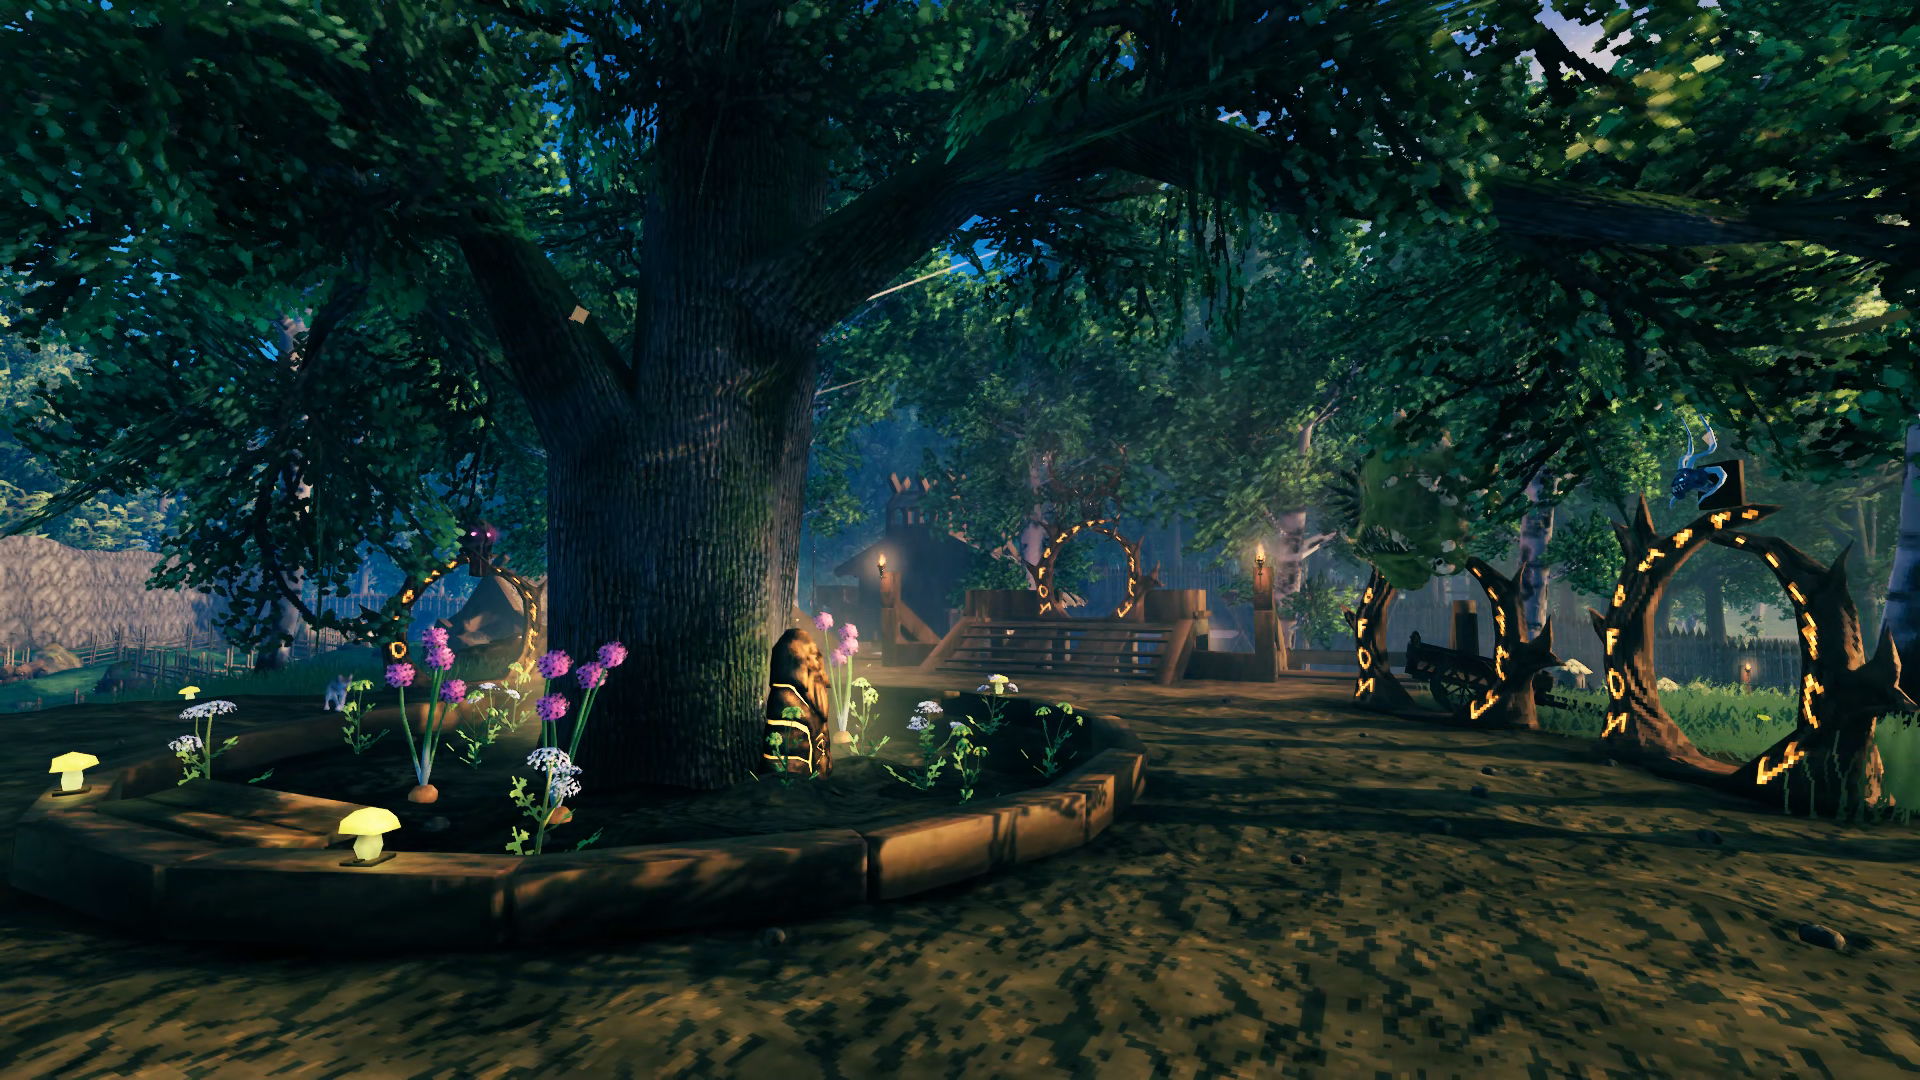
By now the trees had all grown in the way I wanted them to for the portal hub and the stairways, so I went and added some lighting there as well. The hub has nine portals spaced around the circle with the southern end leading to the docks, the northern end leading to the Grand Hall and the eastern/western ends have pathways leading to the pasture and farm. I was going to have them spaced more evenly instead of appearing as clumps of two but the stock game doesn’t have enough angle snaps in the rotation of objects for me to place them equidistantly without facing awkwardly in relation to each other. So the grouping doesn’t mean anything, there’s simply one portal for each biome plus an extra for the merchants. The one on the raised platform is the “exploratory” portal that is used most frequently to get out to whatever temp portal I have placed somewhere in the world. The other portals will eventually lead to additional bases or outposts, one in each biome, but for now they just lead to a portal someplace within that biome if they are active. Above each portal is a trophy of the most powerful enemy in that biome to help identify which goes where – eventually the trophy will be the Ancient One of that biome. Portals without a trophy mean I haven’t leveled up to the point I can explore that biome, or that biome just isn’t ready for exploration yet (Ashlands, Far North).

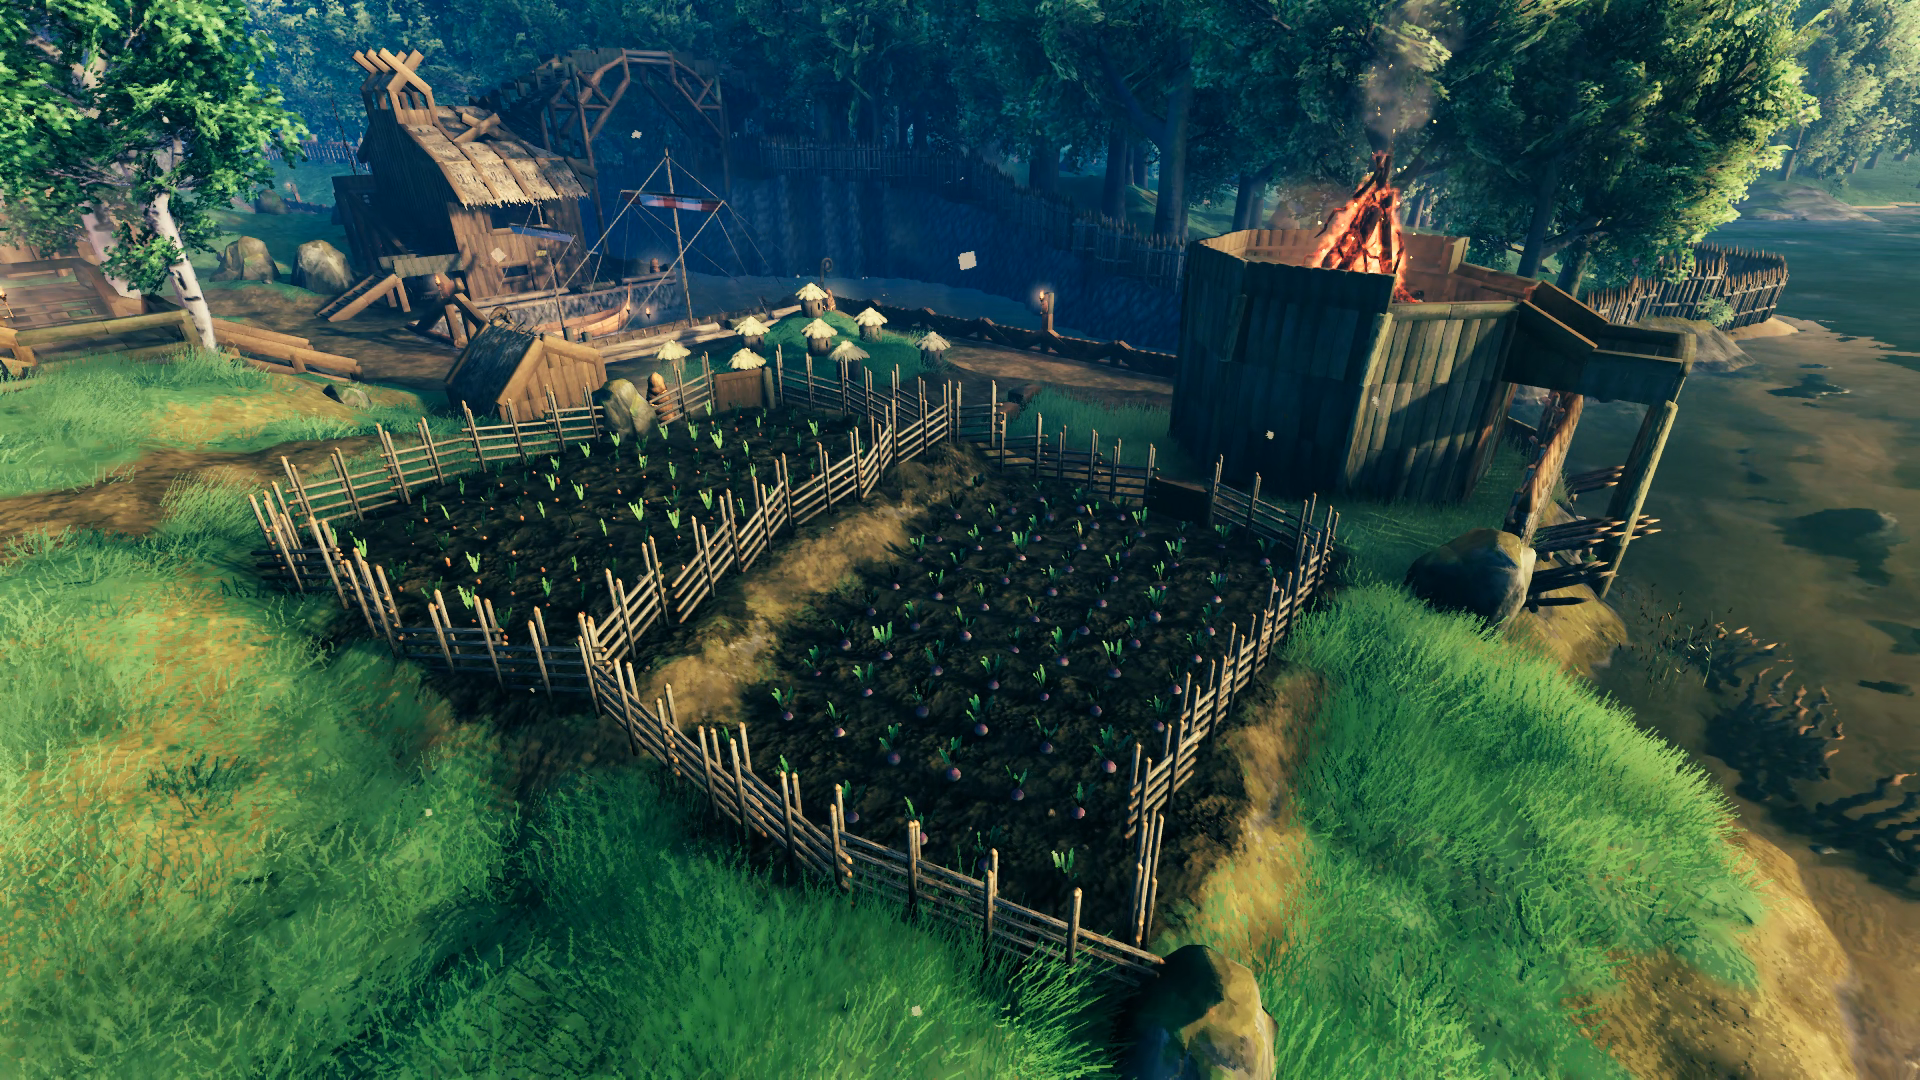
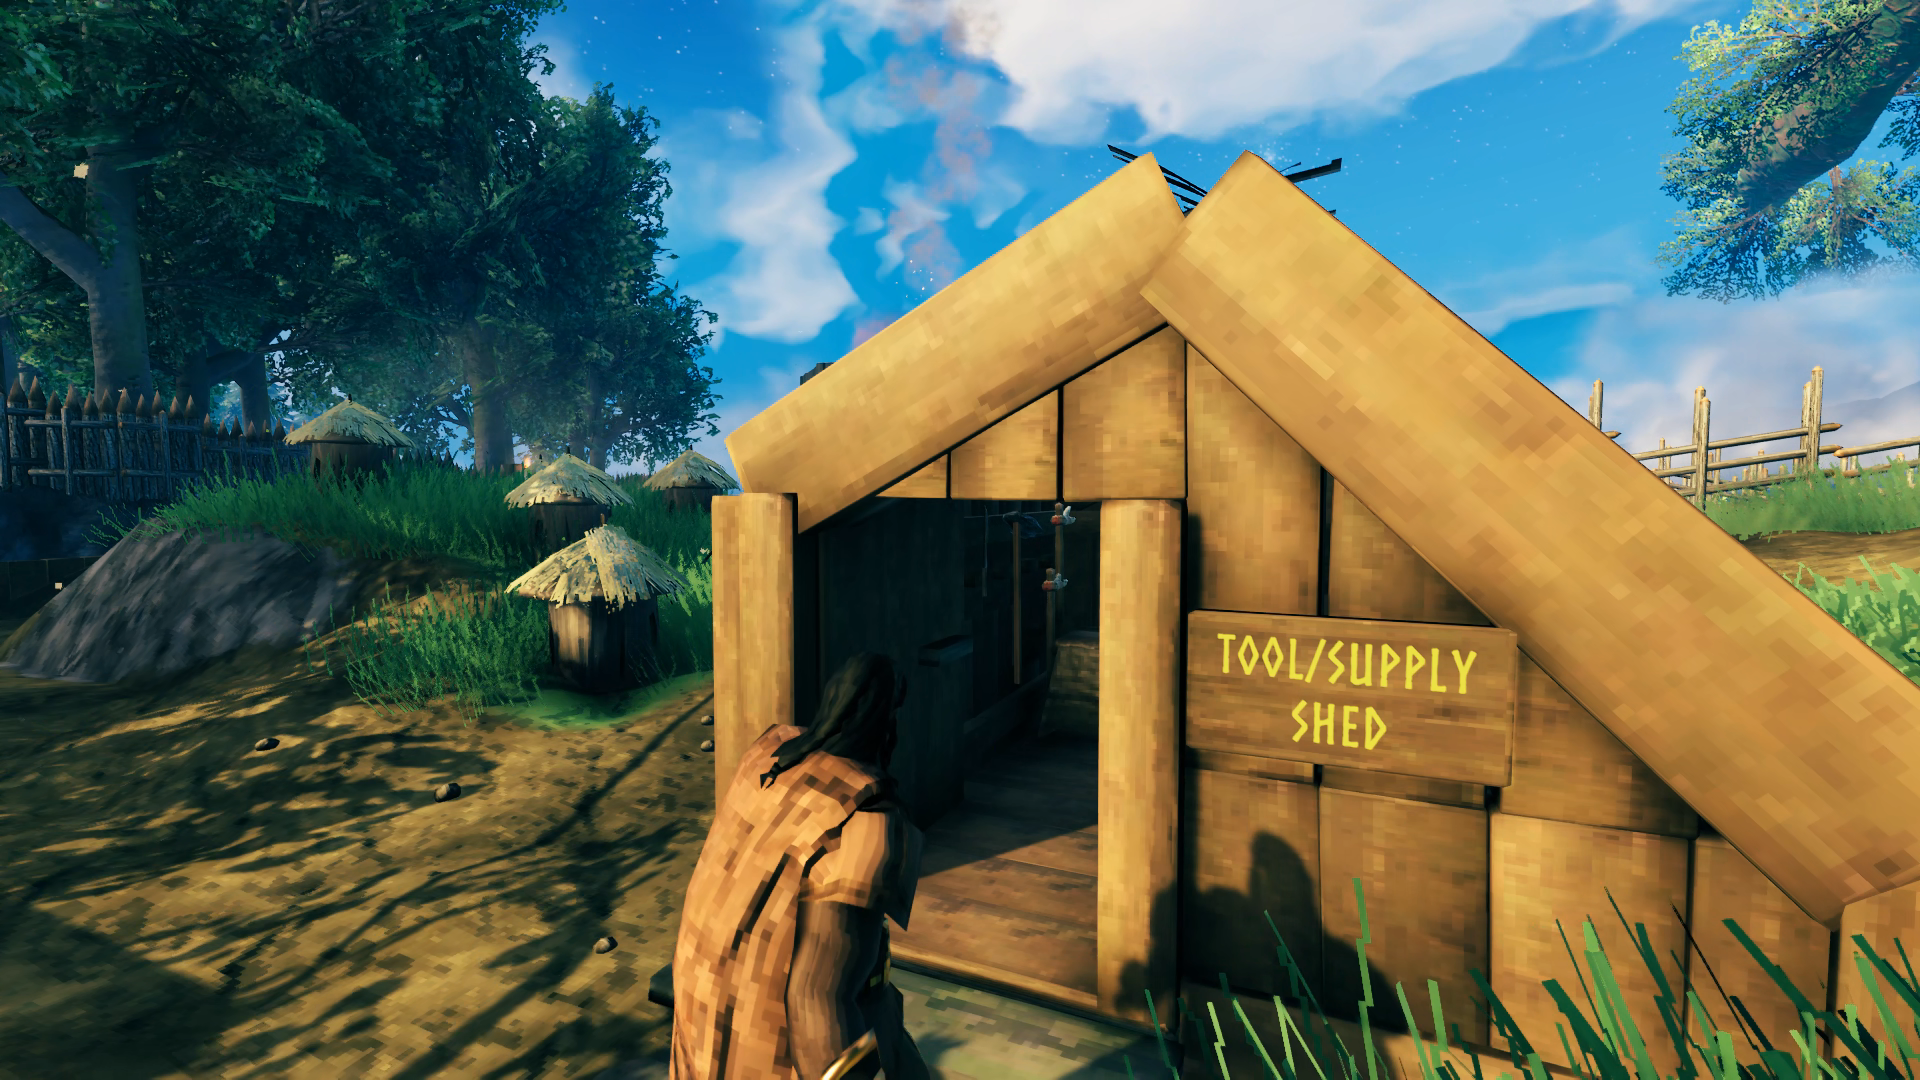
With the pasture occupying the eastern side of the base, I made two fields of cultivated soil on the western side for planting carrots and eventually turnips as well. I happened to catch a coral cod along with some onion seeds while fishing in the Ocean as I traveled around in the Karve, so was able to plant those by the time I had filled up two chests of carrots and turnips. I still plant the carrots as food for the boar and use the other field for onions. Each field can reap 105-120 vegetables when planted properly. I just eyeball the distance between them, although I did initially try to use wooden beams to grid the fields. Nearby are several bee hives for ample honey production and a shed for hanging up tools like my axes, pick axes and butcher knife and storing seeds and fishing gear. If you’re wondering how my sign is yellow with no mods, check out
this YouTube video.

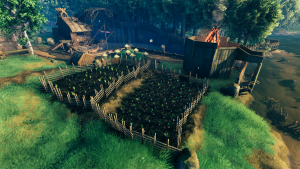
Once the farming was producing significant output, I was able to feed the boar up to 50 vegetables per cycle. Each cycle would start with harvesting the veggies, replanting some for seeds, culling the boar and then feeding the remainder. Then I would harvest and plant the seeds while the boar continued to reproduce until the veggies were ready for harvest again. Upon culling, I could get anywhere from 8-15 boar from the 5 I reduce the herd down to each time. I constructed the barn the same time as I fenced in the pastures but I didn’t plan on using it for anything until I defeated Bonemass and would undergo raids of bats. Its purpose is to hold two boar and wolves under shelter (I’d close the shutters permanently – it just looked nicer with them and having them open until then) so that I could repopulate in the event of a raid that kills any or all that were exposed out in the pasture or around the base.


Let’s head back up to the Grand Hall to explore it more fully. The courtyard was the first thing I built, since it was closest to the stairs that led up from the mid-level. I just wanted to try and do something with curves since that’s not a thing the game’s construction encourages. The only thing really difficult was getting the flooring to remove the hard edges along the curve, which is mostly hidden by the stairs and overlapping 1×1 floor tiles. It’s a bitch to repair when I want it looking nice for photos, let me tell you, since you have to get the cursor juuust right to select the individual floor pieces. Still, happy that there are no corners of floor pieces sticking out anywhere. Using the inverted roof pieces for fins as the serpents snake up to overlook the courtyard is the original idea I’m most proud of. I’m not saying I’m the first person to do it but I hadn’t seen it done before to give me the idea, is what I mean. I’ll admit I’m slightly annoyed by the core wood pillars that rise up in the way of the stairs, but it’s not like there aren’t plenty of other ways up onto the porch area for it to really matter. This is also the only portion of the base that has stone texture on the ground, this is deliberate because I don’t want this initial base to appear too sophisticated in terms of building tech and I think it works best here. Not sure if I want to add anything to the grounds of the courtyard itself since that will just get in the way of entering the hall.
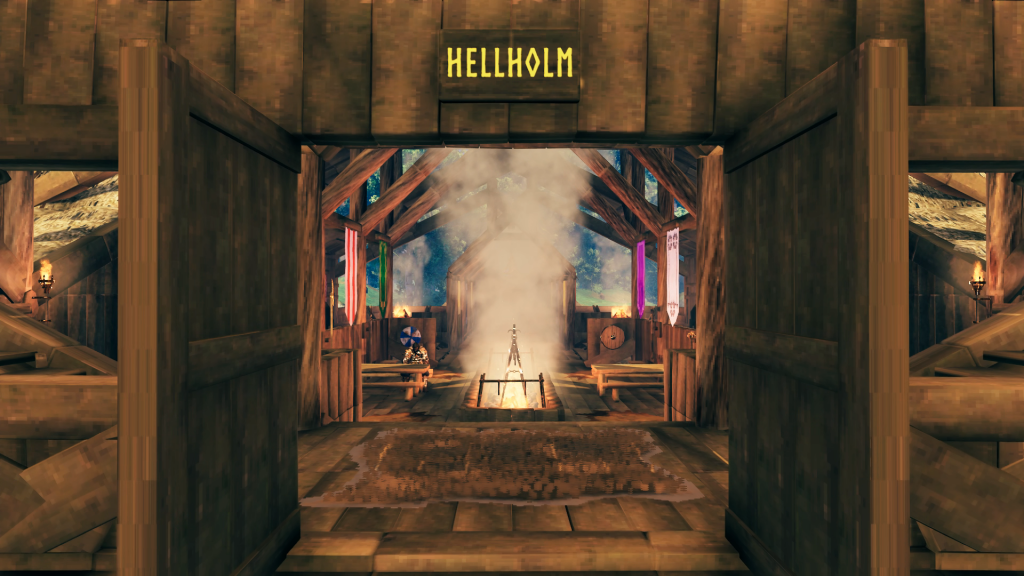


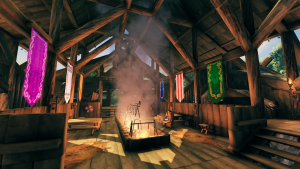
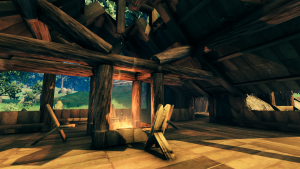
From the courtyard we move into the main hall. The vaulted ceiling required a bit more core wood support than I would have liked but at the same time I think it would have looked a bit too bare and open without it. Unlike the underside of the canal bridge these supports actually do serve a functional purpose. I could have placed two hearths in the middle, but again I was staying away from stone for this build as much as possible and I liked the look of the wood-ringed fire pits. The knee-high walls were made with the help of the X roof pieces’ center-snap. Originally there were four wooden Cooking Stations until I could build the iron one. I liked it better with a single iron one book-ended by two wooden ones at perpendicular orientations, rather than two iron ones – which would only let me cook one more piece of meat anyway. The weapons on the walls around the inset dining area are ones I used in the past, but the shields were all made just for wall decoration. The armor sets near the entryway are comprised of weapons and defenses I actually used as well. The banners along the dining hall are nothing but decoration, each a different color just to show that I had the materials to do it. The banners along the bridge entryway are my favorite colors, yellow and black. The hall is so large and open it doesn’t actually need a chimney to keep the smoke from becoming a problem. The staircase originally only elbowed down to the door before I added a second set that let you go straight towards a wing area. This gave me another corner to put something in, and that would be a mead vial indicative of the biome I’m currently working through – so the Mountains as of these images (was a poison mead bottle earlier while I was in the Swamps). Behind the double red banners is a door that lets you exit out either side of the hall to be in front of the wings. Currently the best comfort level available in the hall is a 9.
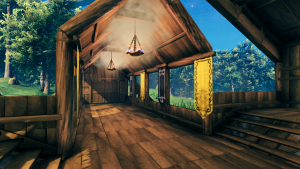
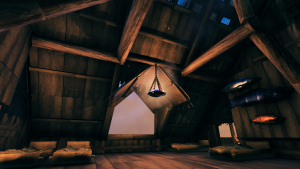
 Above the entryway is my bedroom. The hanging brazier provides the warmth needed to sleep as I’m just a bit too far from the cooking fires for that effect. I only recently added the keys to the wall and found that they glow, so I will probably remove the wall sconces to make that more prominent. The trophy above the bed is the most recently defeated Ancient One. It hangs there until it is replaced by a new one and is then moved down to the portal for its biome.
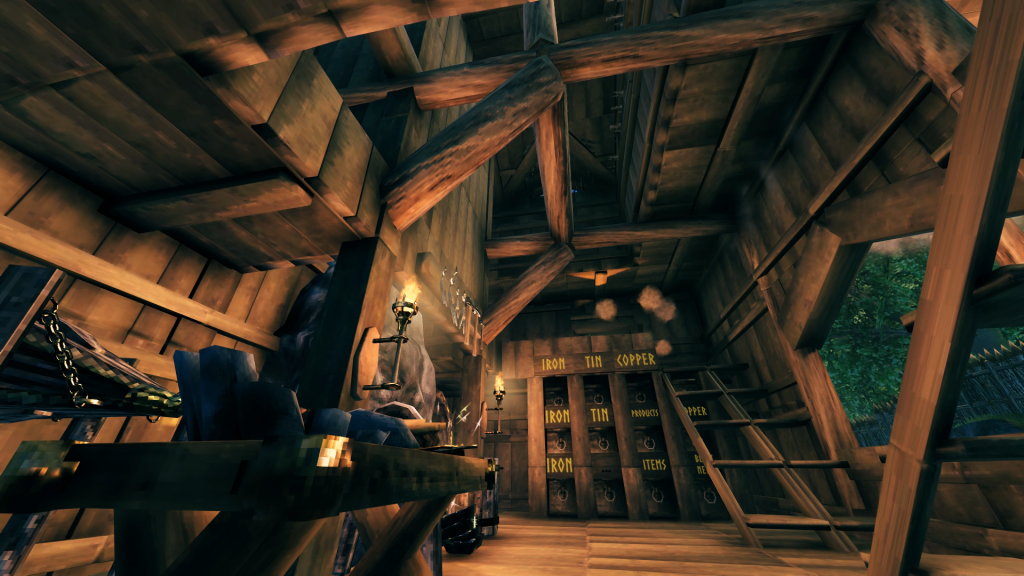
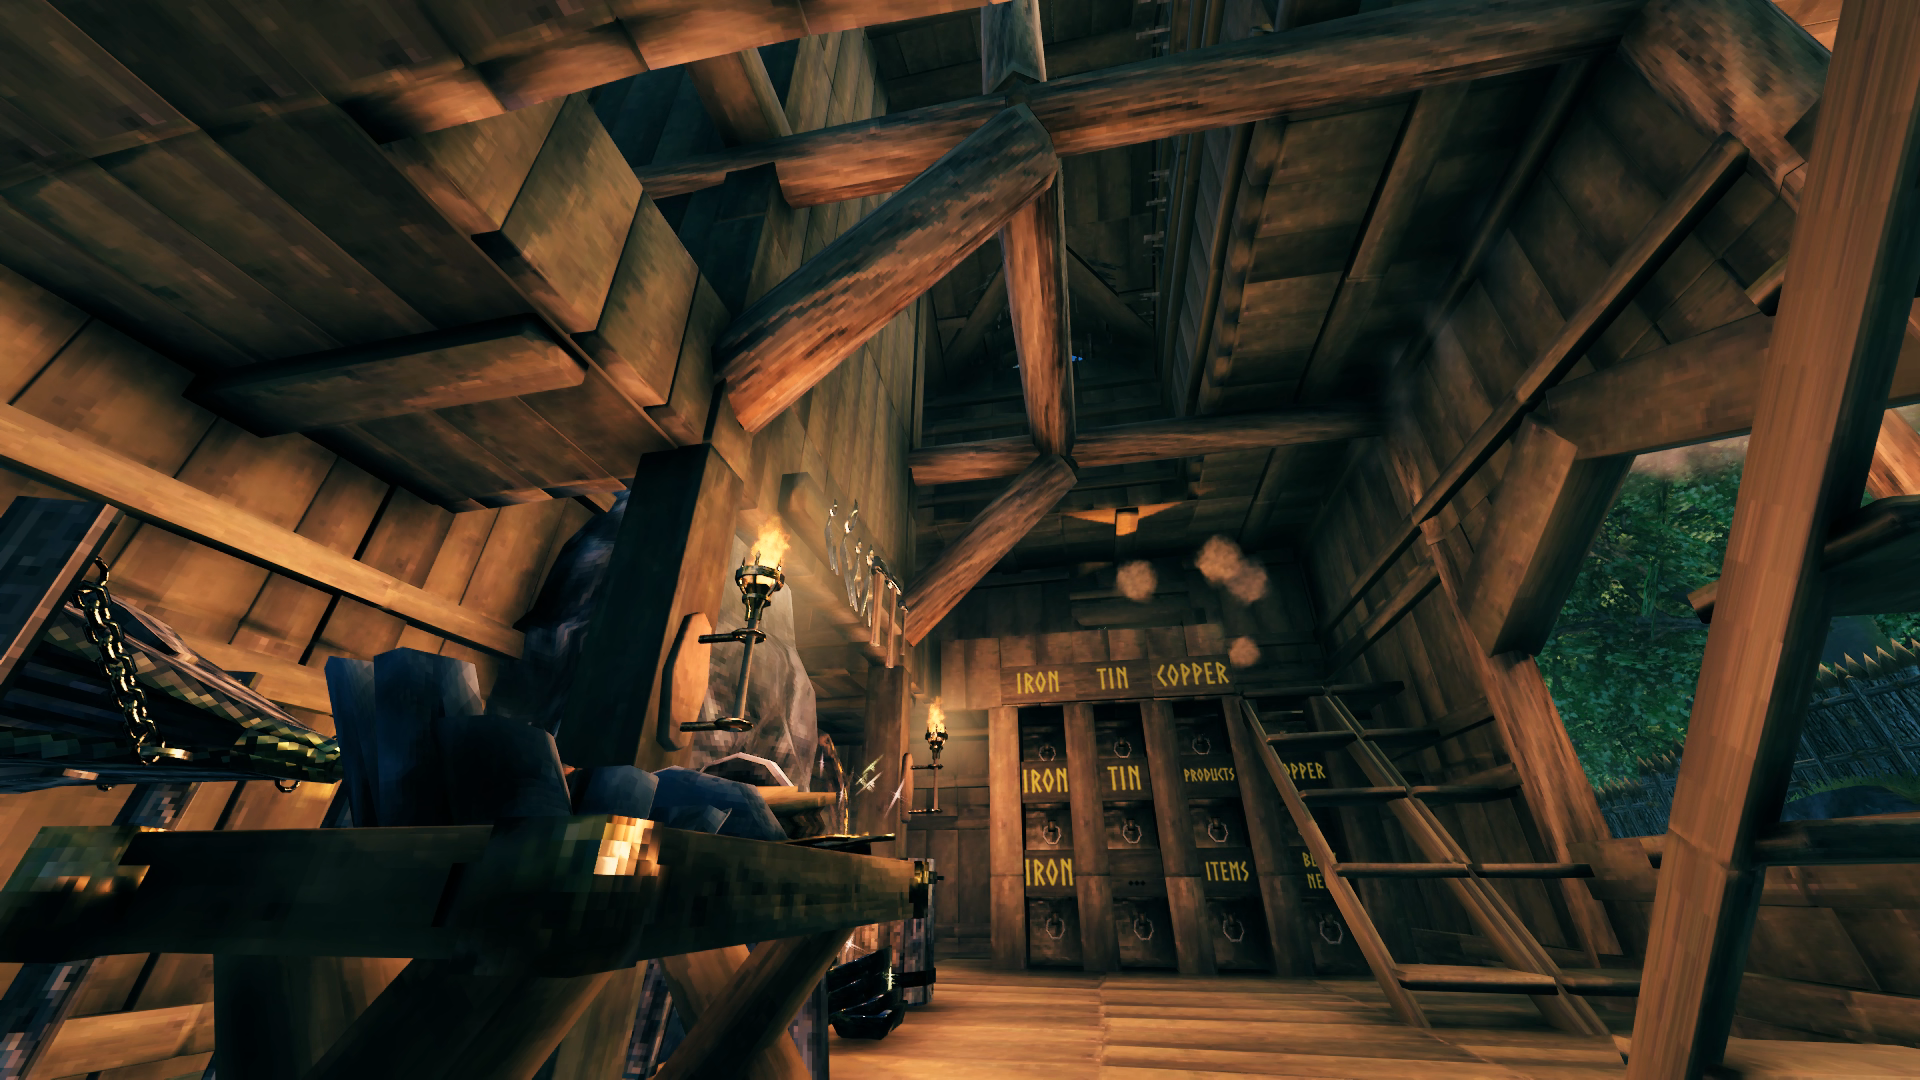
 The workshop wing holds my Workbench and all its upgrades. I have room just outside for them as well if it is needed but they all fit in the corner there for now. The portal leads down to the Smithy for easy transportation of most crafting materials to the Forge and vice-versa. A full wall of chests contains all the various crafting materials I have collected, most in two or three chests. I plan to build a storage tower outpost in the Black Forest for the excess so I can reduce this down to one chest per item since I’m already running out of space working through the Mountains biome. A mapping table rounds out the room’s accessories. Since there’s no snap for the signs, centering them perfectly above the chests was not possible so they usually are written like ” trophies ” with spaces in the name to move the words into the center between the posts. The extra spaces also is an easy way to make the letters smaller to fit the words inside the posts as well since the signs are too big not to clip into them a bit.
 The kitchen wing is also full-up on storage space with chests on both walls although part of that is spared for a little eating nook I just liked to have included even though it’s not really functional. You also can’t actually reach that second Cauldron back with the chests to use it but it looks more symmetrical with two filling that space. The fish trophies are hung here since they are both caught in the Meadows biome. They of course represent the largest of that fish I’ve caught so far.


Let’s head down into the basement. I originally just had it blocked off with shutters to keep from entering the ladderway rounding the corner out of the wings and half-walls to not fall in when running by but then decided it would look better if the entryway had a cover as well, even though it’s also covered by the roof above. Down here I store my wood and stone, with the wood separated into three sets of chests and the stone in piles down a pit. I used the half-half wall trick again to build a platform out over the defensive moat that would let me run up and shoot down at anything in there without worrying about falling off.
This was the only place I felt it made sense to use stone flooring and I like how it stands out from the rest of the build with a functional purpose, being exposed to the elements and hosting a burning fire pit. The “table” seen here was a trick I picked up from a
YouTube video of building tips where you use an item stand to place a wooden shield down atop another object, in this case a vertical wood beam. I was very pleased the fire pits can withstand the rain, I initially placed them there and was like “this looks great but too bad they’ll extinguish when raining.” I didn’t want to build a canopy over them because it would reduce visibility of the forest from deeper inside the hall. Also the way the edge of the roof is extended downwards in the second photo is inspired by the few build examples I’ve looked at online that add those kinds of subtle decorative details. It definitely makes an impact, IMO.
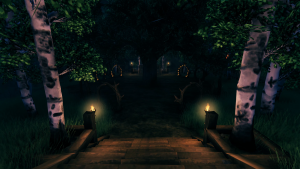
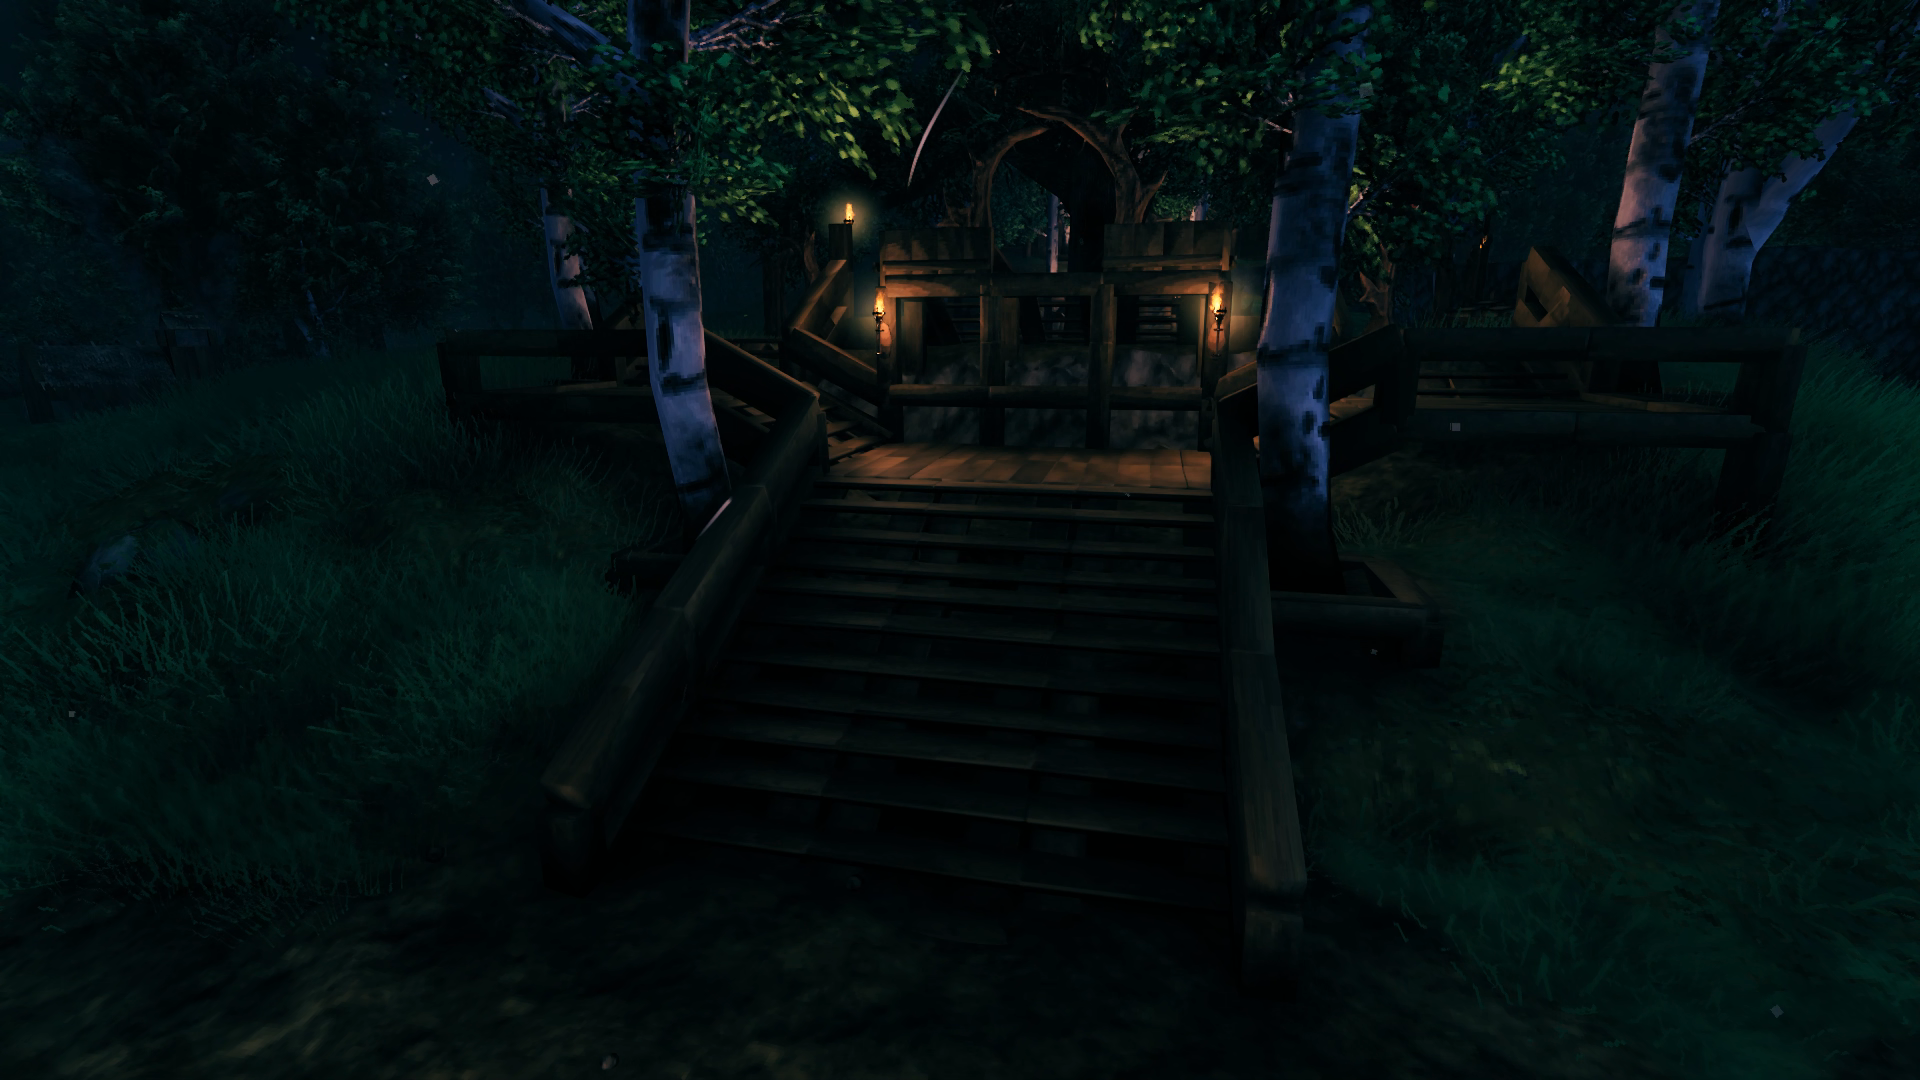
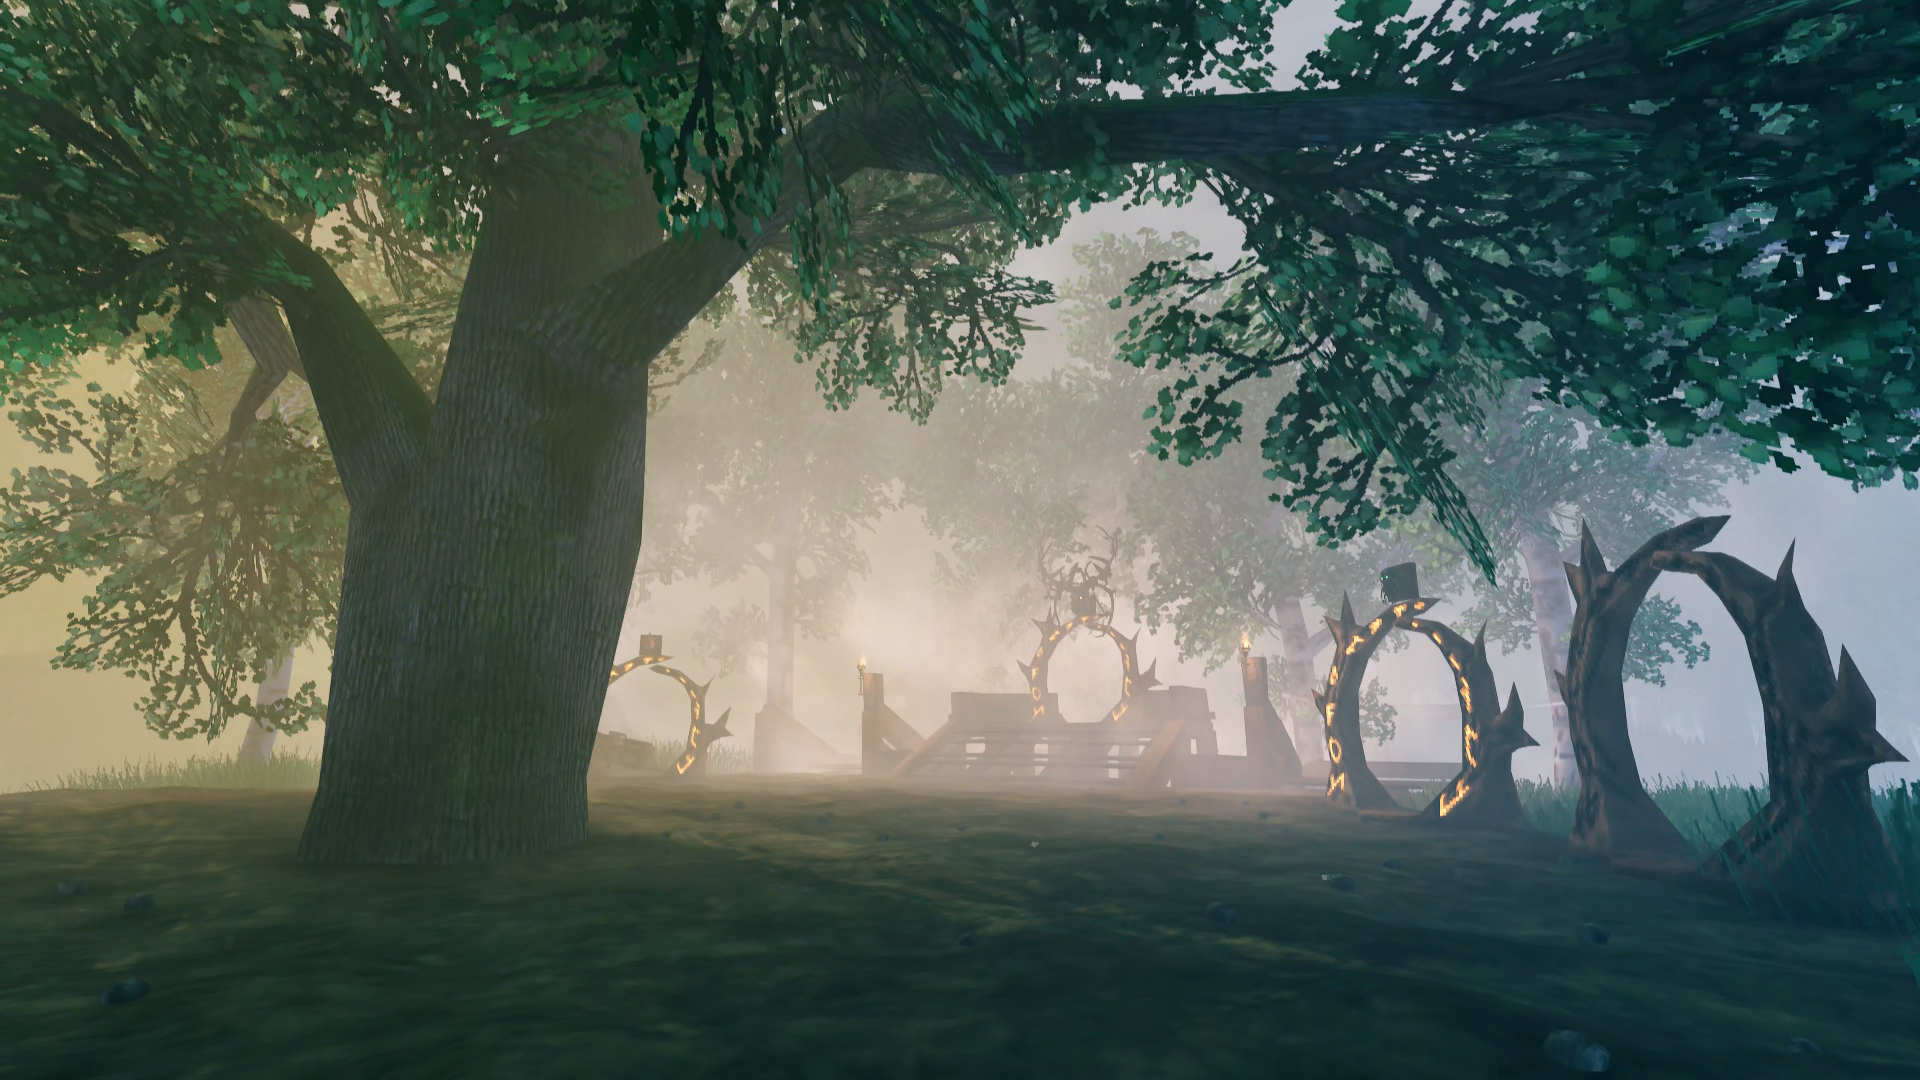
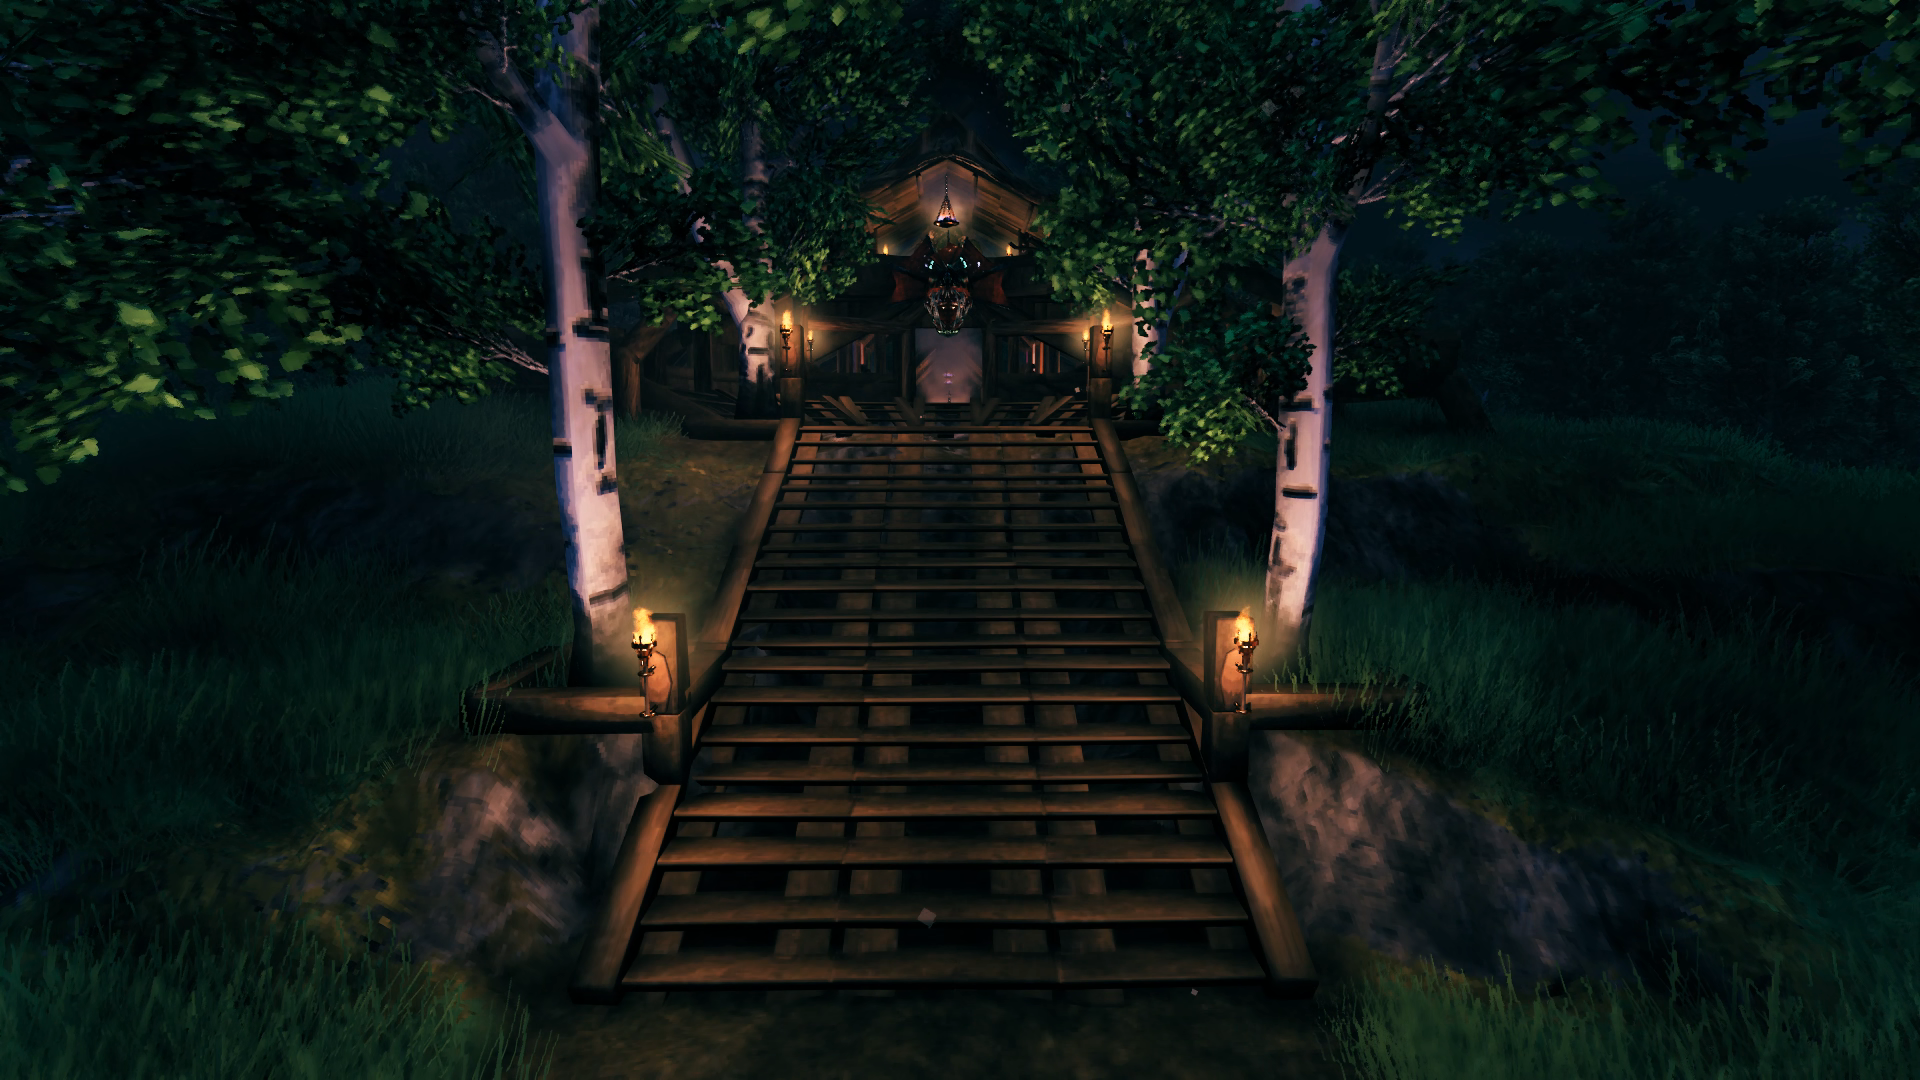
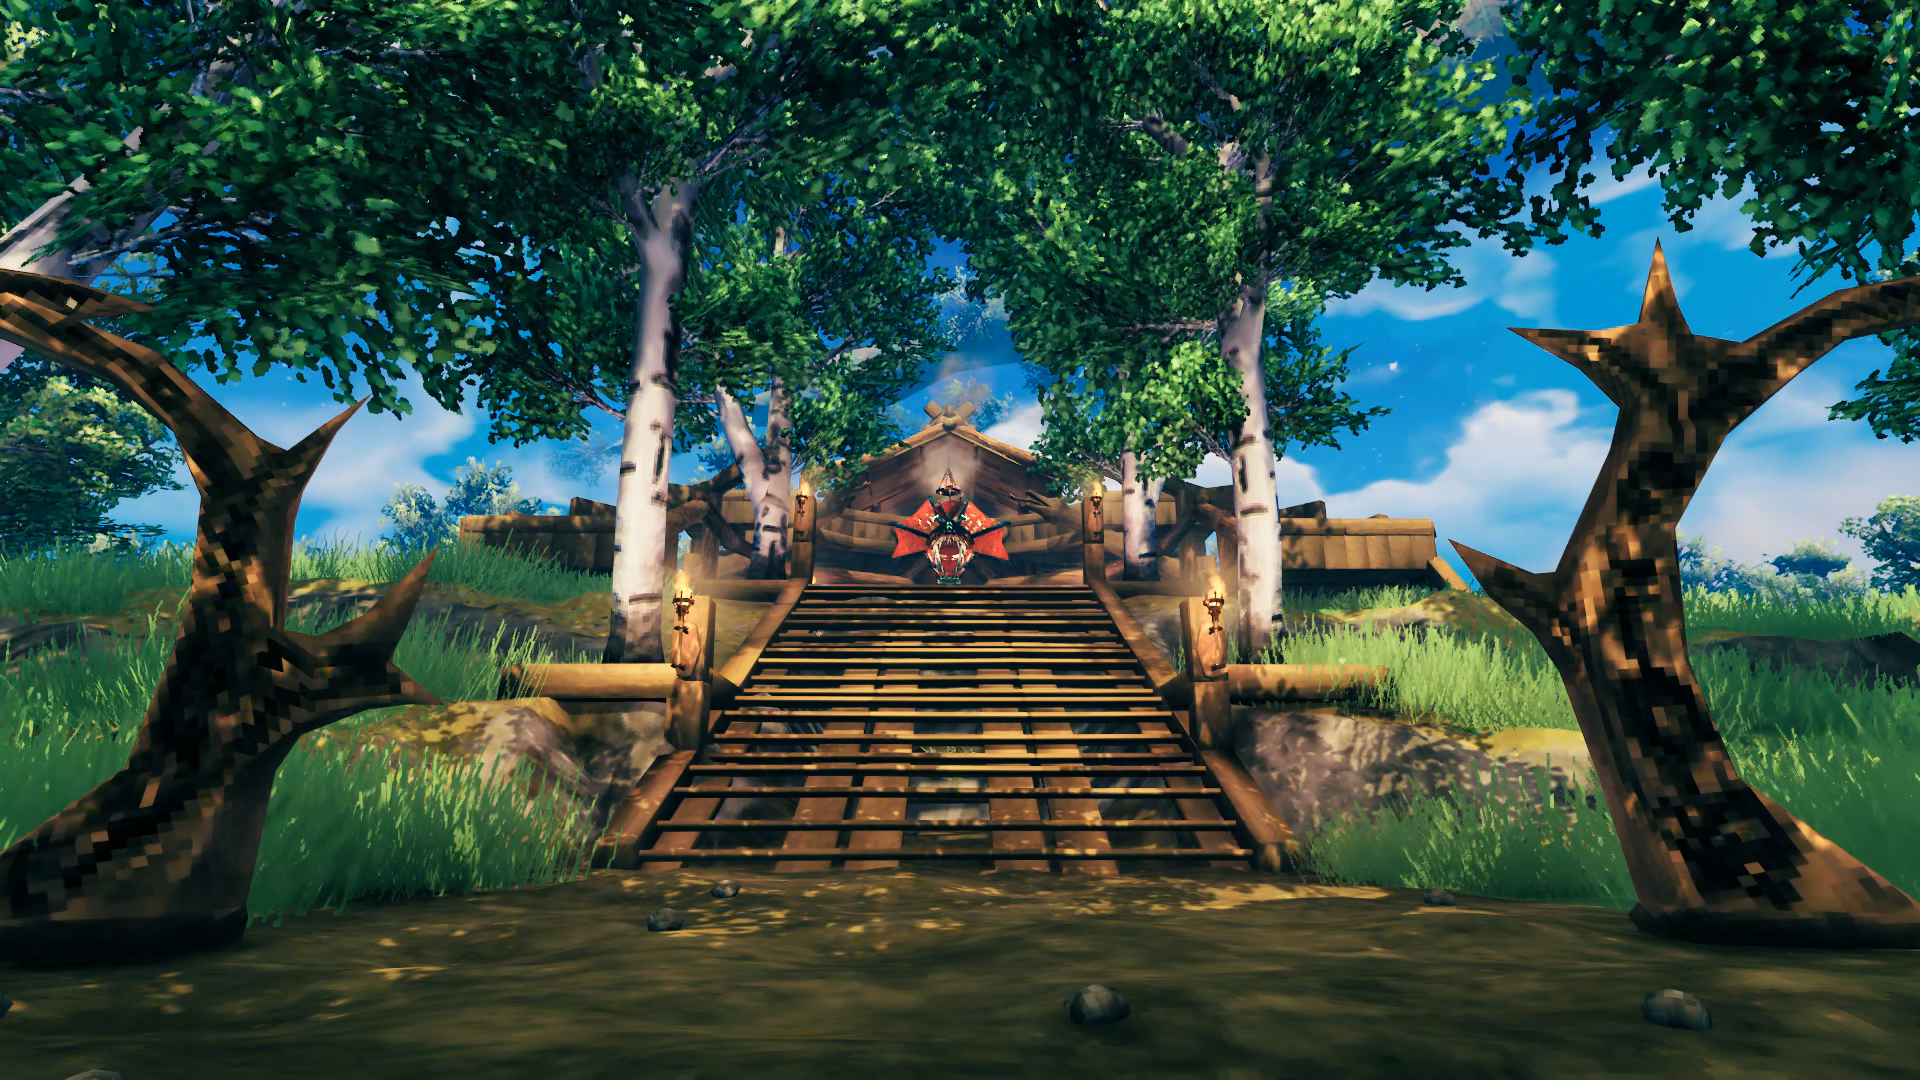
 The main entryway to Hellholm is decorated to be visible at night thanks to a Dverger Circlet mounted on an item stand that illuminates the stairs and two sirtling trophies to frame the entryway (was not going to bother bringing home a second Brenna trophy). I actually managed to collect the two sirtling trophies in relatively quick succession after pretty much completing the Swamps biome and wondering if they even dropped there or not. The beady glowing eyes of some additional trophies also provide some night time reference. Since enemies are attracted to torches, this keeps the night time bands of greydwarves and skellies from coming a knocking.
There is a dirt path that leads from the entrance out into the forest and wends its way a short distance north to the world spawn point. There is a portal there too but it is not always active.

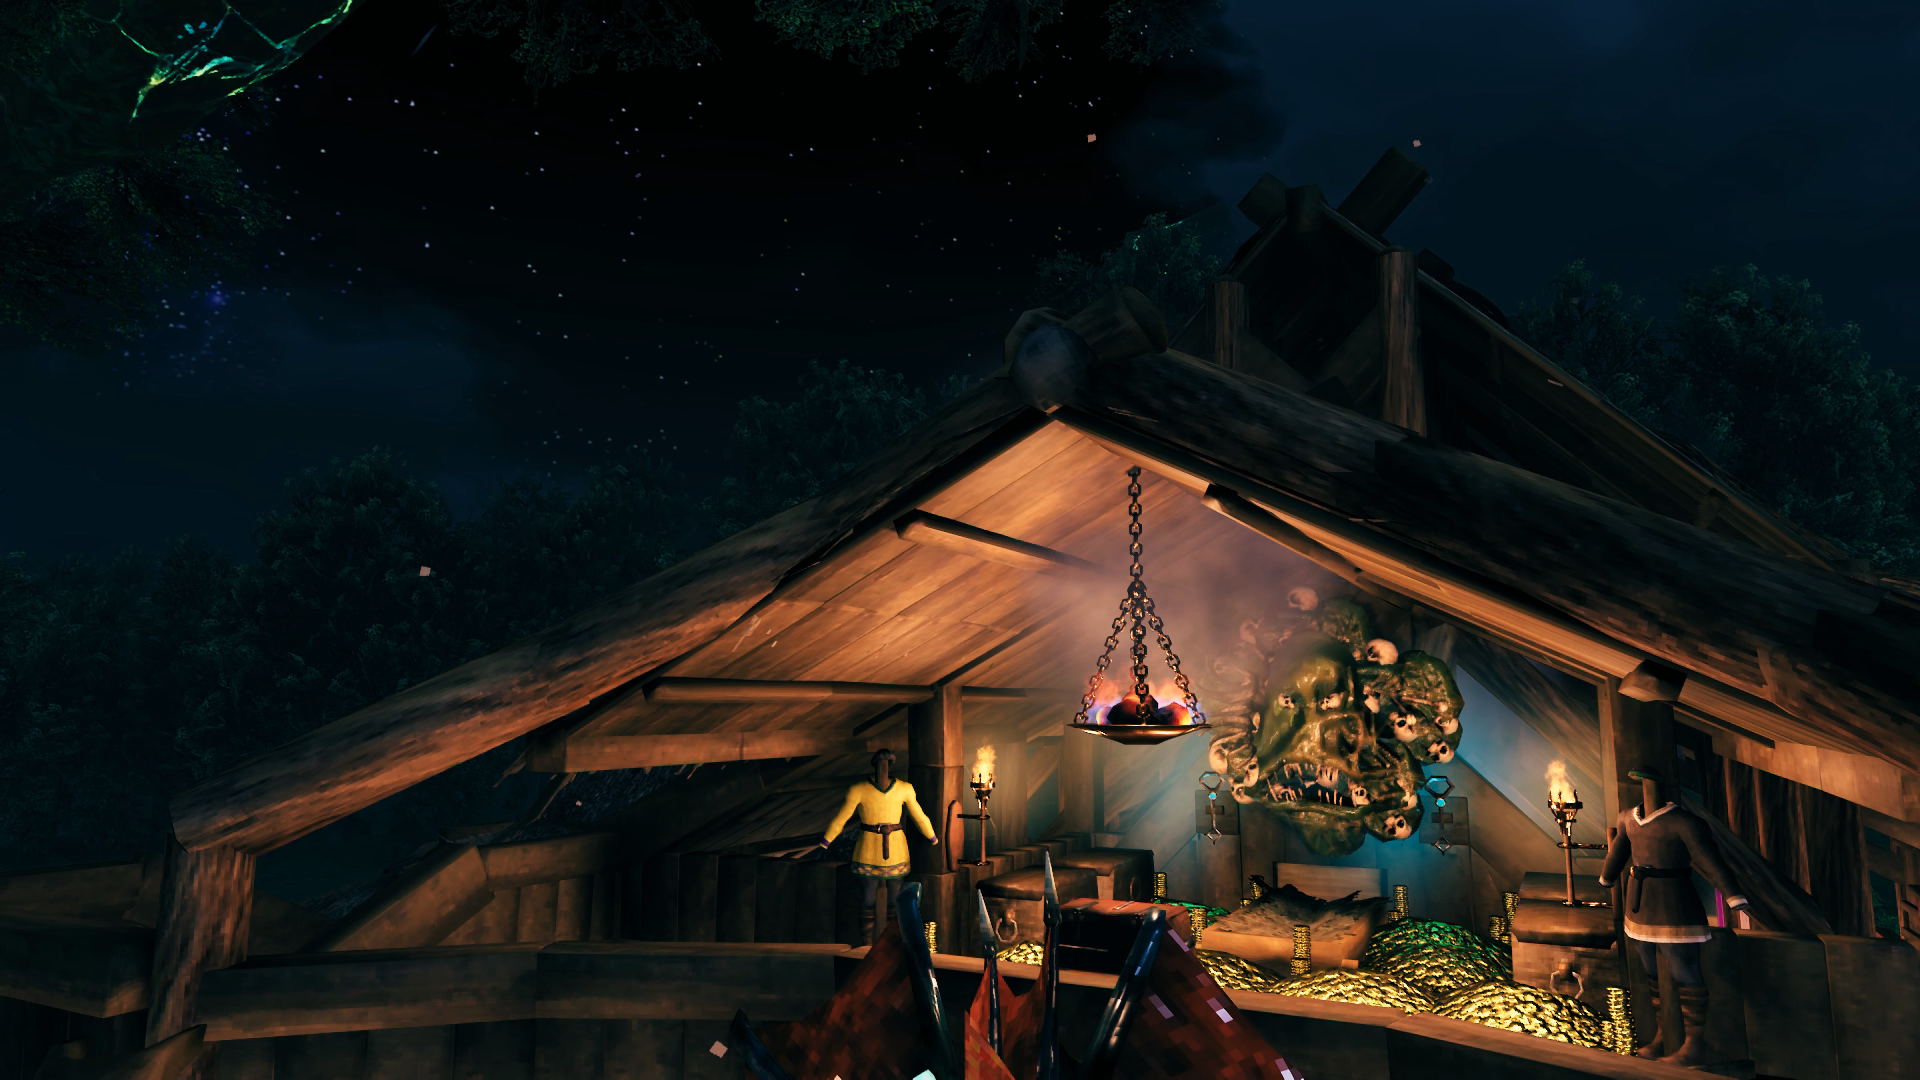
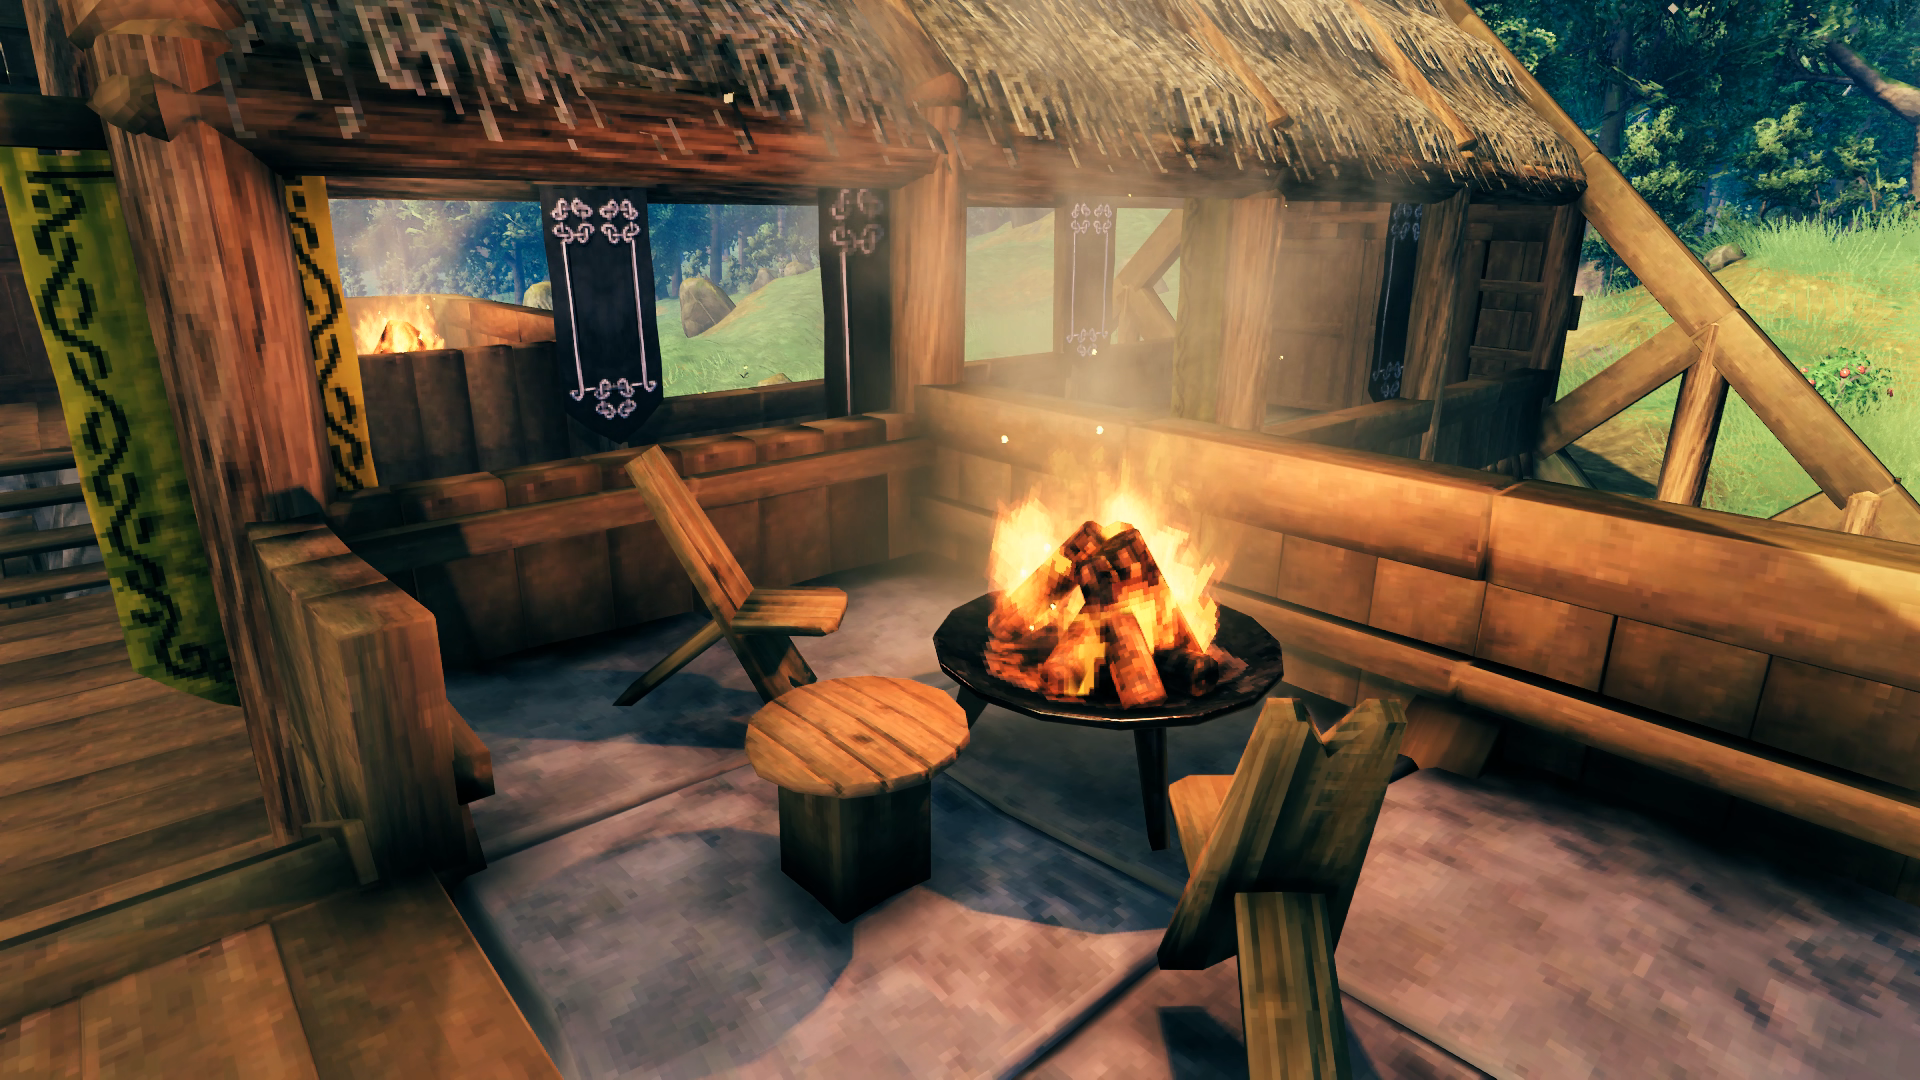
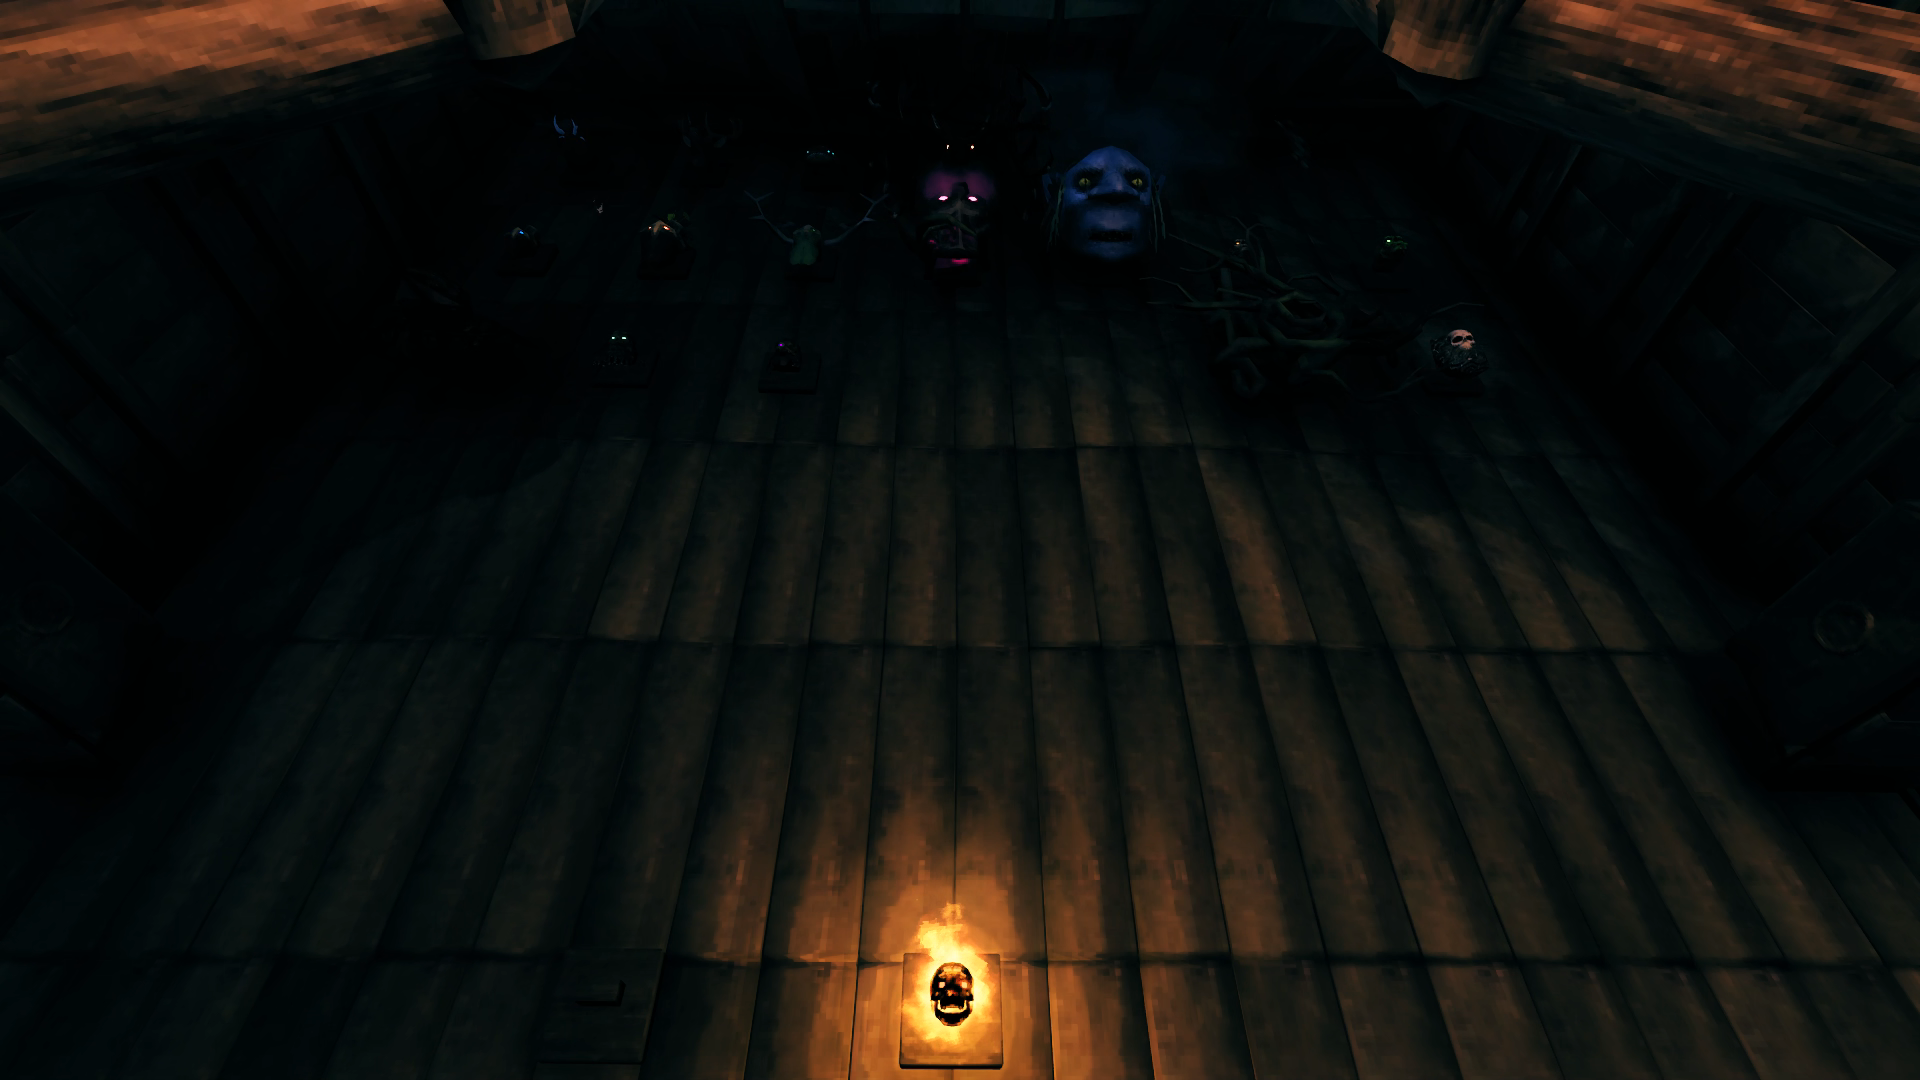
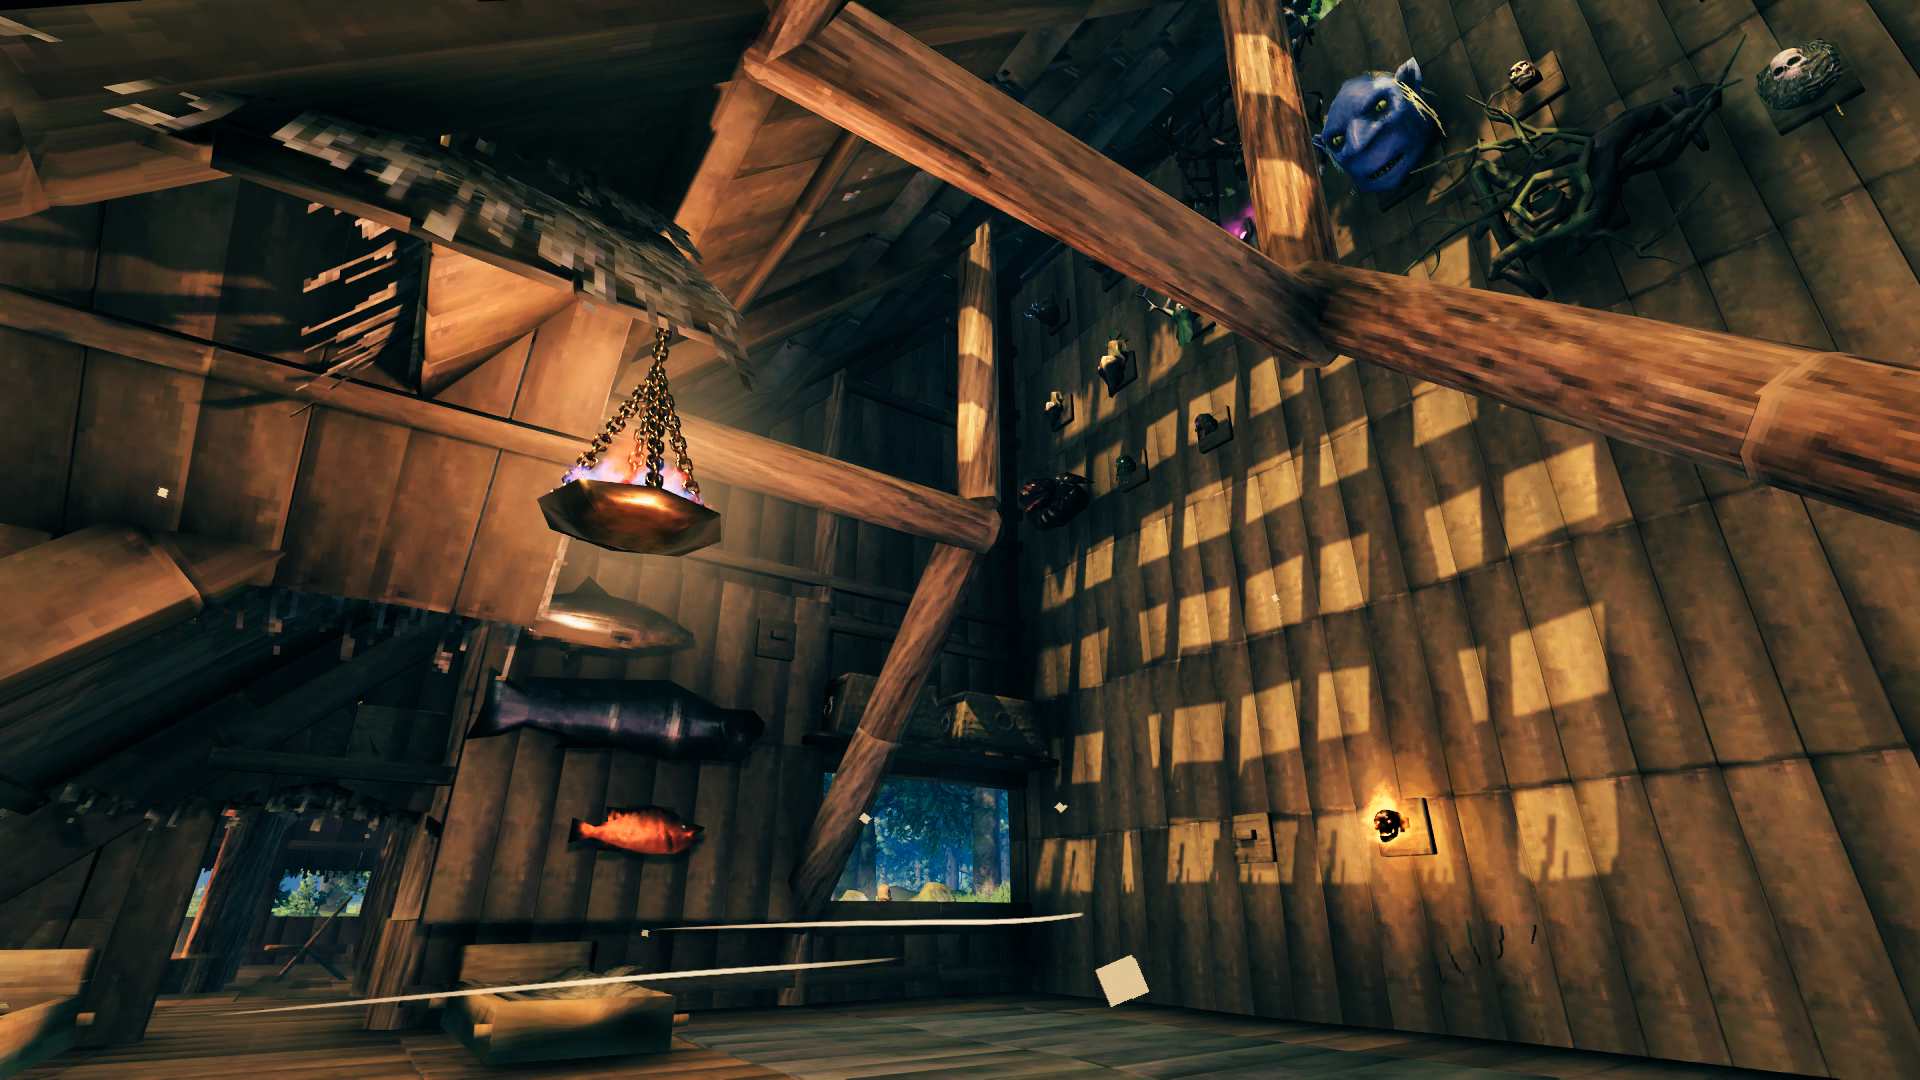
The final large project for the base was the Trophy Hall/Guest House, as well as a fishing dock. Originally it was supposed to be more of a wilderness lodge type of singular large building with a log-cabin design. I started with the dock area and as I began to build back towards the house I instead gravitated more towards a communal gathering space with a fire pit and decided to just attach a building alongside just for the trophy hall. With the original idea in my head it would have been a large central room with trophies hung up all around like a hunting lodge, but I decided instead to just have a huge wall where I could hang the trophies in the same way they are displayed in the dialog window that shows them in the menu. I just built as high as I could and hoped that would be enough space. I don’t think it is cause those boss trophies are huge and will probably have to revisit this with some iron-supported beams as I continue to progress. Thankfully there is plenty of room to build back and higher. The bare vertical exterior wall however is not very visually appealing so I planted a stand of beech trees to screen it. Might go and do some inset wood beam art on it at some point in the future instead.


Despite how differently I originally envisioned it, I’m quite pleased with how it turned out. I planned to have actual rooms for guests to use, but the reality is I don’t expect much if any participation from friends that played with me before so I just threw some beds under a hanging brazier and the sheltered portion of the trophy room. The outdoor fire pit area could use some more decoration of some sort, but I’ll come back to that at some point. I like having a place to moor a Raft so that every type of boat is represented around the base. Eventually those fish trophies will be moved to bases in the biomes where you can catch them. I originally had two braziers hanging from the core wood beams hoping to have the smoke lend an eerie effect to the trophies with glowing eyes but it put too much smoke up there even with the open “skylights”.
If you’ve been keeping track, I have three trophies of each Ancient One – Bedroom, Portal Hub and Trophy Hall. However the portal hub trophy is actually the one moved there from my bedroom, but I still need three because I have to hang one on the stone surrounding the world spawn to get access to their power. So yes I have killed each boss three times.


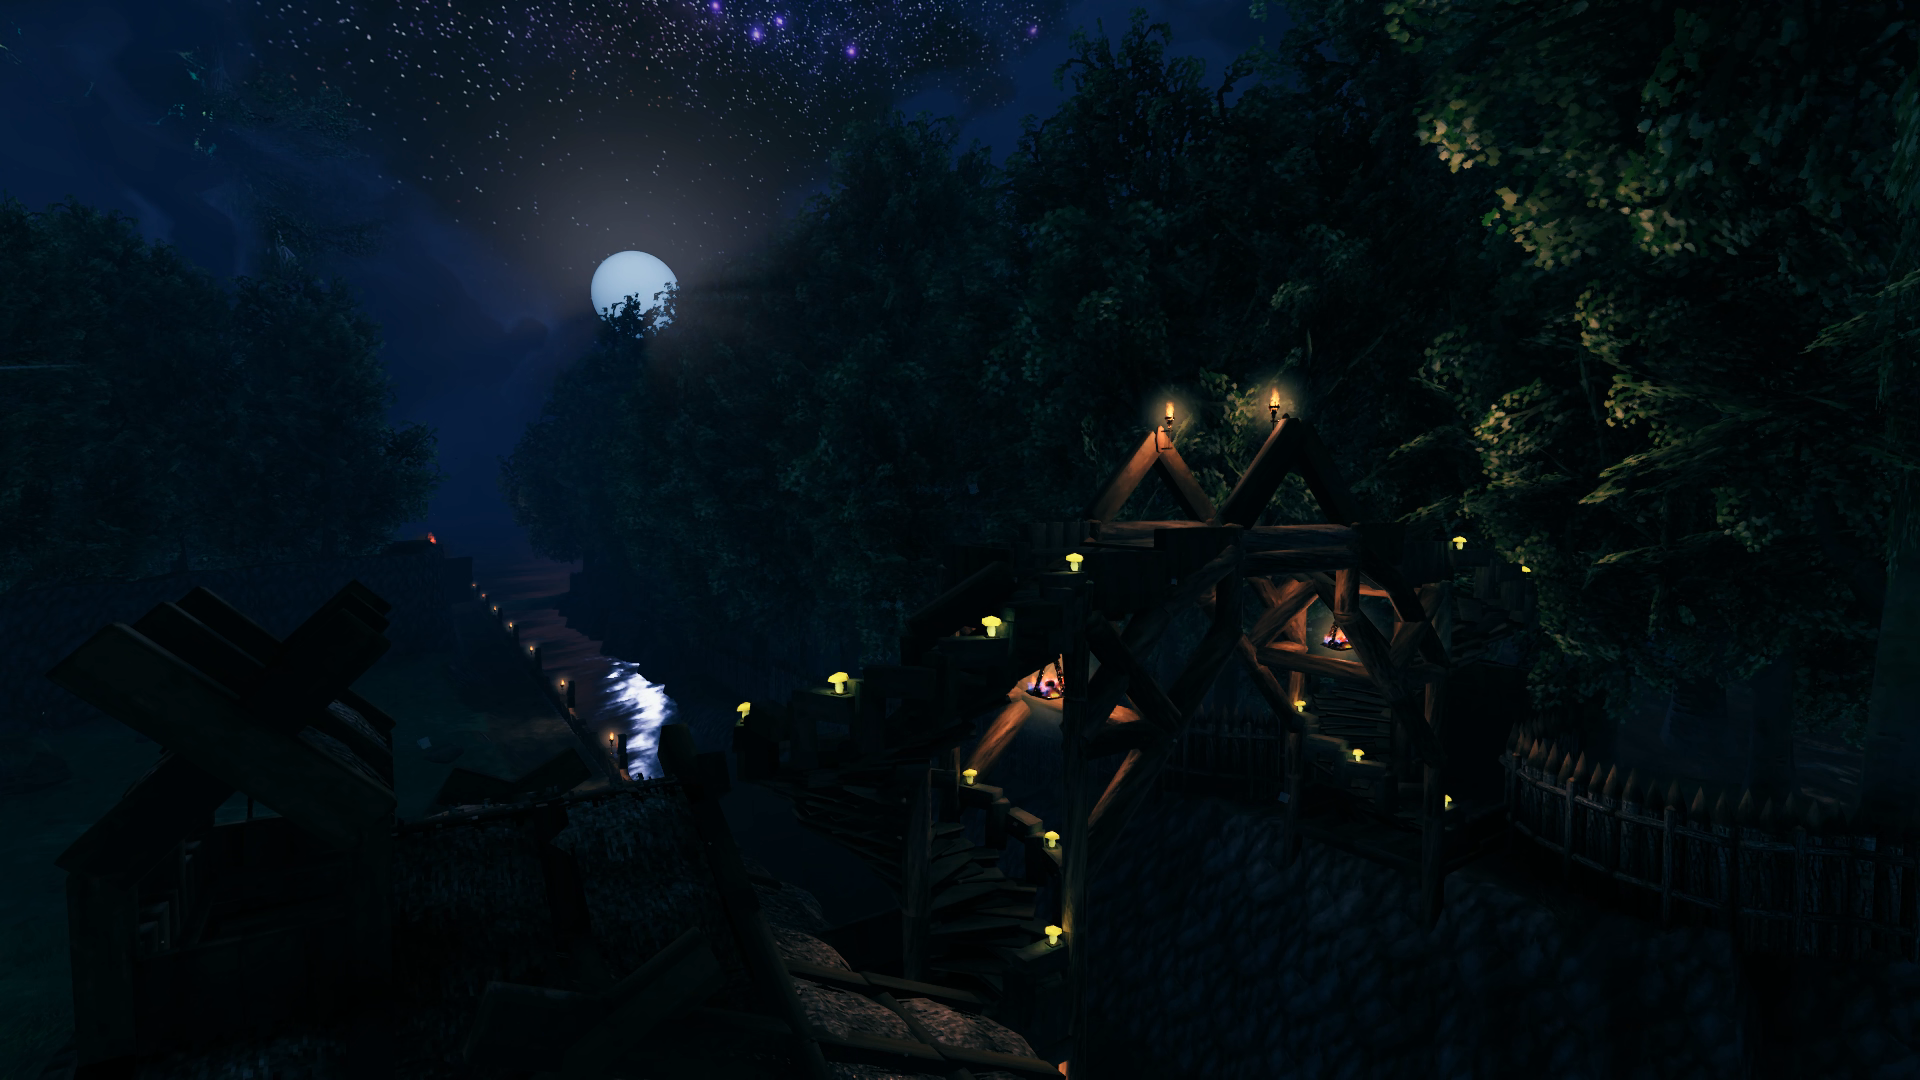
The final version of the canal bridge is now fully illuminated and I also added some roofing to keep the braziers from being doused by the rain. Item stands hold the golden mushrooms, which are great for illuminating pathways and saving me the coal, wood and resin needed to keep everything else burning. Currently the base requires about 150 resin and almost 50 coal and wood every time I need to replenish the flames around Hellholm, which thankfully seems to not be as much as it used to when I played in 2021. My constant exploration has kept all of these resources in ample supply.

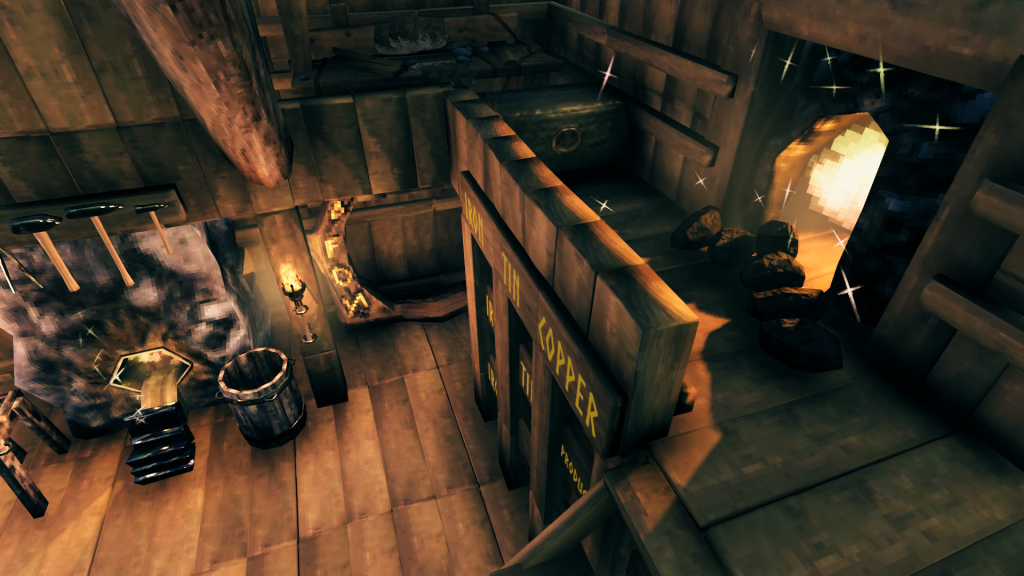
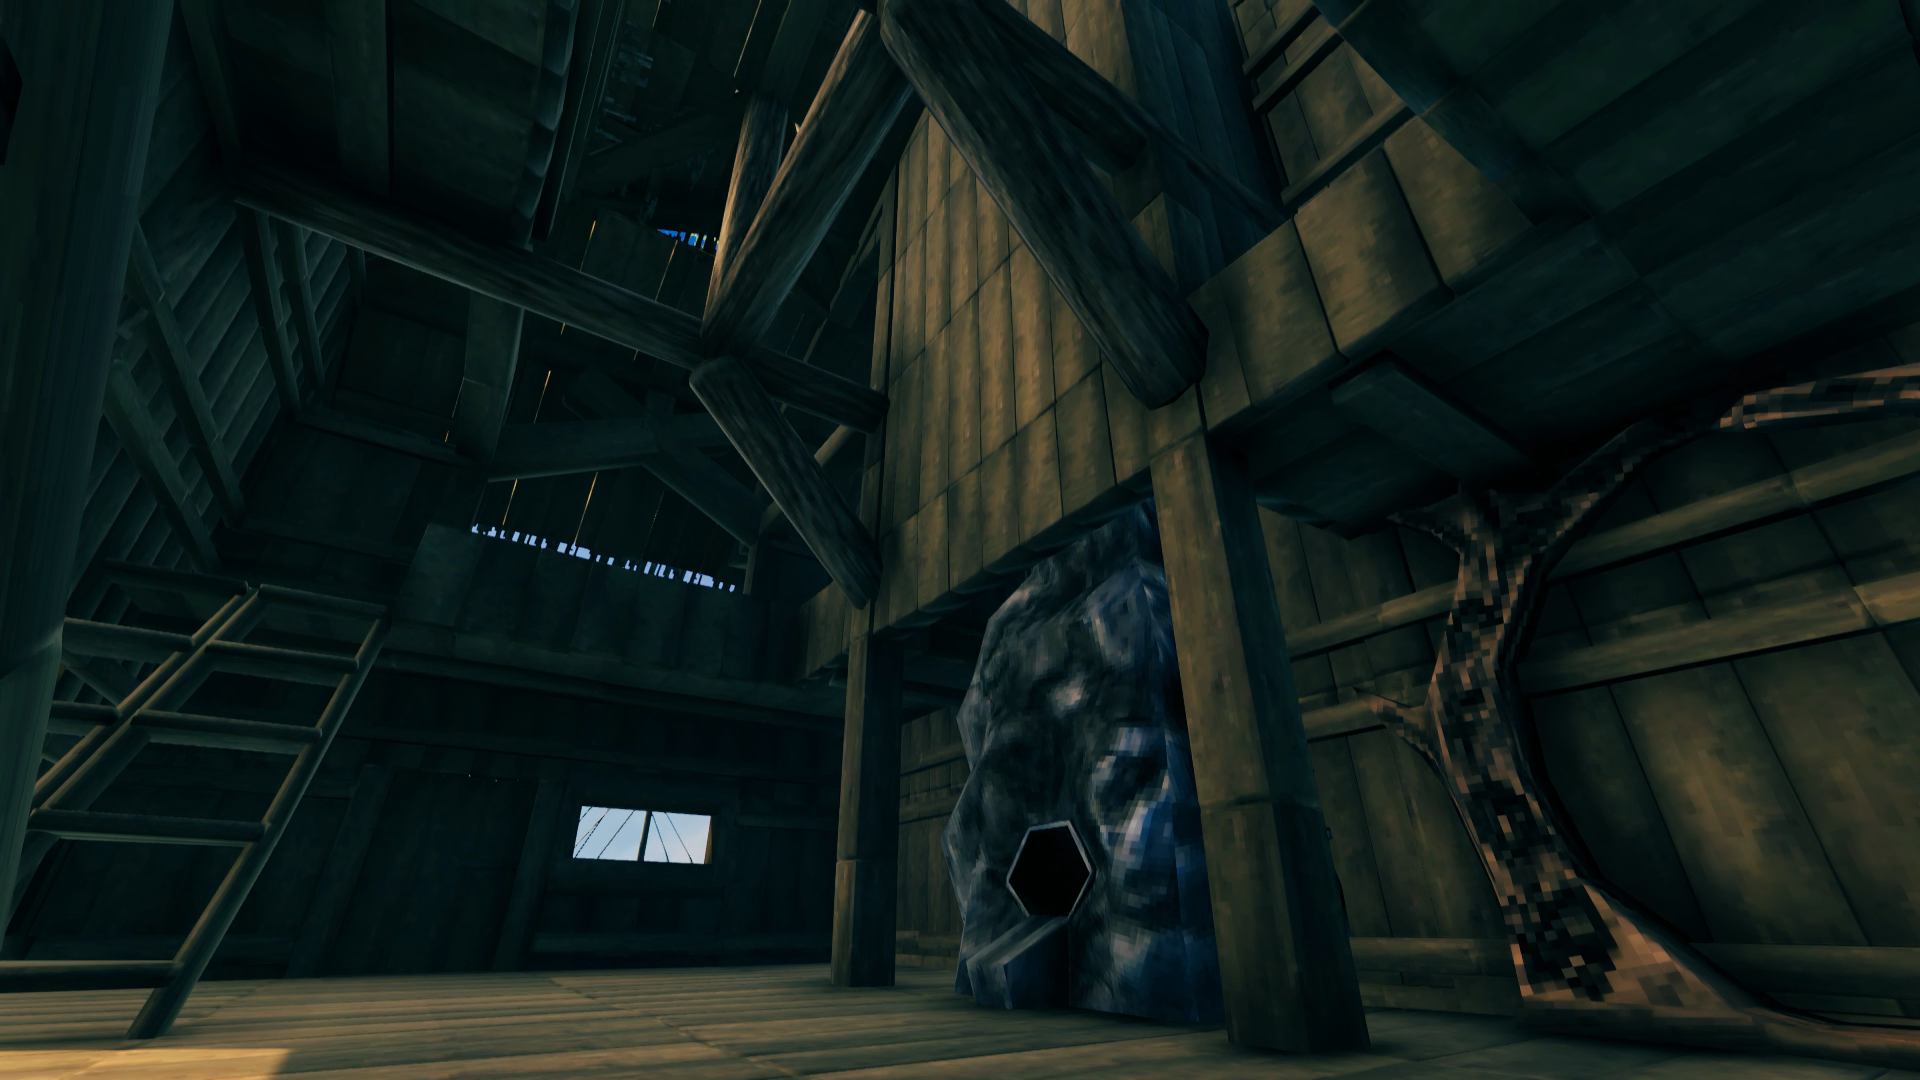
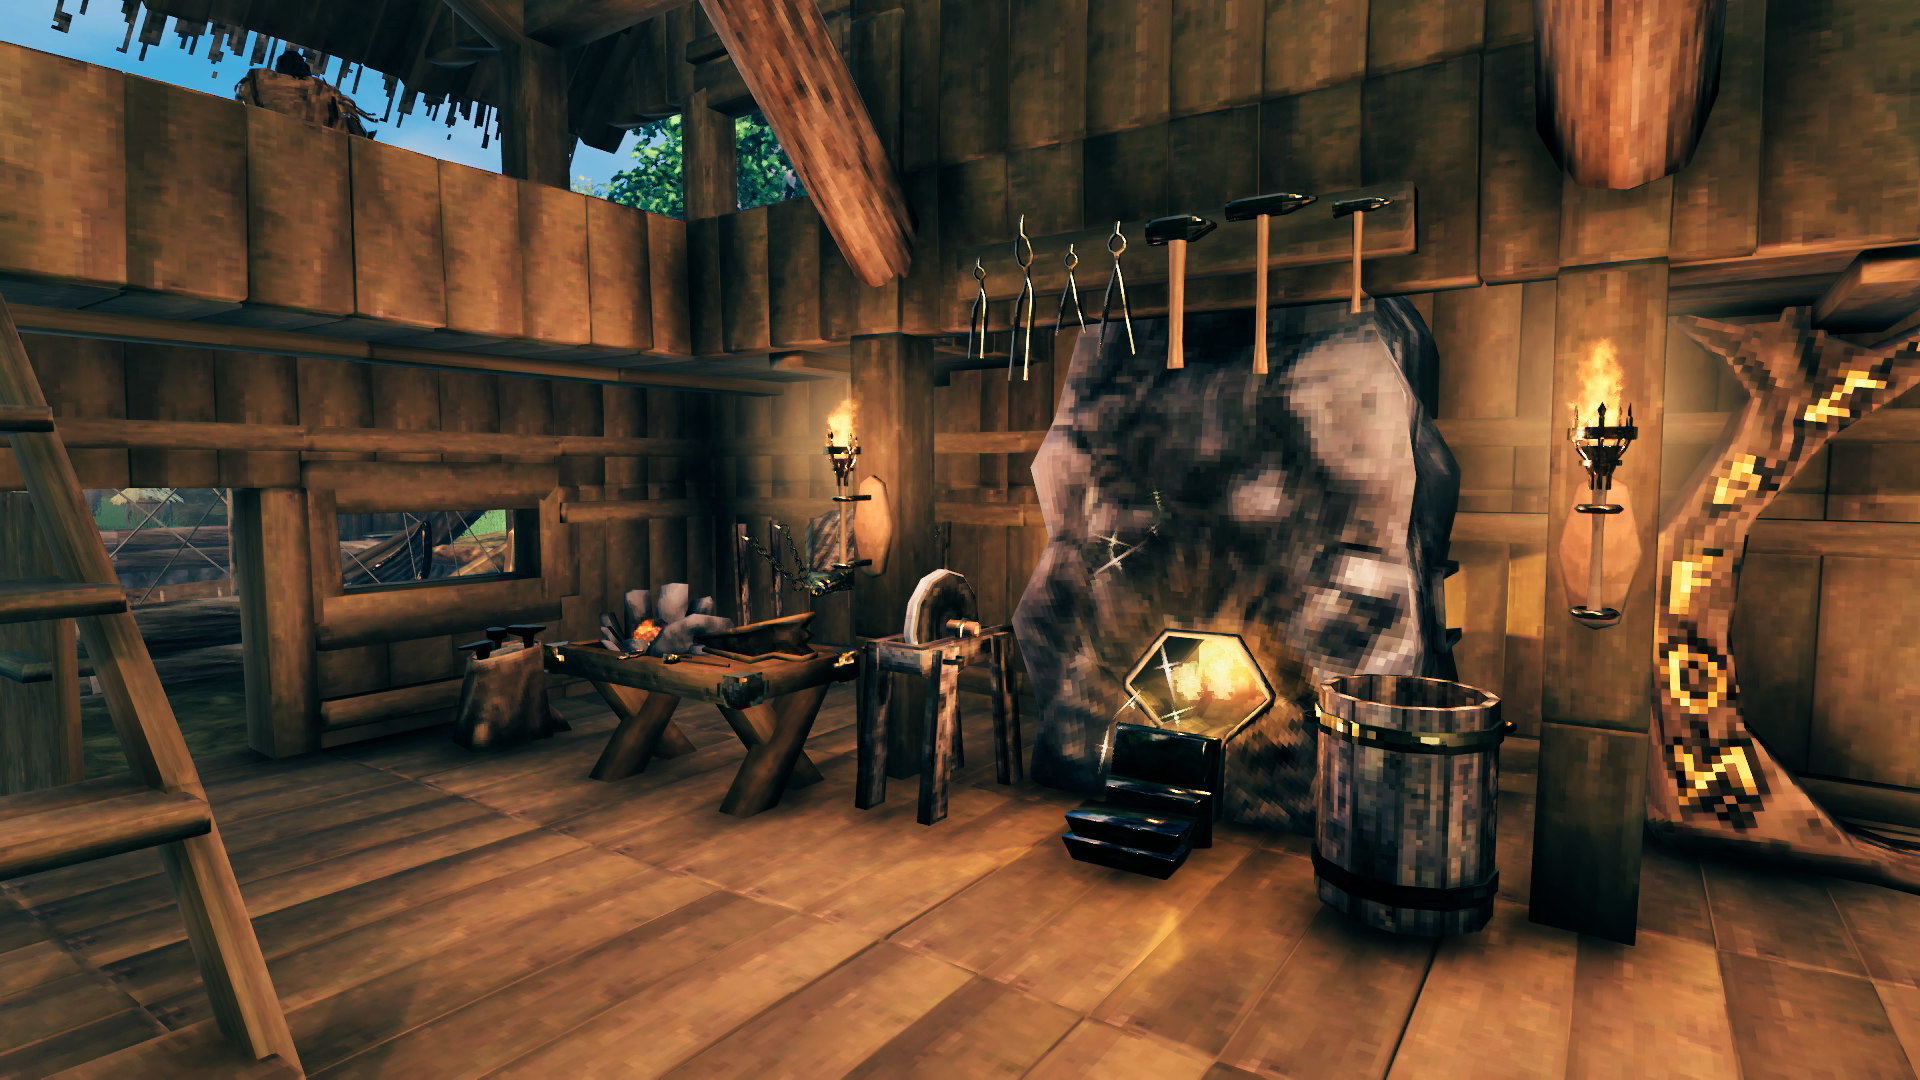
By now the Smithy has been in use through the Swamp biome and has managed to accommodate all the Forge upgrades so far. Standing in front of the Grinding Wheel you can just find a spot with the cursor to allow you to load up the Smelter with ore, so it’s very pleasing to me that the original layout has been working out and I haven’t had to redesign anything about the building in order to keep the Forge upgraded as I progressed. The upper balcony with the Kiln has a chest right there for the coal to keep space free in the chests underneath. Haven’t decided what to do yet with the blank wall space on the chimney.


There were two upper balconies in the Smithy and I realized by now I didn’t need the second one for any real purpose so I tore down the walls and made it more of an open balcony that looks out over the harbor. From the first image to the second image you can see I removed more of the internal structural beams to really open up the space. Around the other side of the Smithy since I didn’t have good spacing for any sconces along this section of the promenade there is a brazier hung there instead for illumination. Super smokey but doesn’t put itself out. The Smithy definitely still needs some attention for exterior decoration as well.
By now I had already used the Longship a few times to get more iron delivered to the base and found that the turning basin was woefully inadequate in allowing me to get the ship in and out of the dock. It has since been made larger and the dock also made a bit shorter but it still requires some deft handling to get the ship in and out without taking any damage. I do like the challenge though.
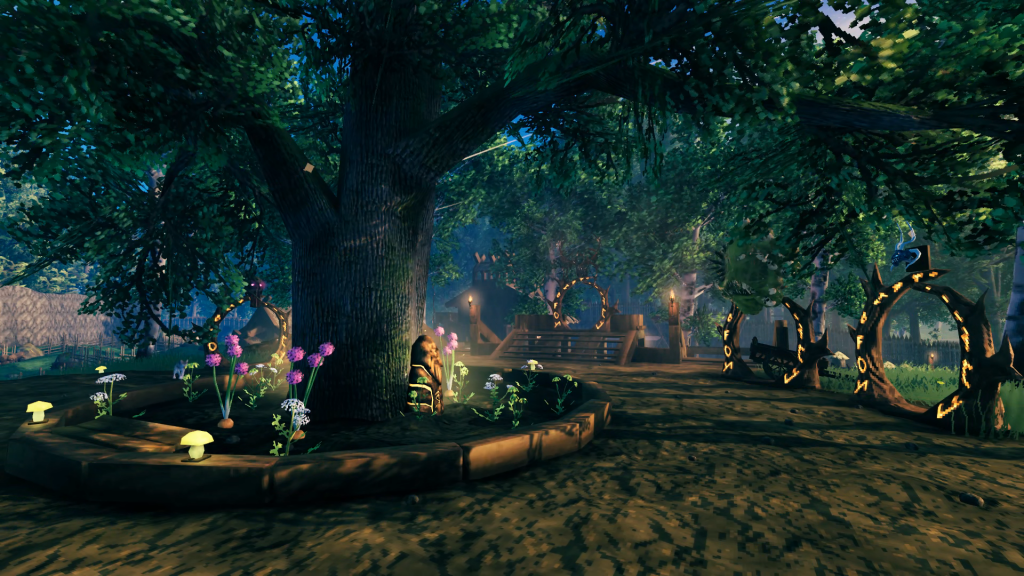 Took me a while but was finally able to decorate the space around the oak tree like I wanted after I had a good variety of flowering veggies to plant. The only trouble I had to deal with were the huge drooping branches blocking the sky in some areas so had to experiment a bit on where I could plant things to come up with a uniform look around the tree. The ward stones and yellow mushrooms again provide great nighttime illumination to save me resources.


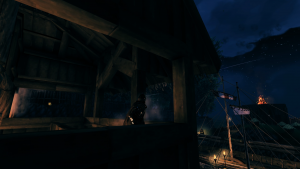
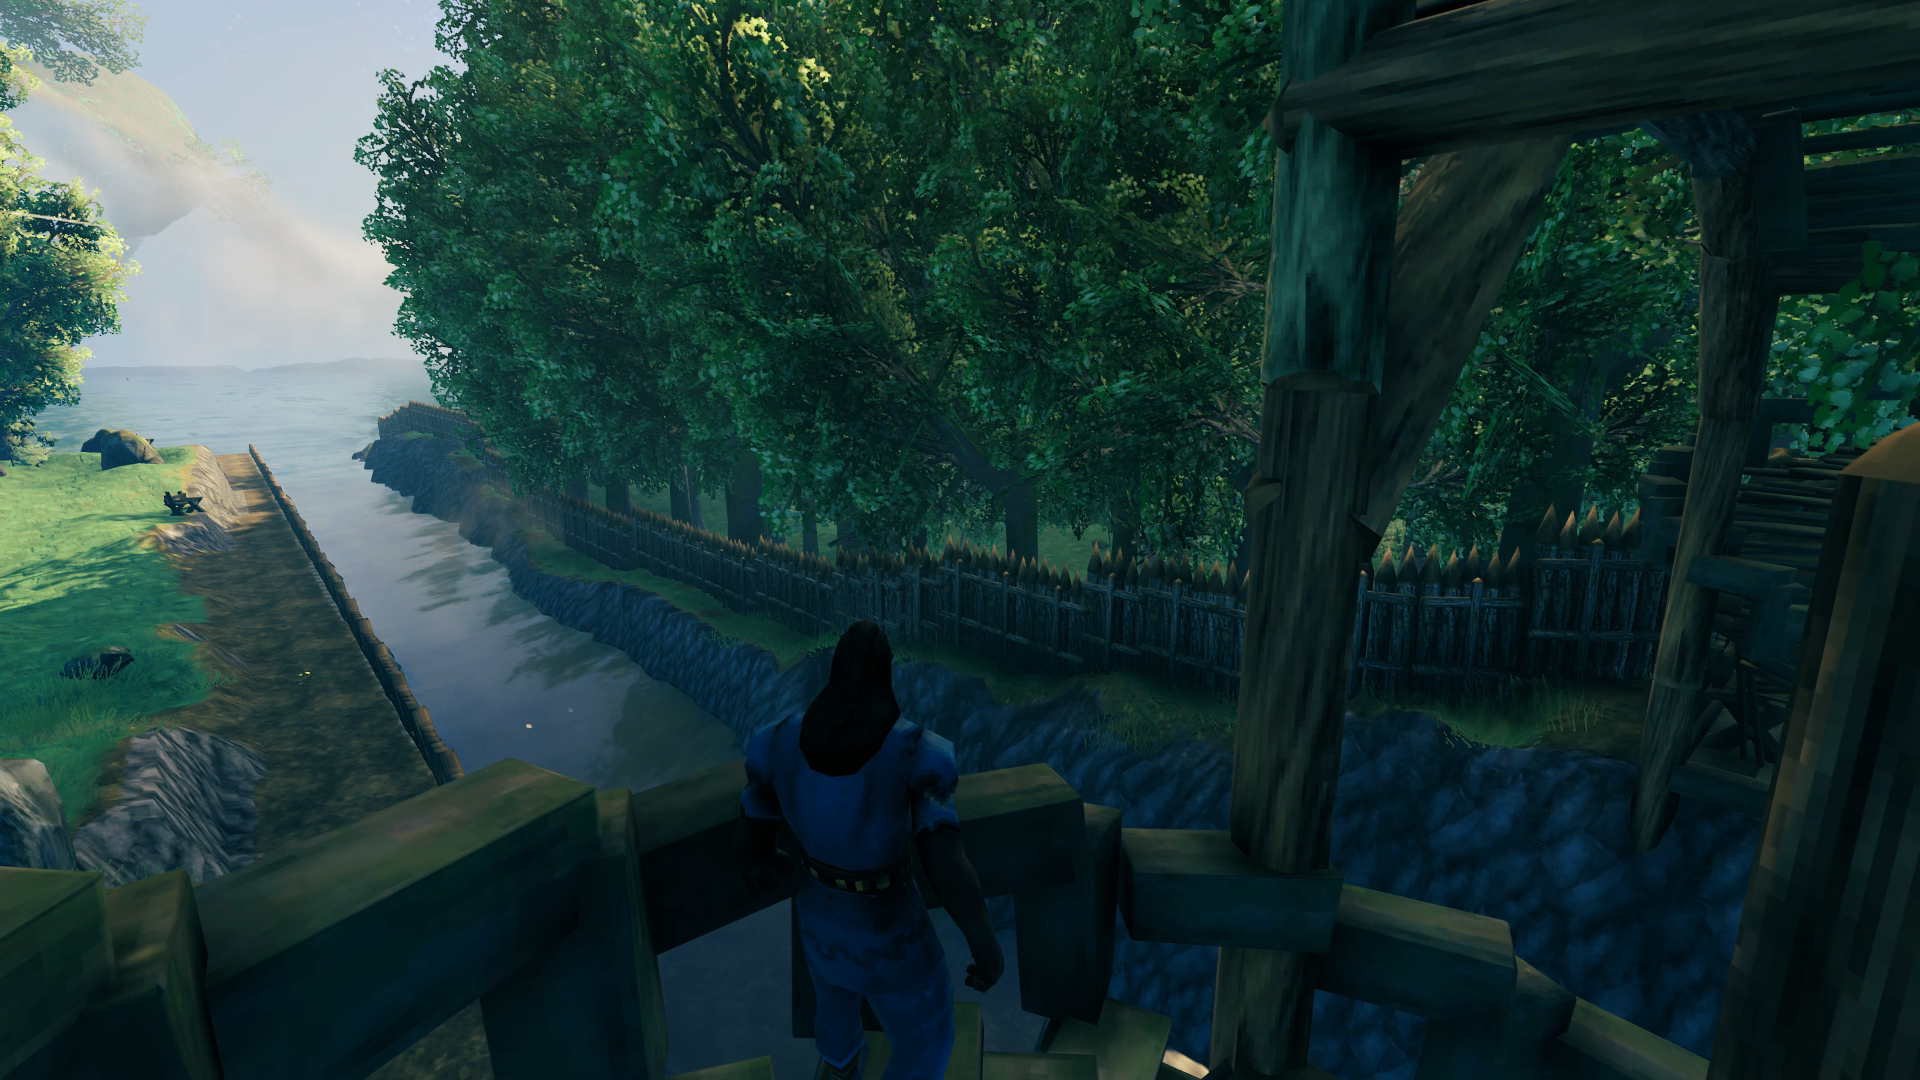
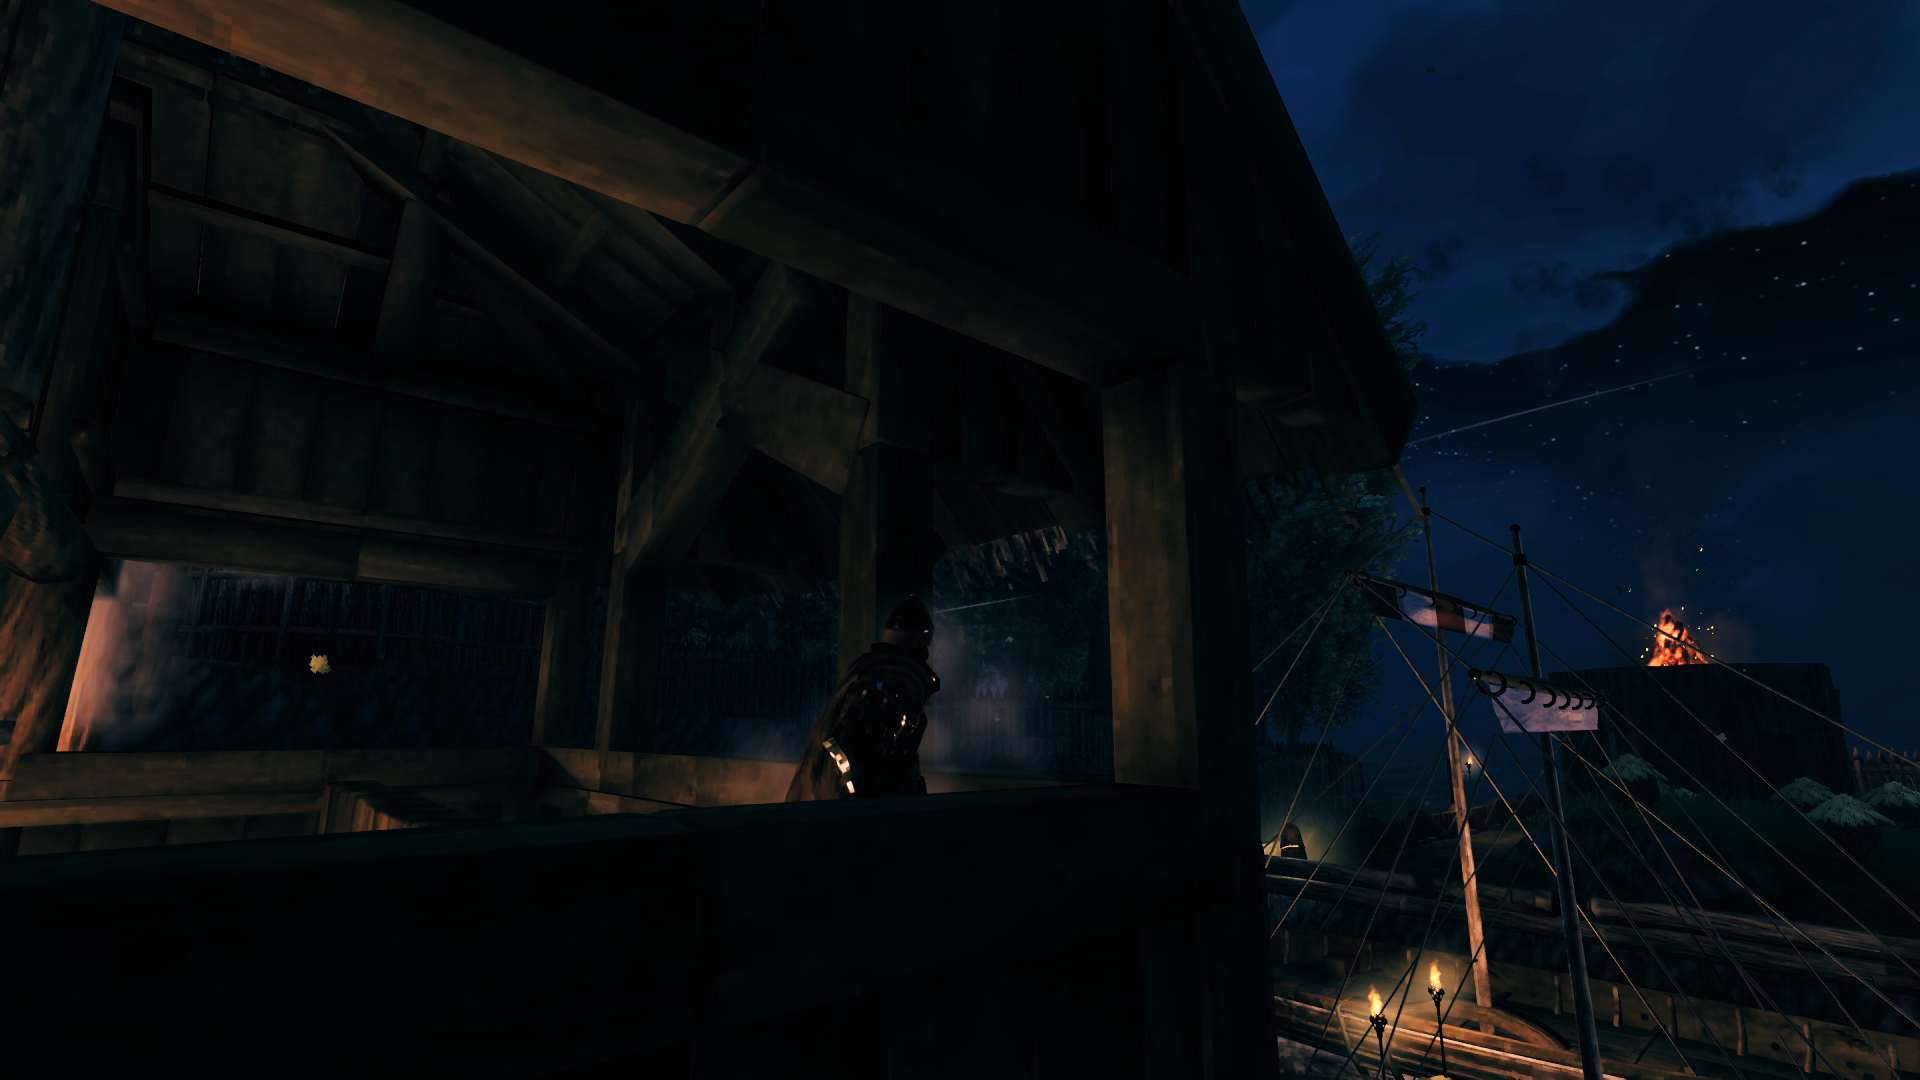
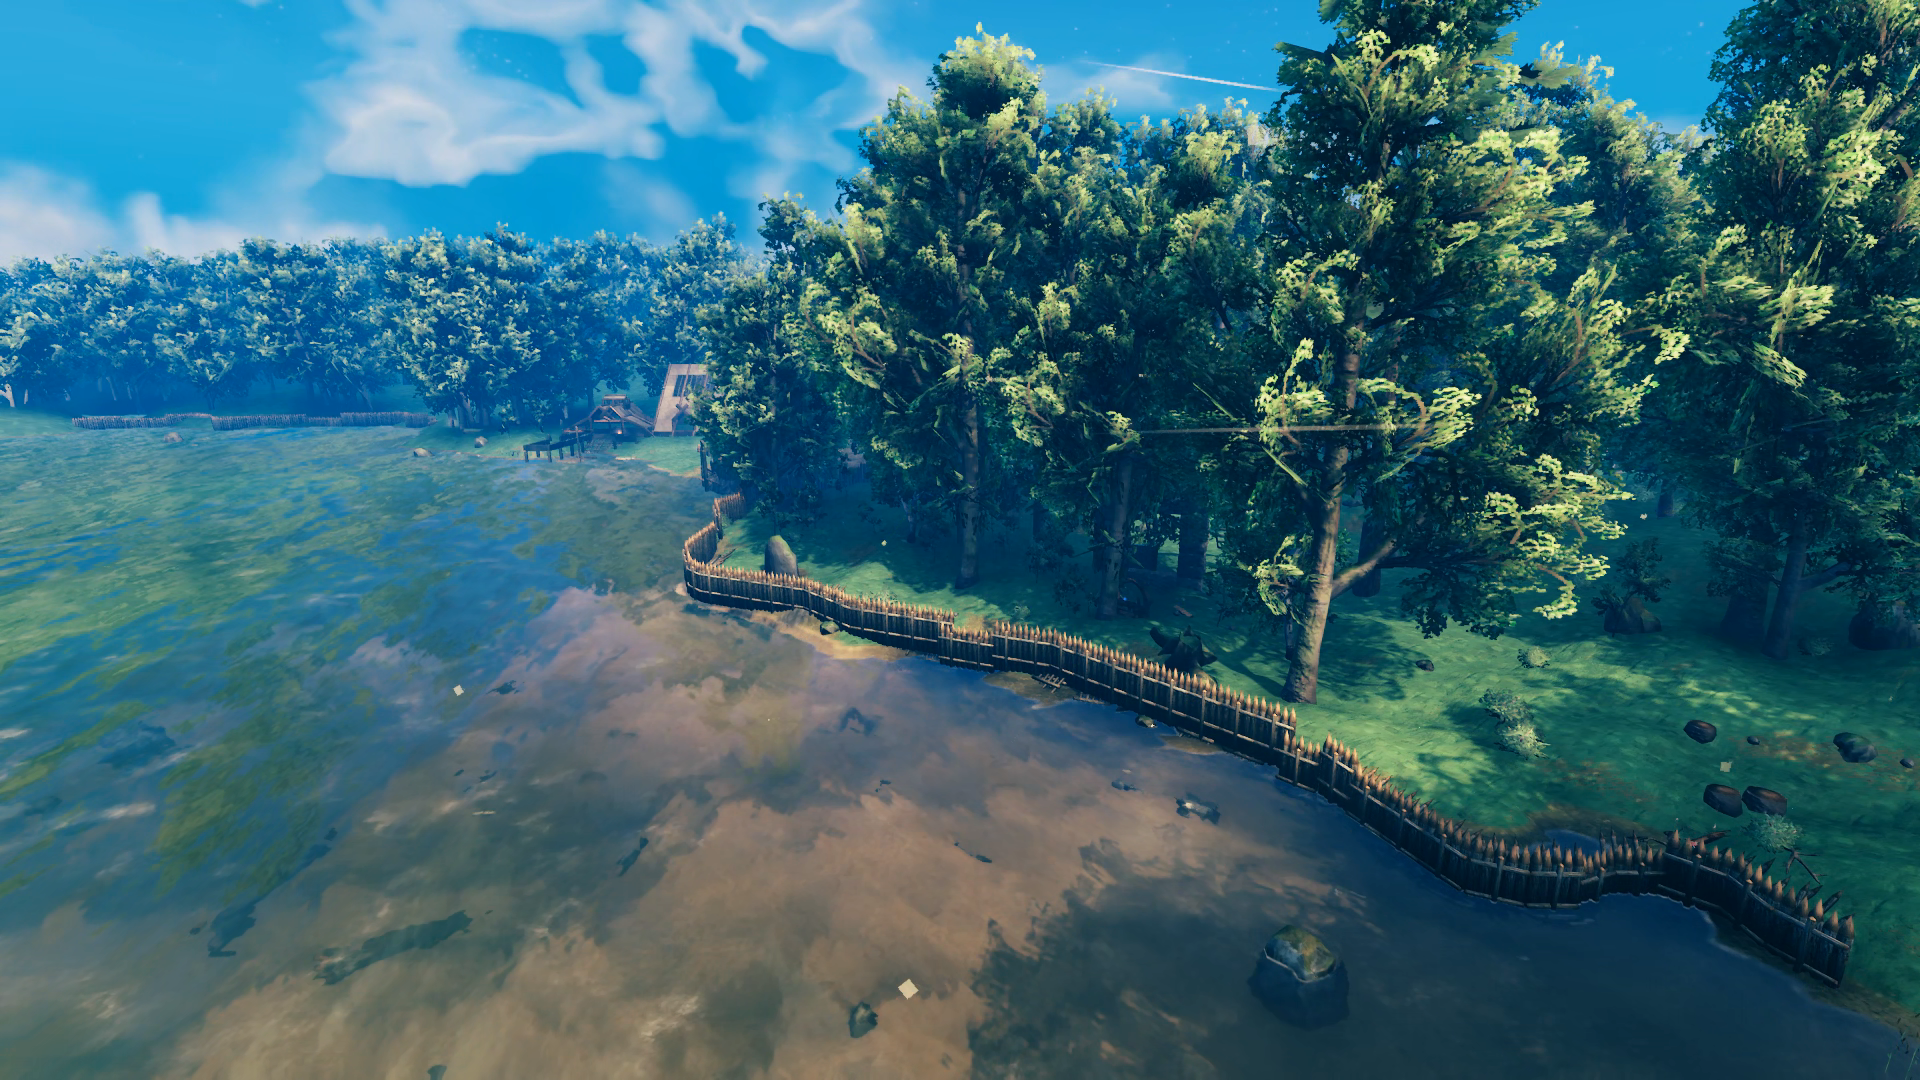
Okay it’s finally time to talk defense. The front of the base is protected by a moat/chasm – you can’t actually dig down to water along the whole length of it, but either way it works. It extends to the sea on the west where it’s blockaded by stake walls, then wraps around to the east where it rises up back to the generated terrain level and a wall begins instead, which runs the rest of the way east to the opposite sea. As you saw earlier, the rear of the base is protected by a stake wall to deny archers from shooting into the base and the canal to keep them from entering the base. These defensive measures were all completed before I went and defeated the Elder for the first time, so when the troll started to come around I was ready. If I’m at the rear of the base I run to either bonfire tower and wait it out from there – if they bust through the stake walls I can shoot them dead before they can walk around the canal entrance. If I’m at the front of the base I run to the upper east wing of my room so they are not trying to batter down the entrance to get to me, but instead stand at the base of the moat in their vain attempts to do damage. Any other raid up to this point doesn’t bring any threat either except for the bats of course.
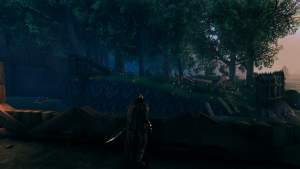

Above is the aftermath of a troll attack on my rear stake wall. They were able to descend into the canal from that point but were unable to climb out of it to get me on the promenade. To discourage any enemies from flanking the wall and swimming around, I have the shore on all sides lined with stake walls that extend two full radii of Workbench build zones so that they would despawn before they made it around the far end.


Although I never had any problems with raid enemies spawning inside my base, I did have a problem with night bands of greydwarves. I actually came out of the house one morning after doing stuff inside over night to find that my entire boar herd had been destroyed! Several times after that despite laying out some additional wards and Workbenches I would run into a single greydwarf wandering around the base after night fell. WTF. I figure it had to do with the spawn point of the raid group being outside my base, but the spacing among the members of the group was such that one of them ended up inside my base every now and then. So I finally went and buried some fire pits all along the perimeter and that finally solved the problem – although getting the pits to remain intact while buried was another issue. You can’t let them be too deep or you’ll come back later to find some stone sitting atop the ground.

 If you’ve made it this far then I raise my tankard to you – Skal!! Thanks for taking the time to learn more about Hellholm. My next big base will be in the Plains to support me in my exploration of the Mistlands (crops to grow, ore to smelt and Lox to ride over the border), which is the only biome I’ve never experienced since playing back in 2021. I have plans for small outposts in the Black Forest, Swamp and Mountains. Once I’ve built all my bases and outposts I want to make a road that connects them all (road will lead to docks if sea traversal required and the water span is too long for a bridge).
I also promised a quick review of GeForceNOW, which lets you play games online. It’s amazing. I have a $250 laptop and I did a second playthrough of CyberPunk 2077 with all the graphics cranked up to max and it didn’t feel any different than when I played it through the first time on my desktop PC. The latency is so good even over 5Ghz wireless, which is mostly all I’ve used for it, that you don’t feel any lag or delay in your inputs. For games like Rocket League where milliseconds affect the precision of your ball contact, you can tell the latency is there but you still can’t really feel it in order to compensate, but I was still able to maintain competitive play at the diamond level. Yes, you can suffer disconnects and unfortunately when you do there is no auto-pause. I got dropped during one Valheim session and came back (it reloads you back into your game if possible) just in time to save myself from being killed by one more hit from a draugr. But on the other hand I’ve never been killed as a result of network performance, even though during times I’ve been force to use 2.4Ghz wireless there was a lot of stuttering to deal with (but not all the time). All the thumbs up for this service!


 There was a natural break in the trees to the eastern sea and so I decided to make that the entry point of a canal that I hoped I would be able to dig from one shore to another so that I would have a centrally-accessible location for smelting copper, tin, iron and silver ore brought in by boat. I probably should have placed wood beams to use to guide me in my digging but I didn’t think of that and just went at it with the pick axe:


 I took a momentary break from the canal to build a tall wooden tower in order to get an idea of just how high the core wood beams would let me go. I made it 5 stories above the ground, which was pretty good – I thought I could only make it 3-4 but I stopped playing right before the Hearth and Home update that made a lot of changes to the build system. So I was excited that the Grand Hall could be as grand as I imagined it this time. The view from the top gave me a good look at the canal I built with its promenade railed in.
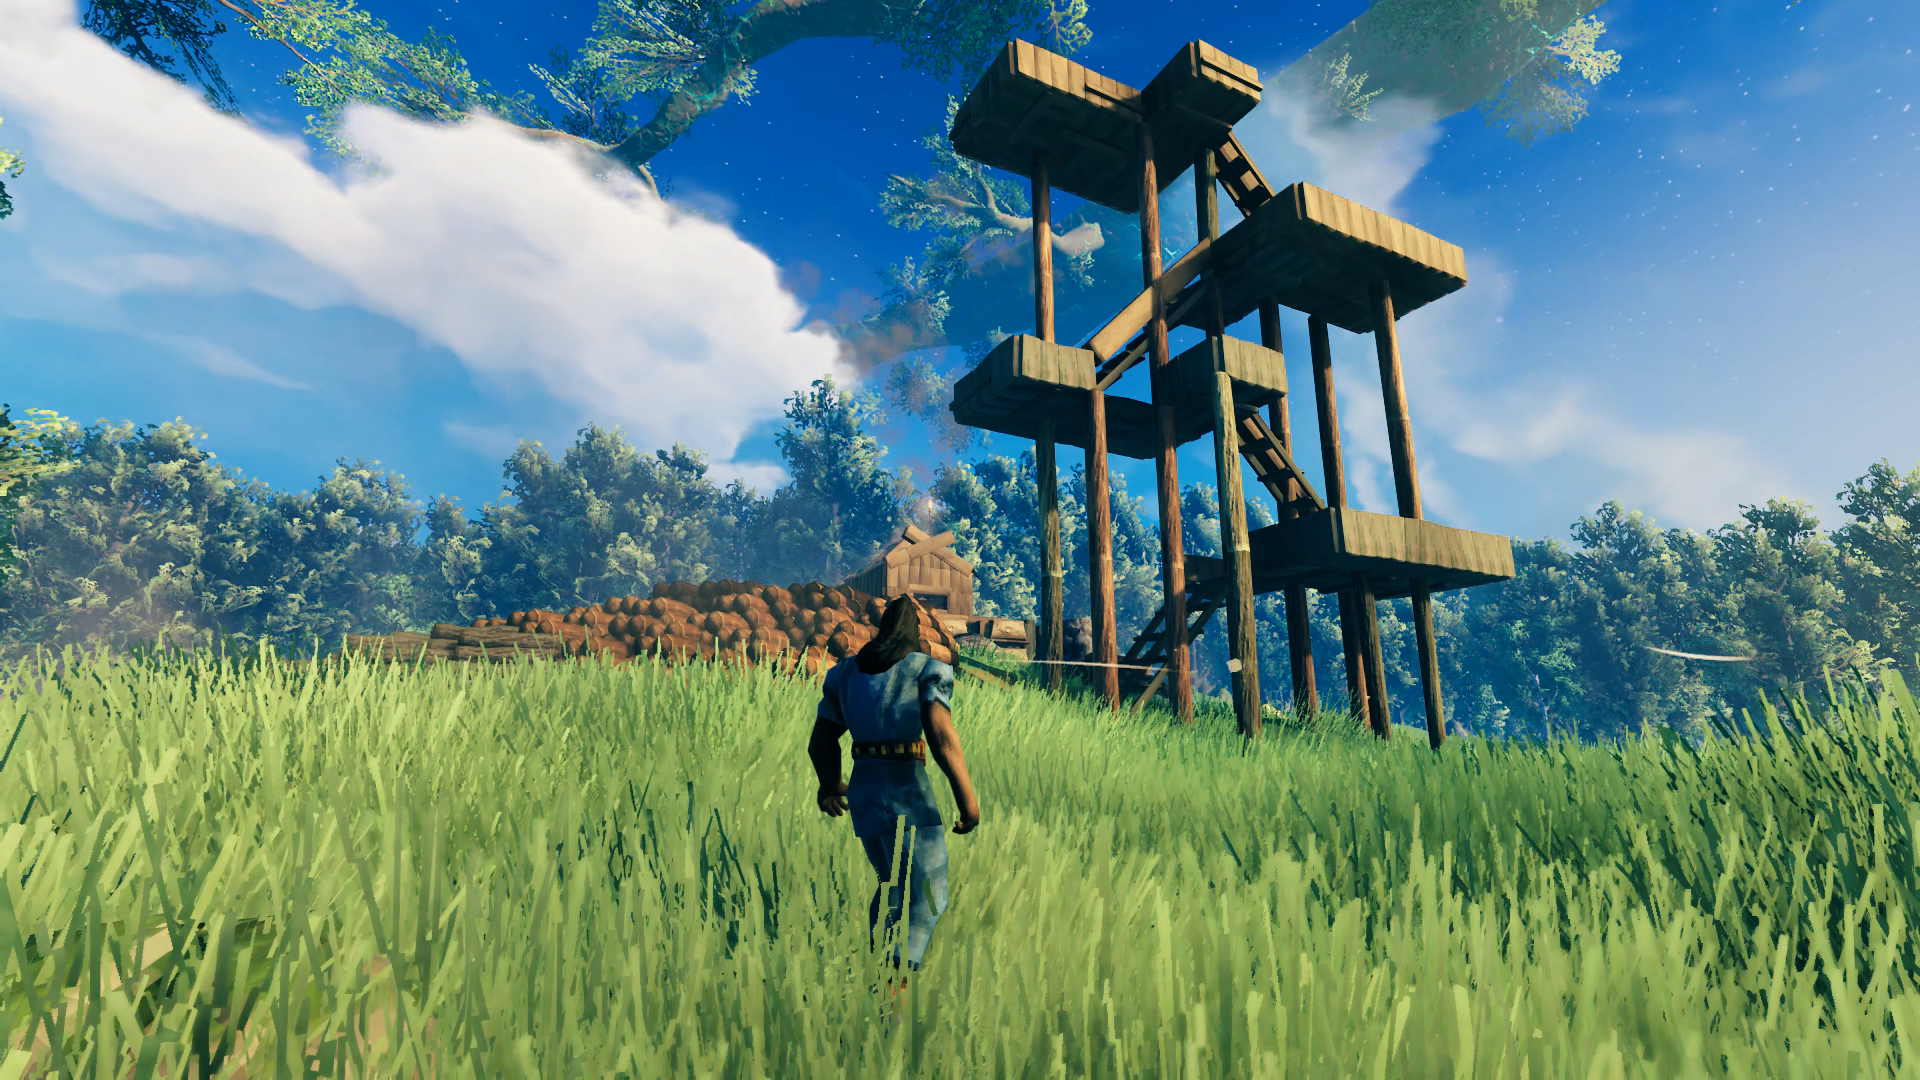
 Hard to see but at the end of the dock are ladders leading down into the water for an easy out if I fall in. The entire bottom of the canal and harbor is leveled with the hoe to be just deep enough to wade in, so the boats don’t bottom out but I also don’t have to swim around. Although the dock looks like it’s placed in the center, it’s actually just a bit offset as the empty slip is a little wider to hold the Longship eventually. Although the railing prevents a cart from being pulled up the stairs, the dock is short enough and the holds are at the front so that you can encumber yourself that distance easily to load a cart up on the promenade.
 Okay yea that was a lot of progress 😝and a bridge! With spiral stairs! But we’ll get to that. For the Smithy, the idea was to have it right next to the dock so I wouldn’t have to haul ore any further than necessary to get it processed. You can do a full Longship load in one trip – encumber on the dock from the boat to a cart on the promenade, wheel the cart to the Smithy door, and encumber inside to a chest (works the other way too). Minimal stamina required. I was quite pleased with being able to integrate both the Smelter and Kiln into the building, and although the chimney for the smelter was easy enough the rest of the roof went through two iterations before I found a design I was satisfied with.
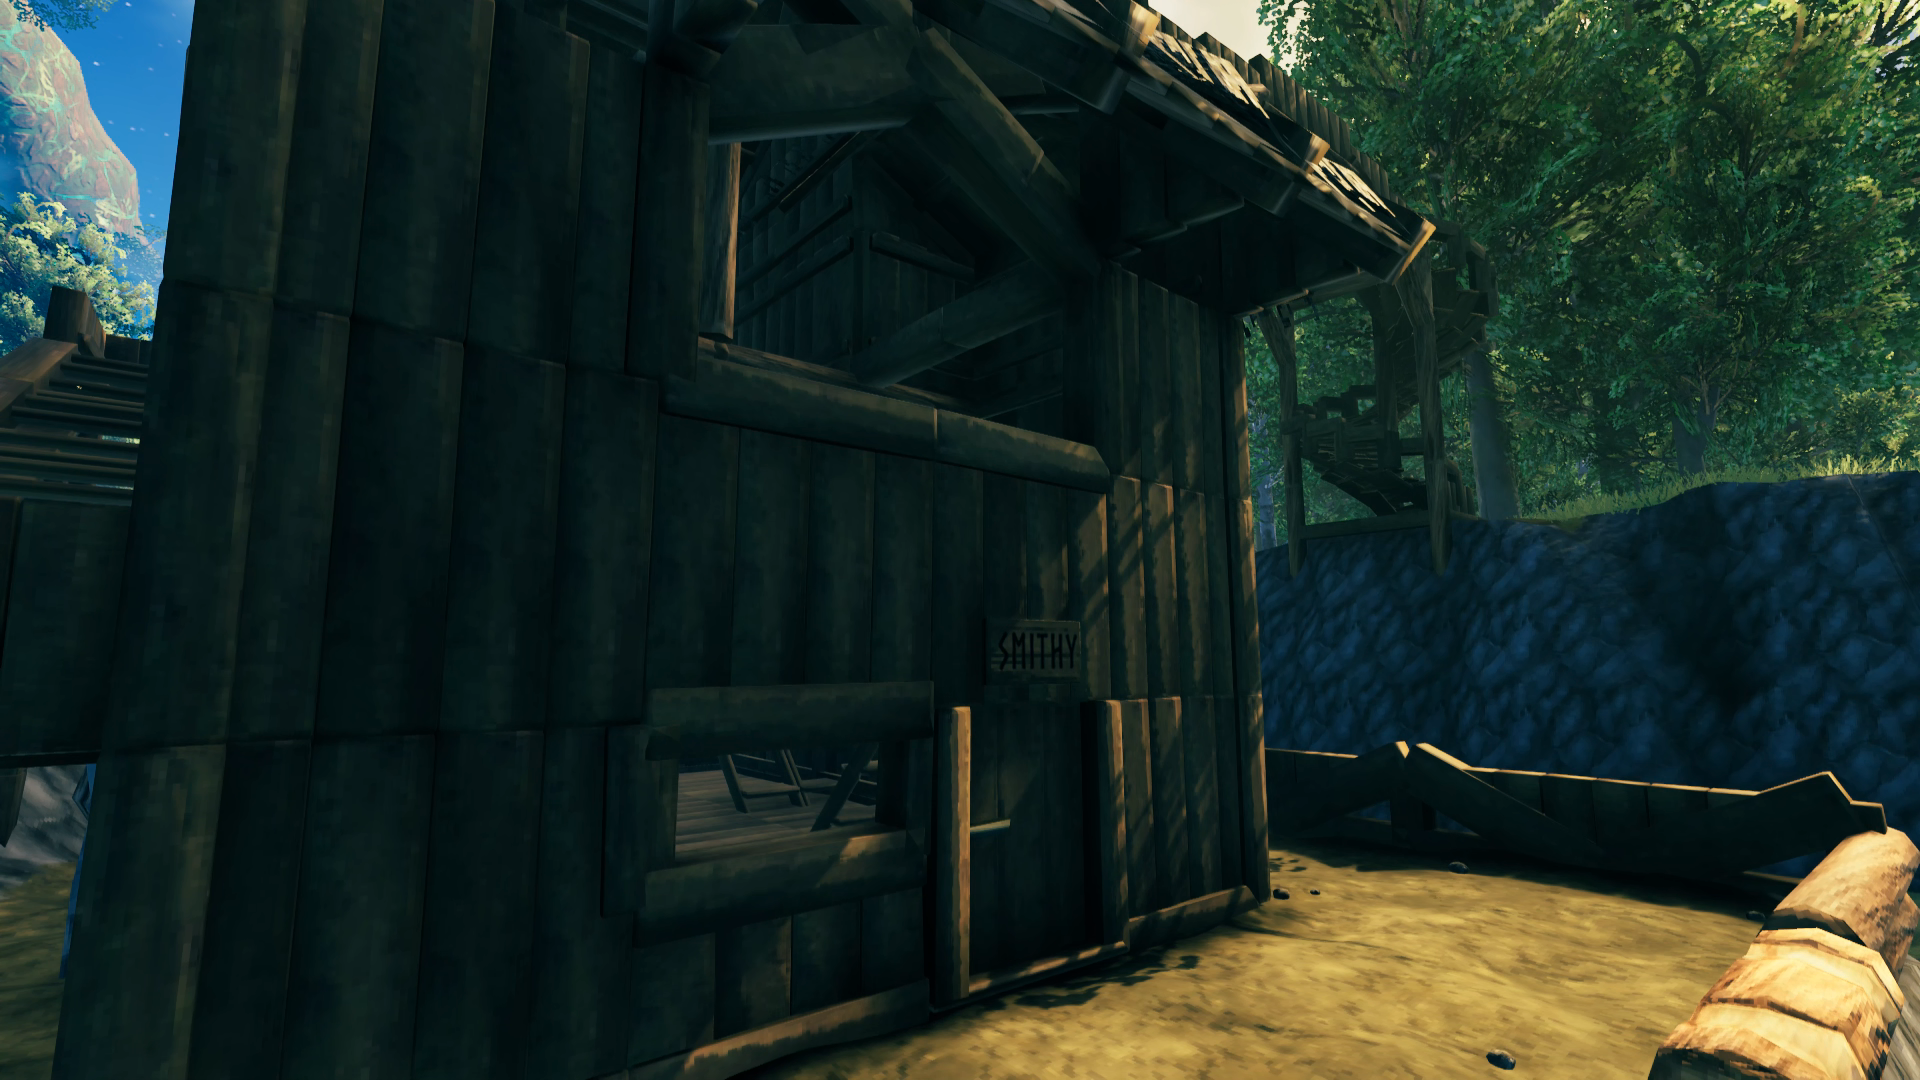


 Since this would be the rear entrance to the base, I just built a small gate house at the bottom of the stairs.
 The “bottom” of the base was now complete enough to begin building “up” from the lower-level to the mid-level, which would hold the portal hub. I started with the wooden staircase that would rise five levels, split around the middle to wrap around a future portal platform. To the sides you case see squared-off beams that would define the location of future birch trees. Once the wooden elements were in place I raised the ground up to match. I considered removing the wood floors for bare earth but decided to keep the flooring for better continuity from staircase to staircase.
 As I was building up the mid-level I planted an oak tree in the field down by the water, which you can see in the background. Not the tree, I already chopped it down, but the wooden beams used to measure how far the canopy extended. This let me place a center post marking the tree planting location in the mid-level and extend out radials in all directions (they are now shortened at the distance I plan to place the portals). The center post was aligned with the middle of the three-wide stairway using an X roof beam piece’s center snap point when placed across the middle stairway. Once I had the circumference of the portal hub established I was able to raise the ground up to match, this time removing the wooden flooring afterwards.
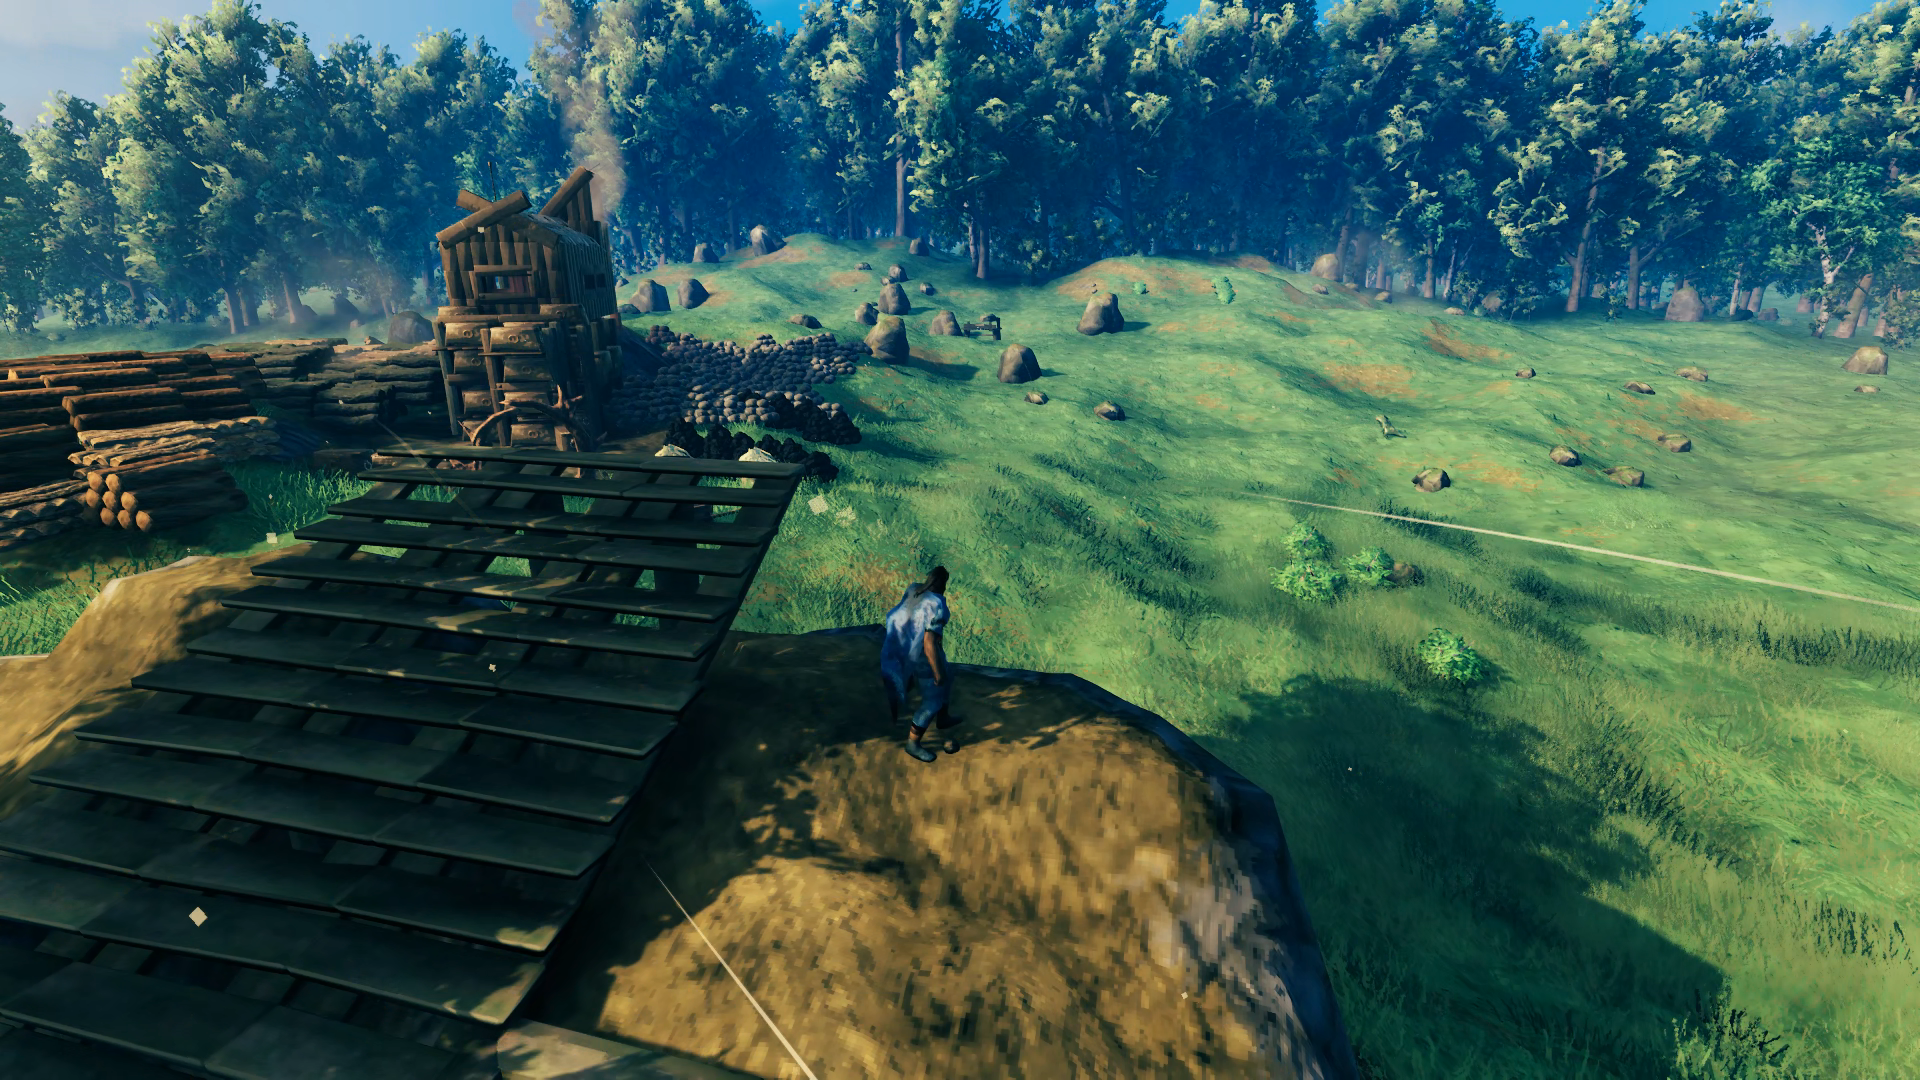 With the portal hub fully built up, I could start getting an idea of how high the upper-level that hosts the great hall would be, placing another five stairs this time with them all ascending straight up. Meanwhile I have my birch trees and oak tree planted and waiting for them to grow. Thankfully the game now allows you to rotate them, but from the sapling it’s not possible to tell how that will turn out since you can still end up with one of a few different types of birch tree and they can also be tall or short. So I had to chop down and replant them several times, I would say about 6-8 times all told before they all grew in the way I wanted, with similar heights and good orientation of the branches. The oak tree took three tries to get the rotation right so the drooping branches would fall over the pathways exiting the portal hub and not in front of any of the portals themselves.
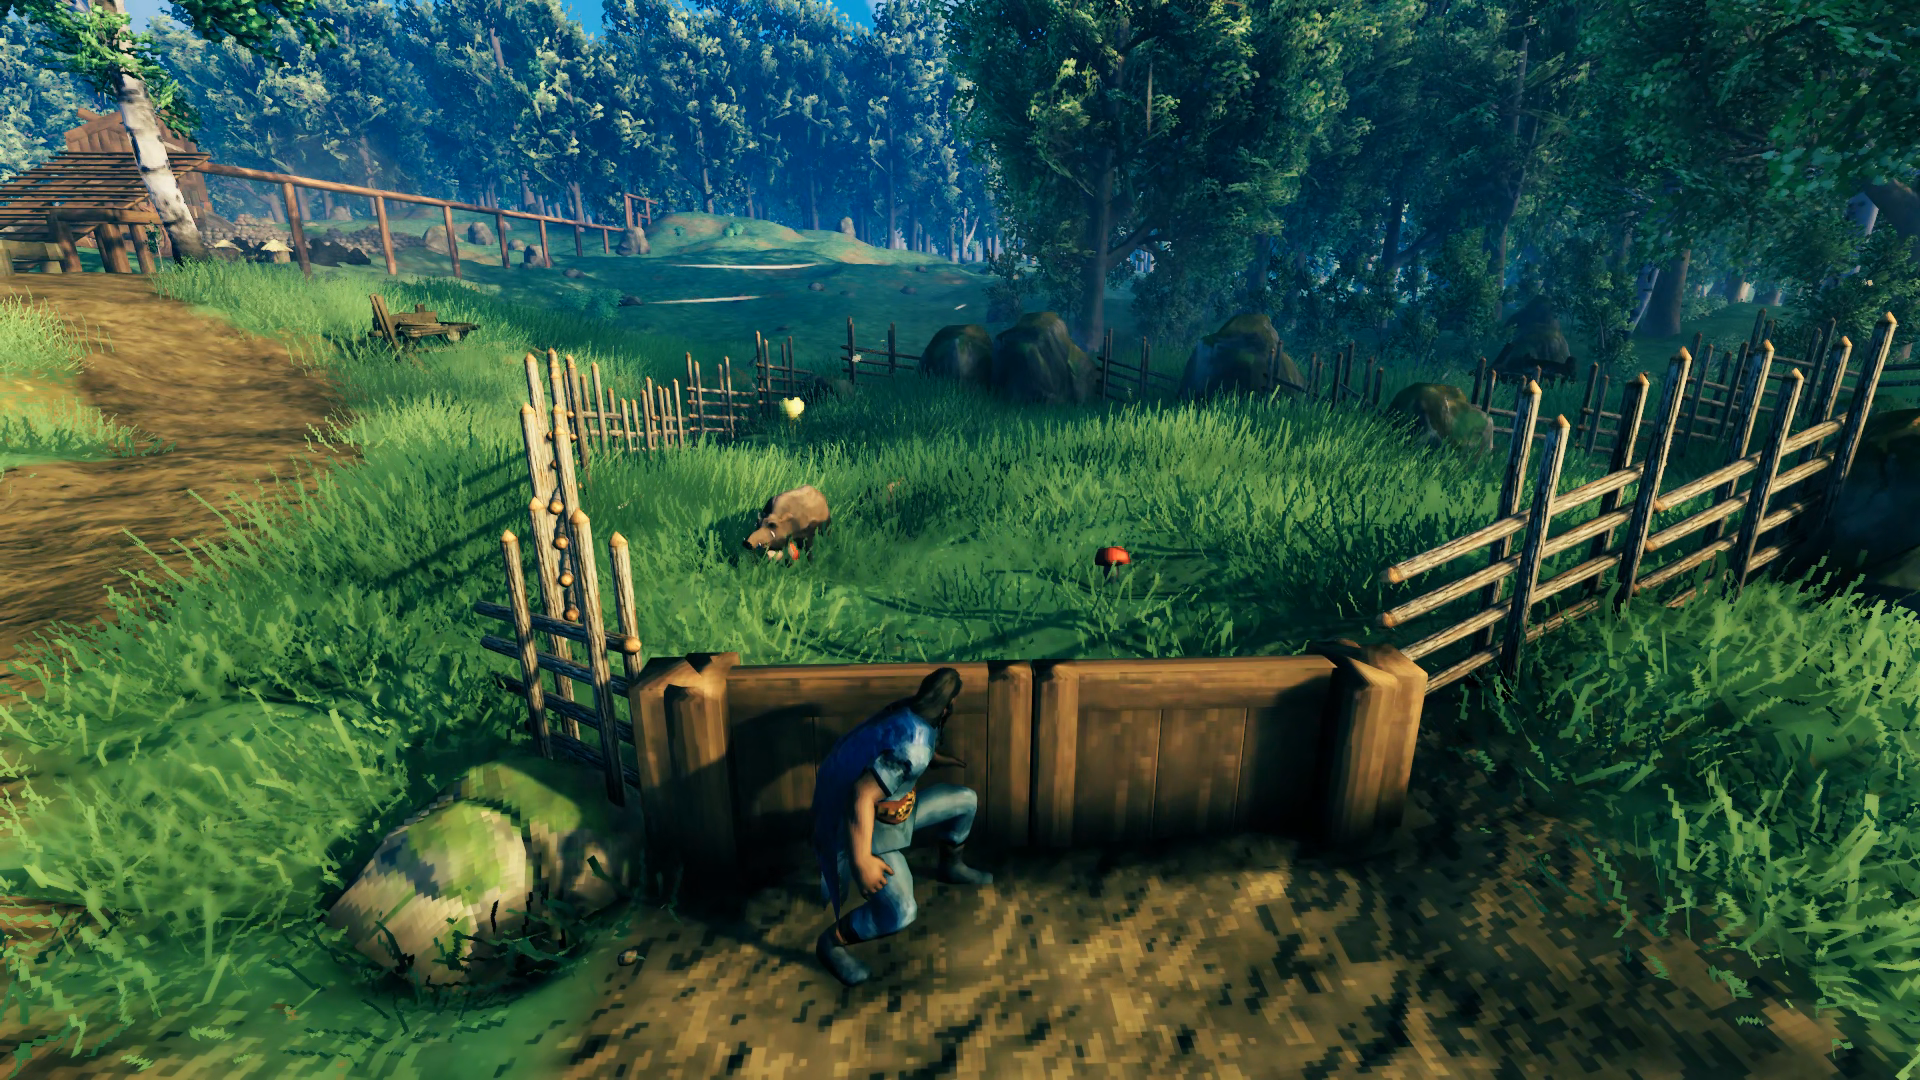

 Although I was mainly focused on the portal hub and grand hall at this point, I couldn’t help but return to the bridge to make the support structure look a bit more “busy”. It doesn’t do anything to improve the overall structural integrity but does look less plain. I stayed away from looking at other build projects as much as possible during construction of the base to keep myself from copying ideas too much, but I had checked out a couple of things and seen some way more impressive bridge undersides so felt compelled to make mine a bit better too.


 The wing design came together pretty much in one go, and I was able to come up with a nice-looking way of integrating it with the main hall. Since this would be the kitchen, it includes a chimney for the cooking fires. A second chimney is mirrored on the other side with space below for an eventual Stone Oven to be built. The whole wing minus the chimneys would be mirrored on the opposite side of the hall.
 That final roof X beam way up there is as dark as red as can be when you look at it with the hammer selected! I was able to peak the roof right at the limit of wooden structure height, and was very happy I didn’t have to sacrifice my inset central dining floor, or use more stone to raise the foundation to keep it. I also just prior to this point realized I didn’t have any idea what I was going to do for a bedroom. I realized I had space over the entryway and courtyard so I was able to fit in stairs to an upper floor. Originally I was going to have it opened out to the inner hall but realized that wasn’t very private and instead opened it out to the courtyard with a balcony as well.
 After completing a full half of the Grand Hall, before I could start building down to complete the other half I had to finally tear down my original house, which was in the way. I built a small temp cottage down by the shore where I wasn’t going to be doing any further terraforming. I also had to move all the chests of stuff I had collected as well as reposition all the wood and stone I had built around it. That was a lot of stuff!!

 With a crypt also near the border of the Meadows I was able to carry out more than enough iron on the Karve to make the nails necessary to construct a Longship with the ancient bark I had also acquired. It fit perfectly in its berth and I had also by this time added some additional details to the dock for the purposes of night lighting. The wards especially make for nice night lights where I didn’t feel it looked right to place more sconces. They are also a functional aspect of the base’s defenses in stopping raids from spawning inside the walls. Another slight modification shown here is an extension to the lower level of the staircase to allow me to park a cart under there when it’s not being used to carry ore to/from the ships.
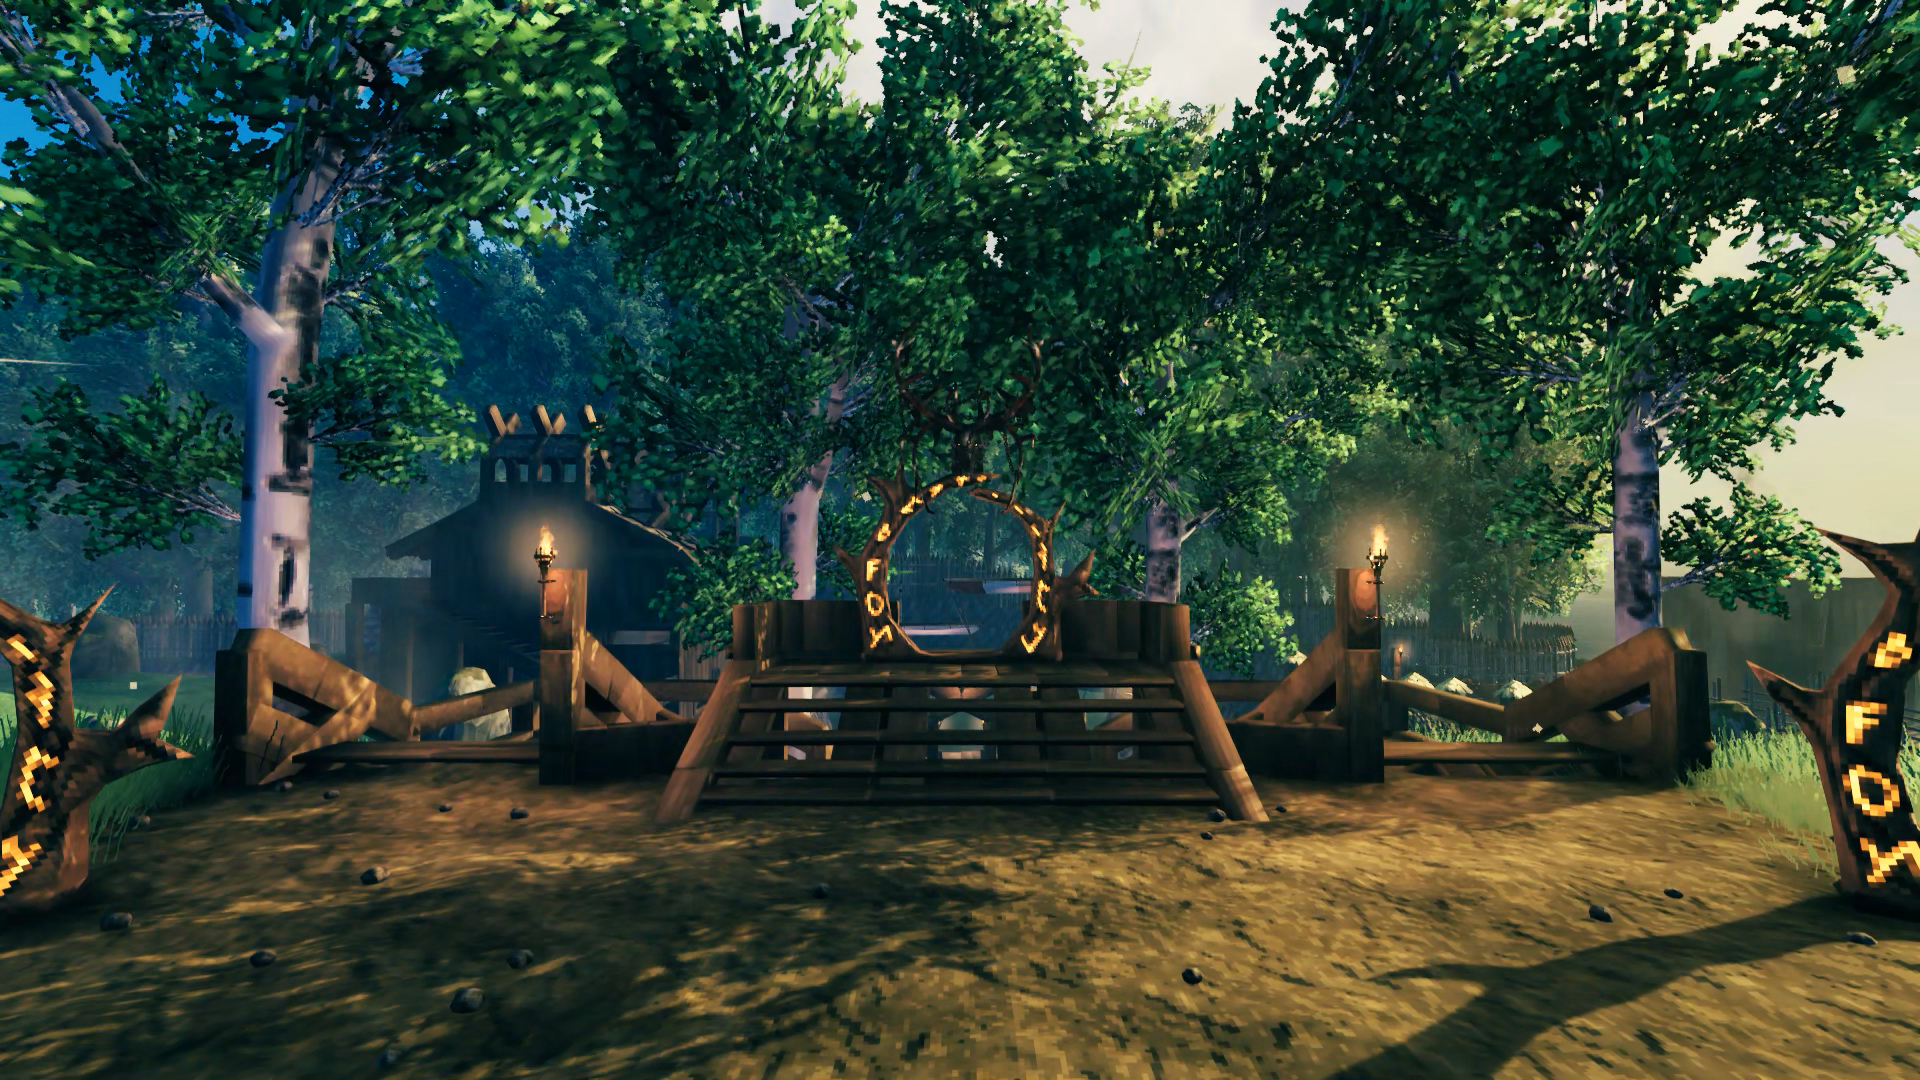


 Above the entryway is my bedroom. The hanging brazier provides the warmth needed to sleep as I’m just a bit too far from the cooking fires for that effect. I only recently added the keys to the wall and found that they glow, so I will probably remove the wall sconces to make that more prominent. The trophy above the bed is the most recently defeated Ancient One. It hangs there until it is replaced by a new one and is then moved down to the portal for its biome.
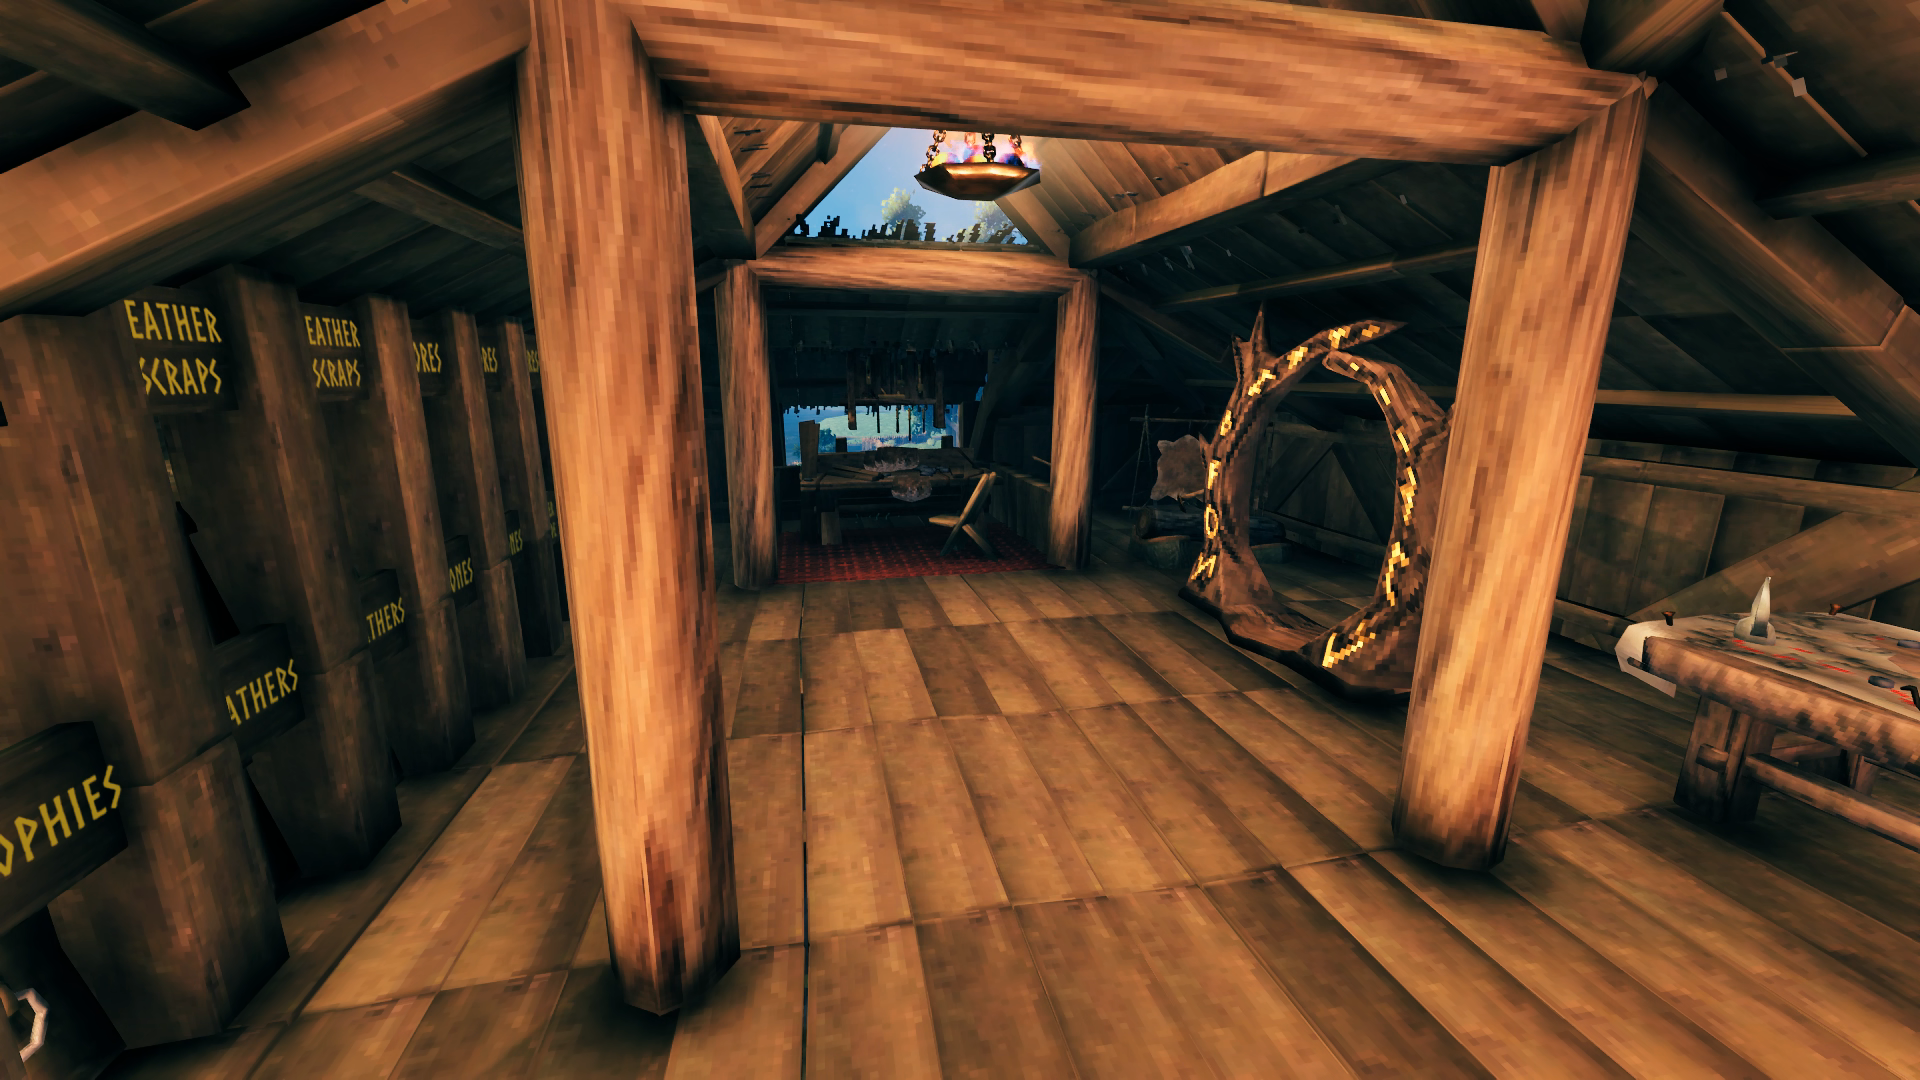 The workshop wing holds my Workbench and all its upgrades. I have room just outside for them as well if it is needed but they all fit in the corner there for now. The portal leads down to the Smithy for easy transportation of most crafting materials to the Forge and vice-versa. A full wall of chests contains all the various crafting materials I have collected, most in two or three chests. I plan to build a storage tower outpost in the Black Forest for the excess so I can reduce this down to one chest per item since I’m already running out of space working through the Mountains biome. A mapping table rounds out the room’s accessories. Since there’s no snap for the signs, centering them perfectly above the chests was not possible so they usually are written like ” trophies ” with spaces in the name to move the words into the center between the posts. The extra spaces also is an easy way to make the letters smaller to fit the words inside the posts as well since the signs are too big not to clip into them a bit.
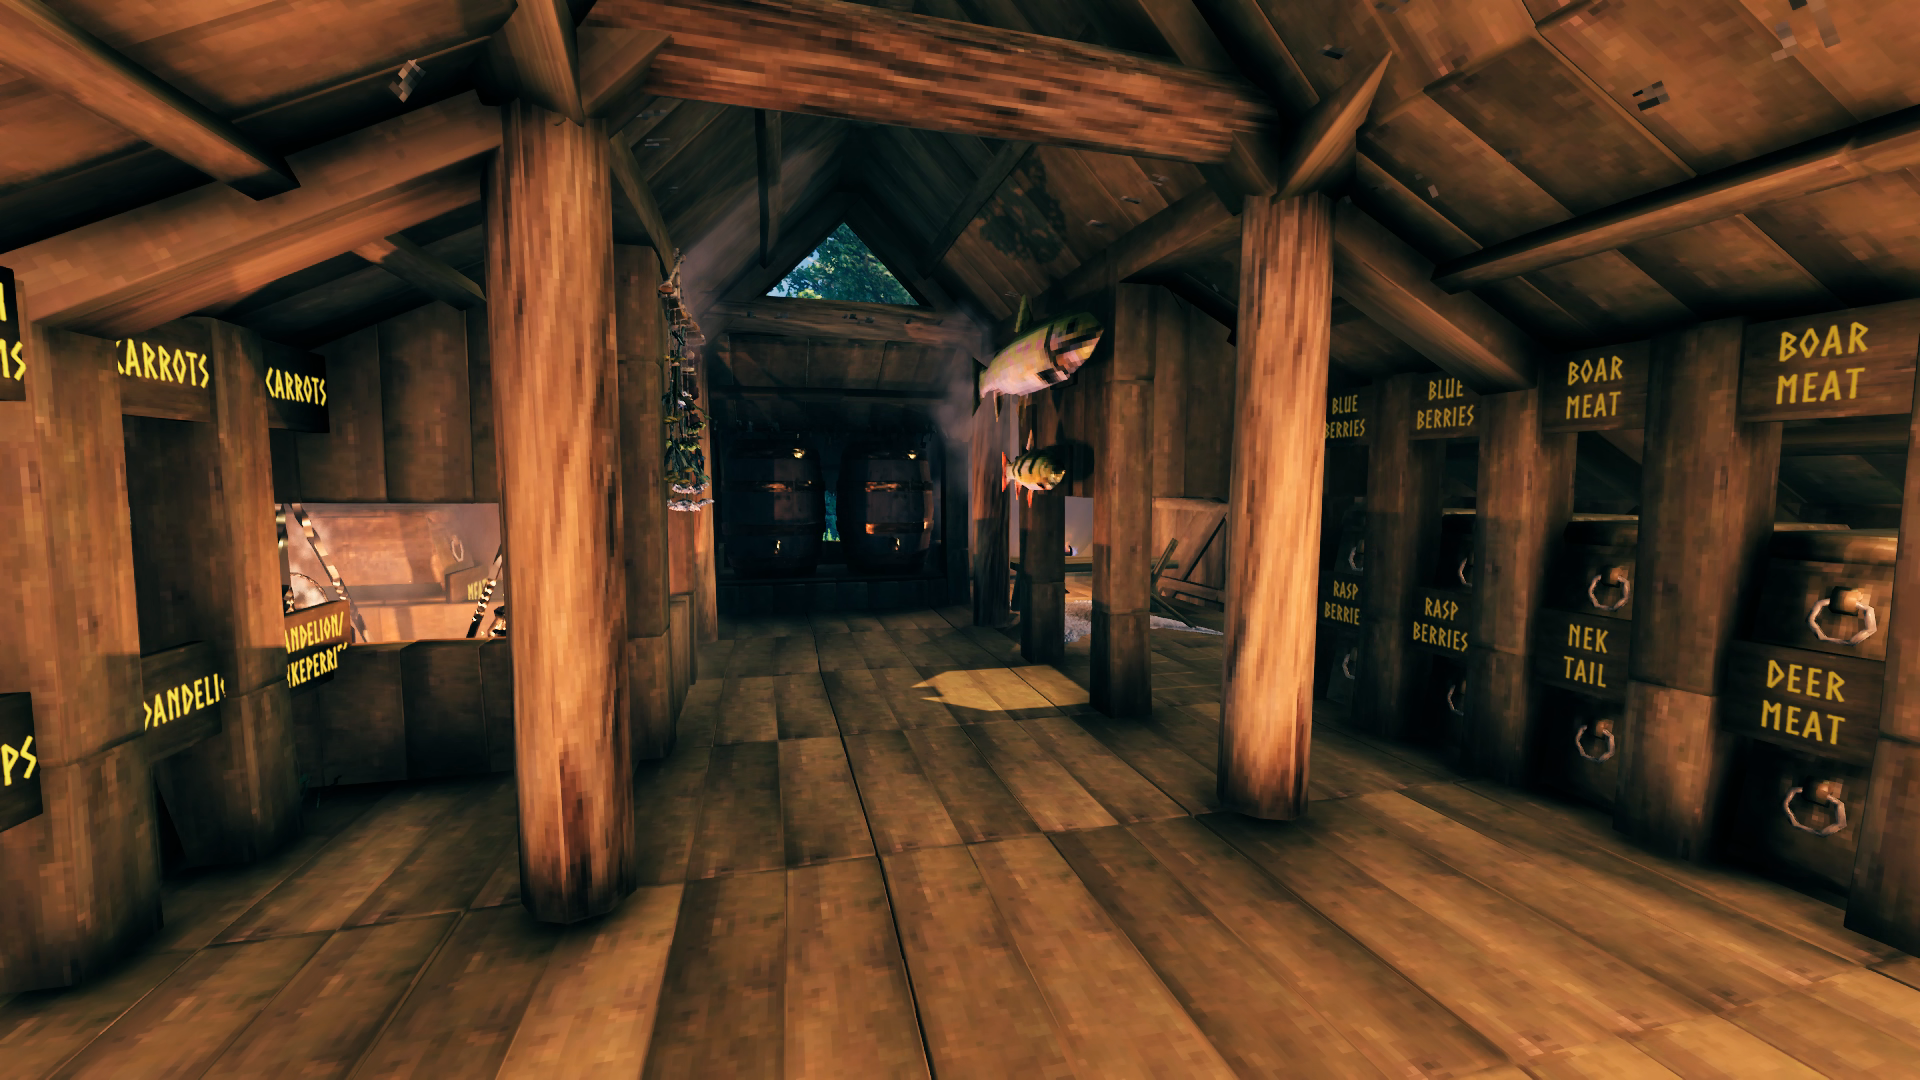 The kitchen wing is also full-up on storage space with chests on both walls although part of that is spared for a little eating nook I just liked to have included even though it’s not really functional. You also can’t actually reach that second Cauldron back with the chests to use it but it looks more symmetrical with two filling that space. The fish trophies are hung here since they are both caught in the Meadows biome. They of course represent the largest of that fish I’ve caught so far.
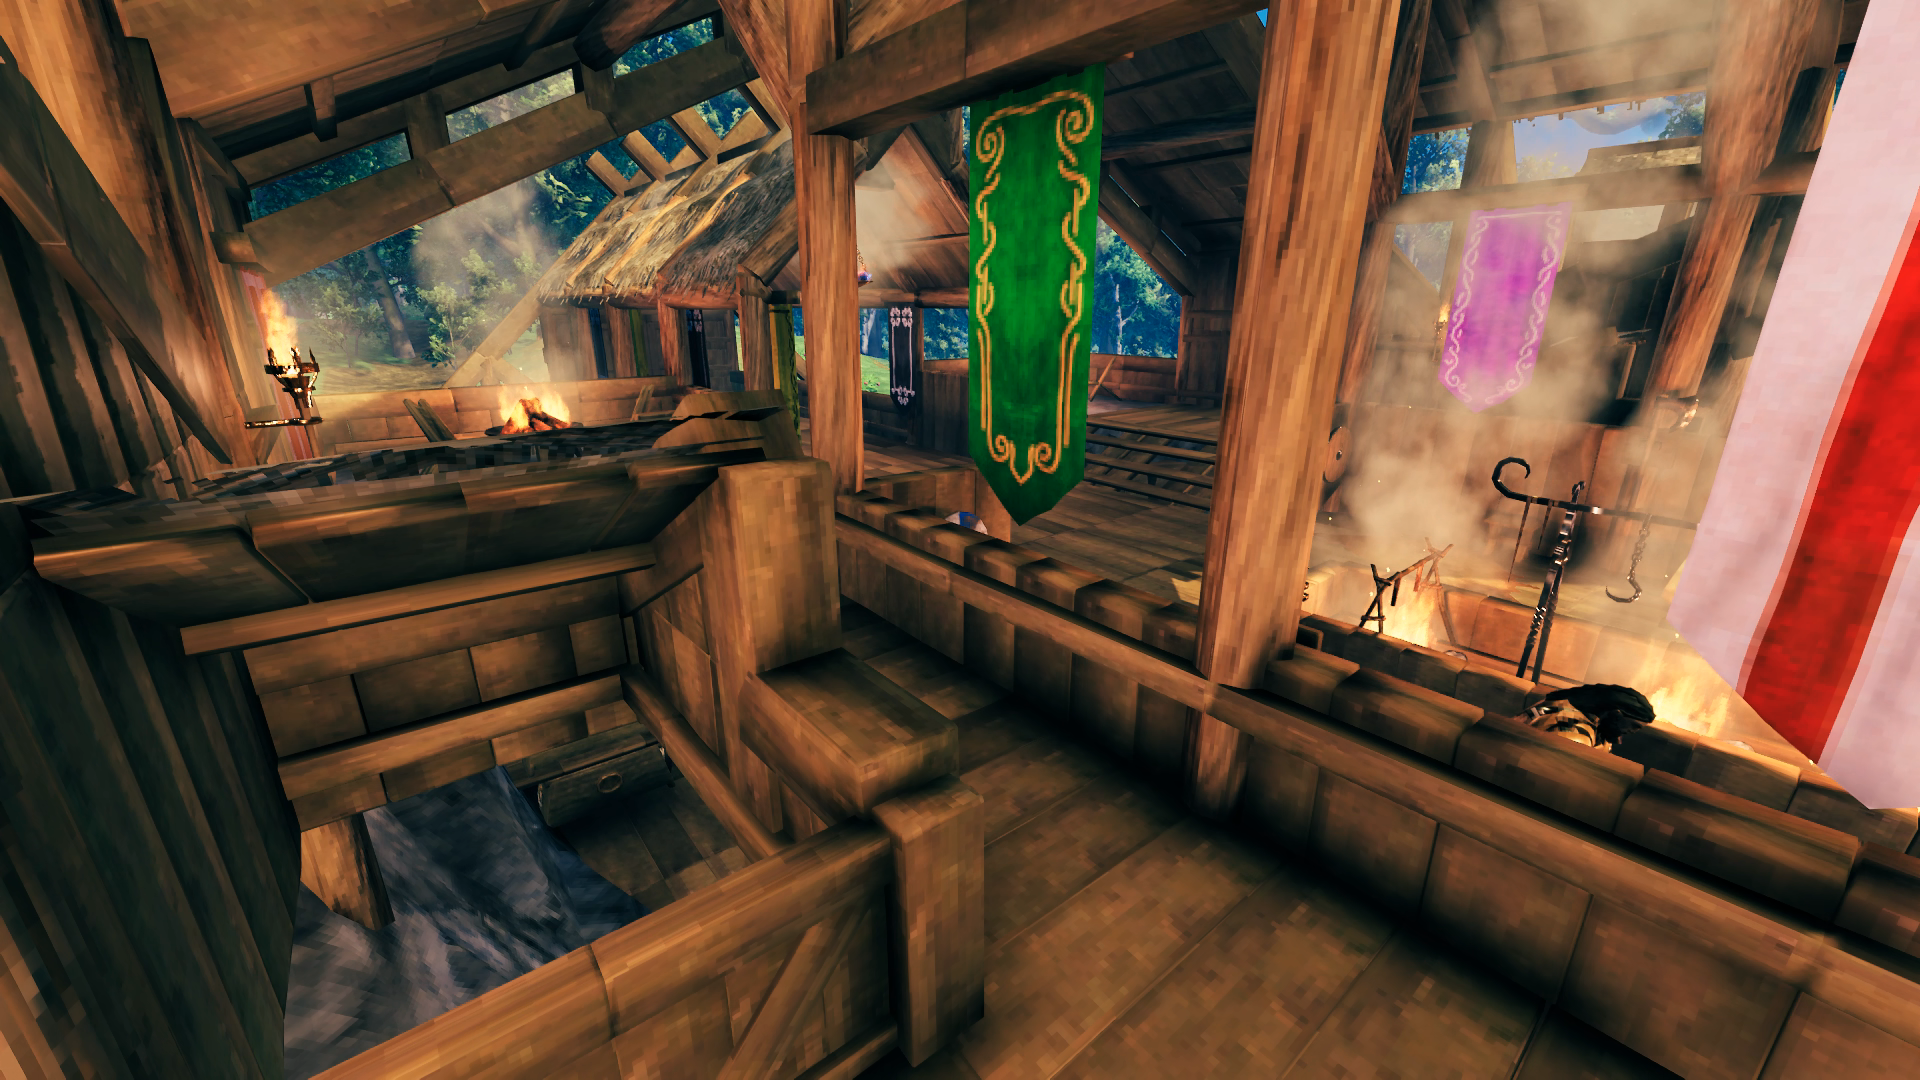

 The main entryway to Hellholm is decorated to be visible at night thanks to a Dverger Circlet mounted on an item stand that illuminates the stairs and two sirtling trophies to frame the entryway (was not going to bother bringing home a second Brenna trophy). I actually managed to collect the two sirtling trophies in relatively quick succession after pretty much completing the Swamps biome and wondering if they even dropped there or not. The beady glowing eyes of some additional trophies also provide some night time reference. Since enemies are attracted to torches, this keeps the night time bands of greydwarves and skellies from coming a knocking.
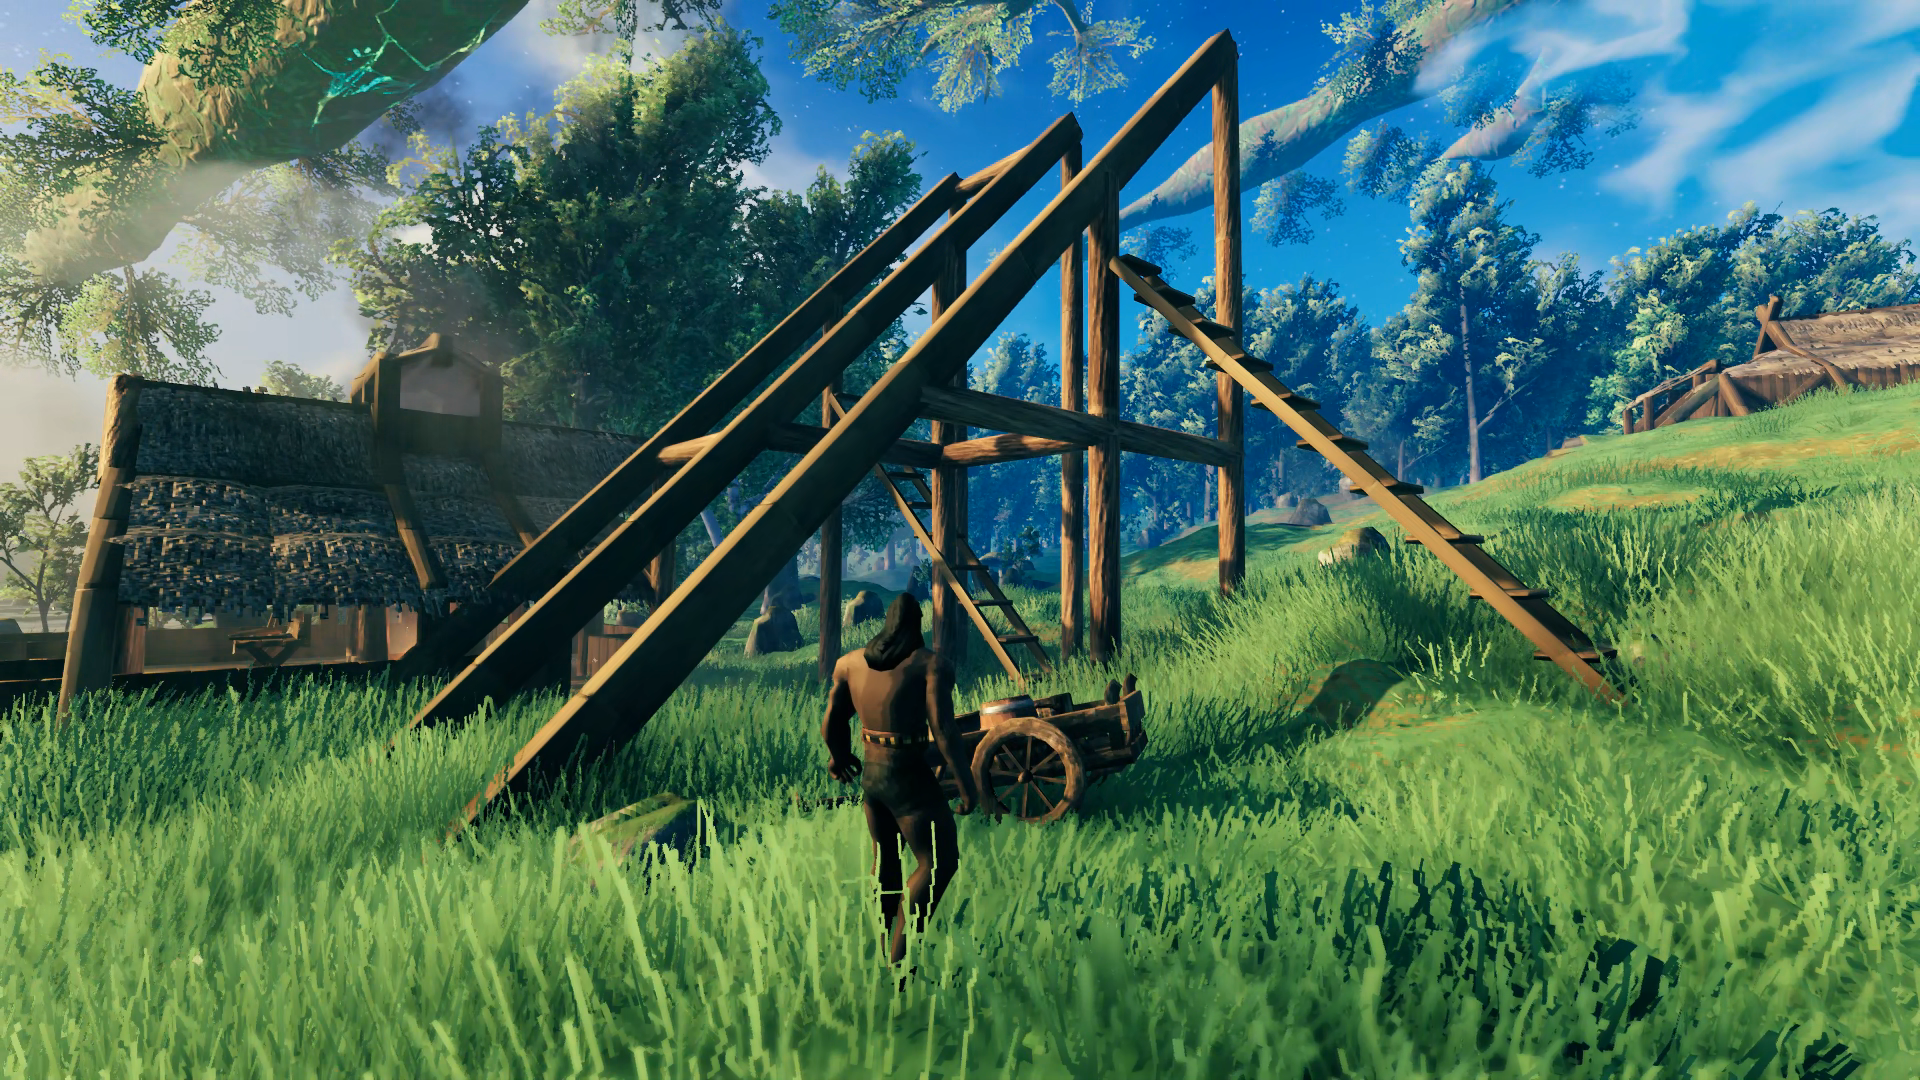


 Took me a while but was finally able to decorate the space around the oak tree like I wanted after I had a good variety of flowering veggies to plant. The only trouble I had to deal with were the huge drooping branches blocking the sky in some areas so had to experiment a bit on where I could plant things to come up with a uniform look around the tree. The ward stones and yellow mushrooms again provide great nighttime illumination to save me resources.
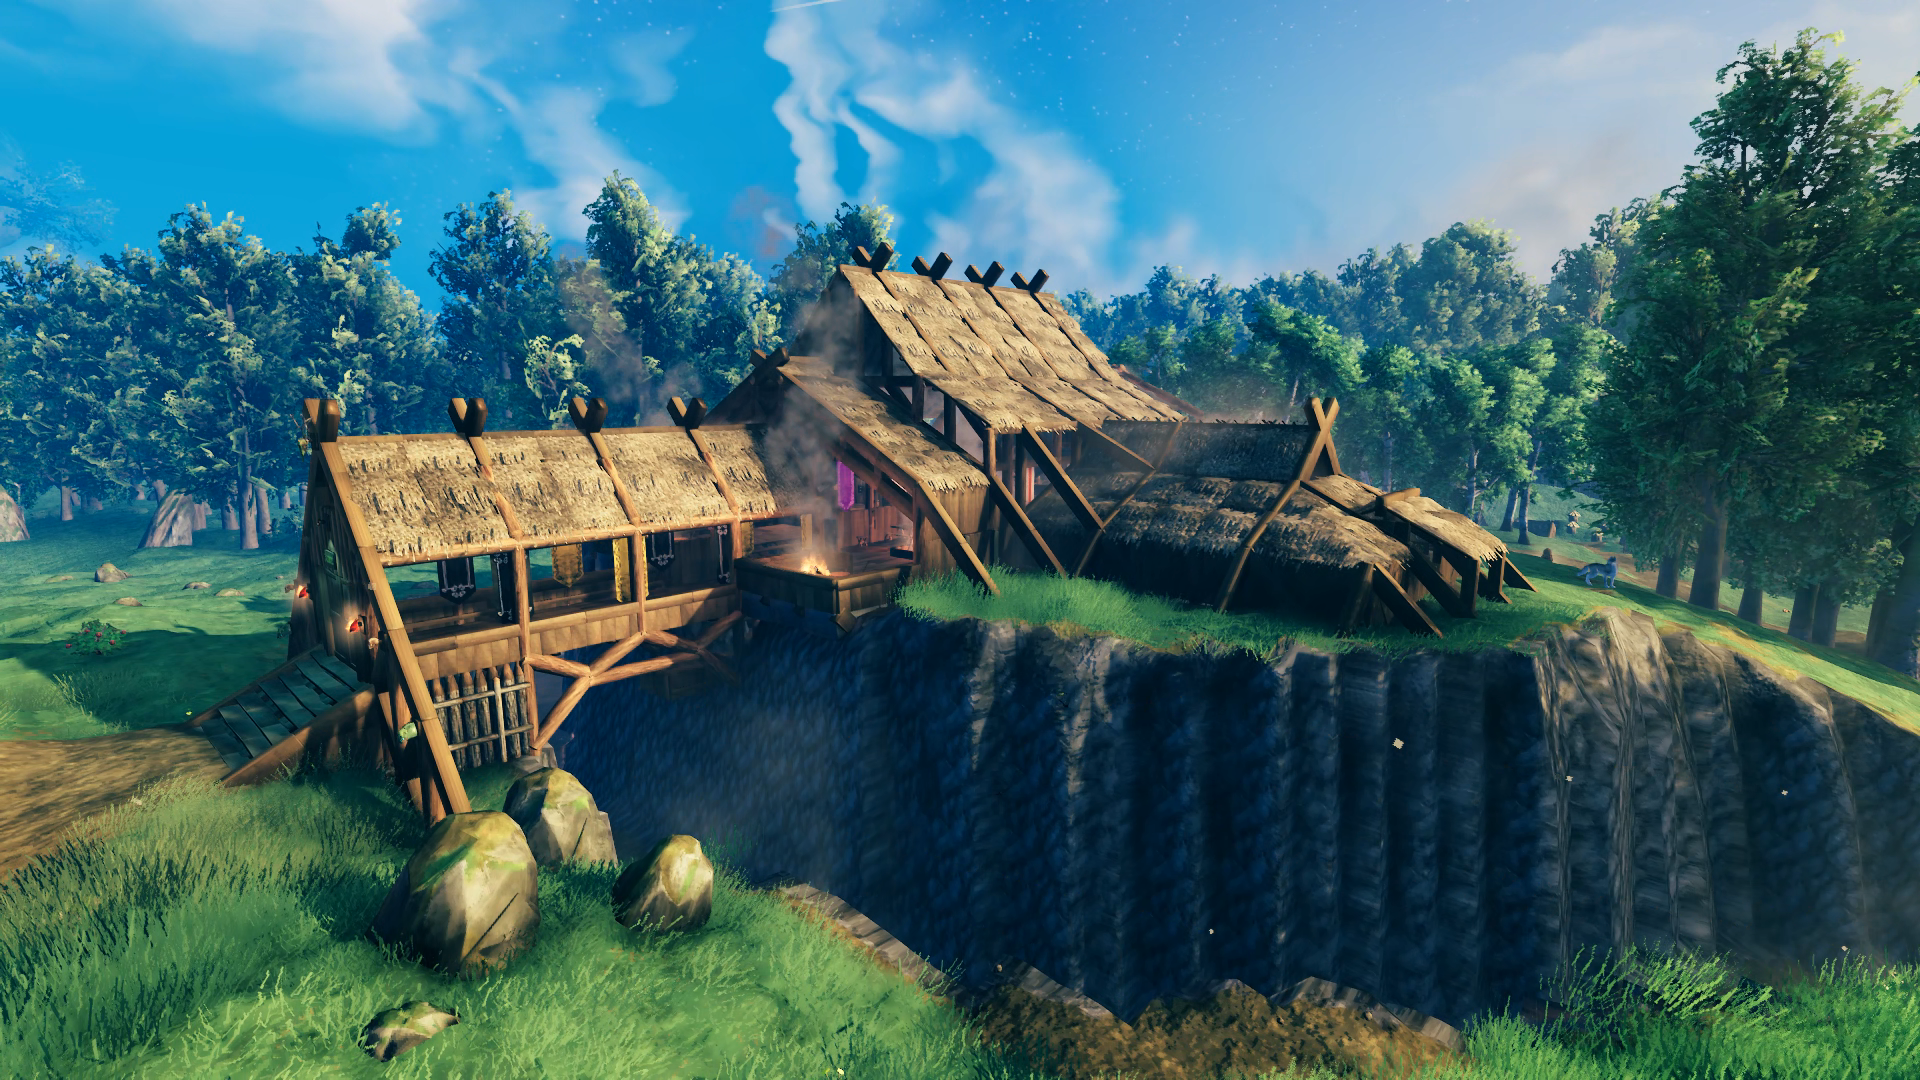

 If you’ve made it this far then I raise my tankard to you – Skal!! Thanks for taking the time to learn more about Hellholm. My next big base will be in the Plains to support me in my exploration of the Mistlands (crops to grow, ore to smelt and Lox to ride over the border), which is the only biome I’ve never experienced since playing back in 2021. I have plans for small outposts in the Black Forest, Swamp and Mountains. Once I’ve built all my bases and outposts I want to make a road that connects them all (road will lead to docks if sea traversal required and the water span is too long for a bridge).