
Transposed from Gaiiden’s Scroll
So I ended up ordering my new drive before going to bed that fateful night. NewEgg has a warehouse in Jersey, so despite the fact that I have to pay sales tax (bah) that means 1 day ground shipping, so I tacked on an extra $3 for rush processing to make doubly sure the drive was sent out Monday. It was and arrived yesterday, although in a manner that makes me want to shoot the next UPS delivery person I see. I woke up early to catch the delivery and heard the truck driving down the street and ran to my window only to see it seemingly pass my house and continue on. What I didn’t realize is that it wasn’t driving by my house, it had just pulled away from my house. Regardless I went down to the front door and looked out on the porch – no package. I even went down to the mailbox. No package. Double checked the door for a notice that they had attempted delivery. None. Looked out back – my last delivery had been left out back when no one answered the door. Nope. So I waited. And waited. Finally nearly two hours later my mom comes home and brings a package inside. It had been placed by the garage door. AUURRRGGHHH!!!! They didn’t even ring the freaking doorbell?!? I was awake!!
So yea that sucked. Anyways I swapped that sucker in pronto. Here’s the full story.
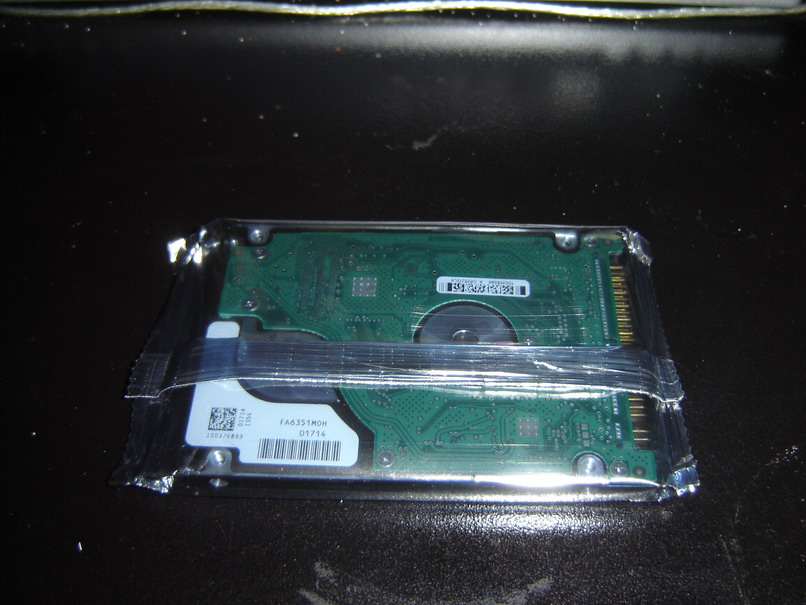
The new drive, still in its anti-static wrap. It was an OEM drive, so this is how it arrived, bubble-wrapped in a box :p
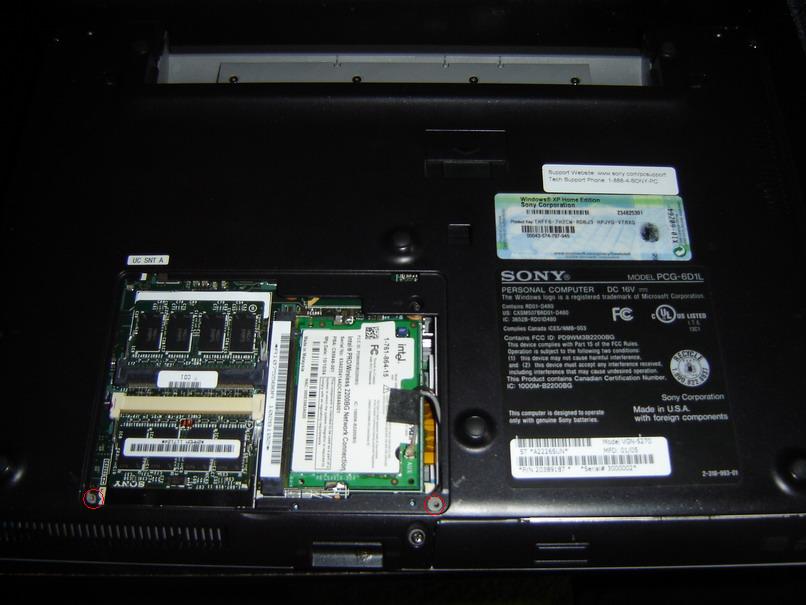
Step 1: Flip the lappie over and remove two screws holding down the cover for the RAM and wireless adapter
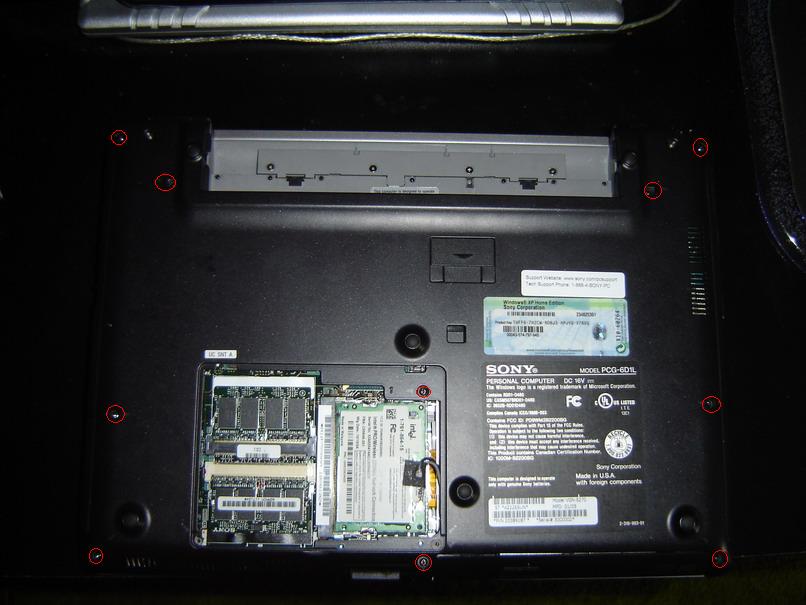
Step 2: Remove the ten screws on the bottom of the case
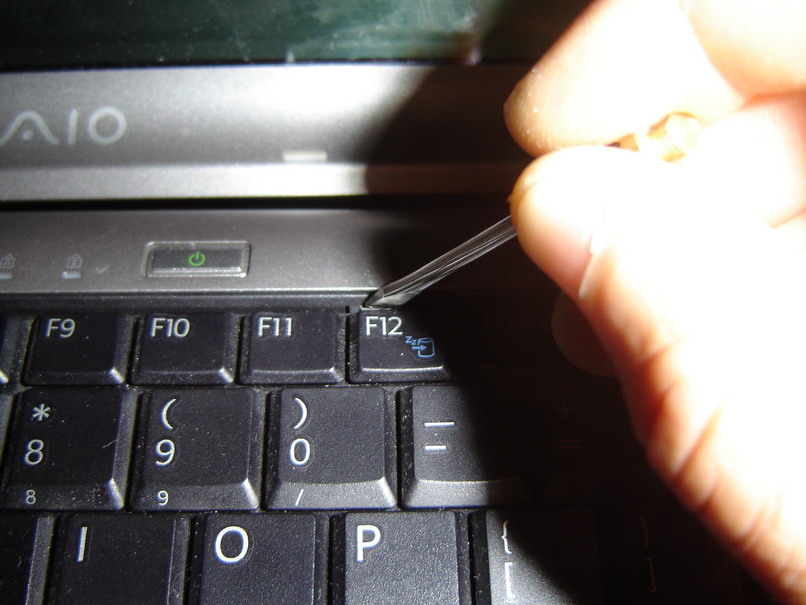
Step 3: Use a screwdriver to push down on these tabs, one over the F12 key and another over the F4 key to pop up the keyboard
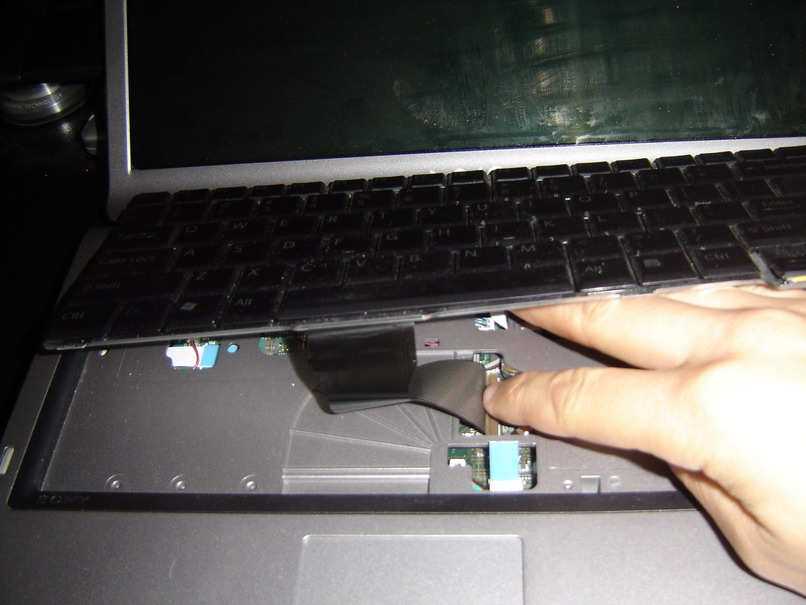
Step 4: Remove the keyboard ribbon by flicking down its mount
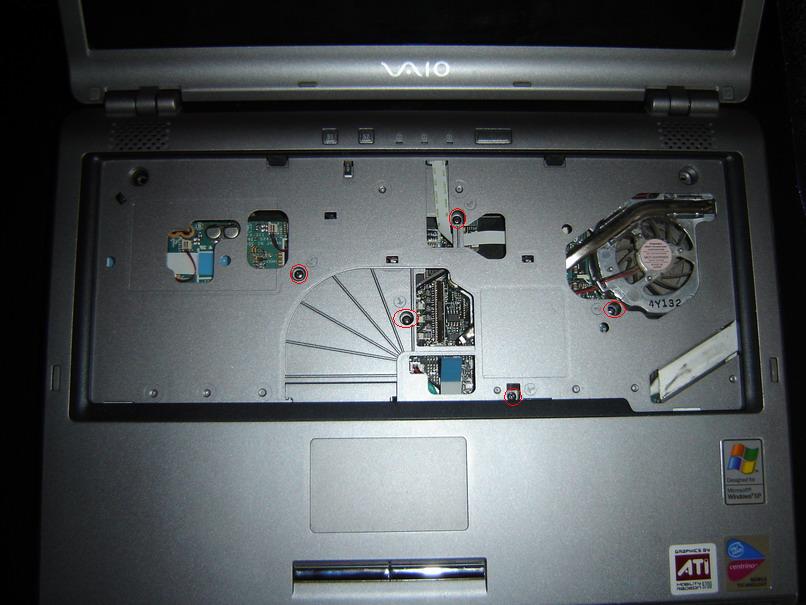
Step 5: Unscrew five more screws – it took me like 15 minutes to figure out why I couldn’t get the damn cover off after taking out the bottom screws when I first took it apart to remove the busted drive. Tricksy Sony
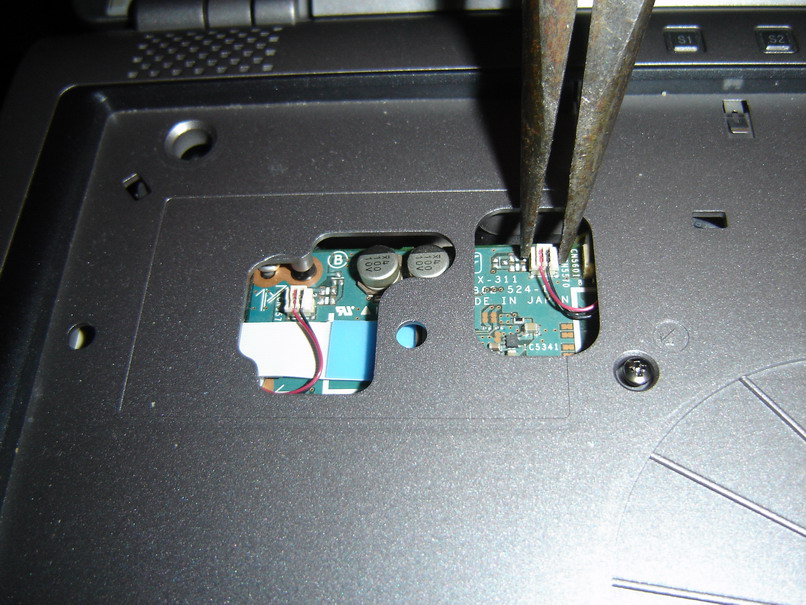
Step 6: Caaarreeefully detach the audio cables. Very delicate – I almost broke off the one on the left during my first servicing, eep!
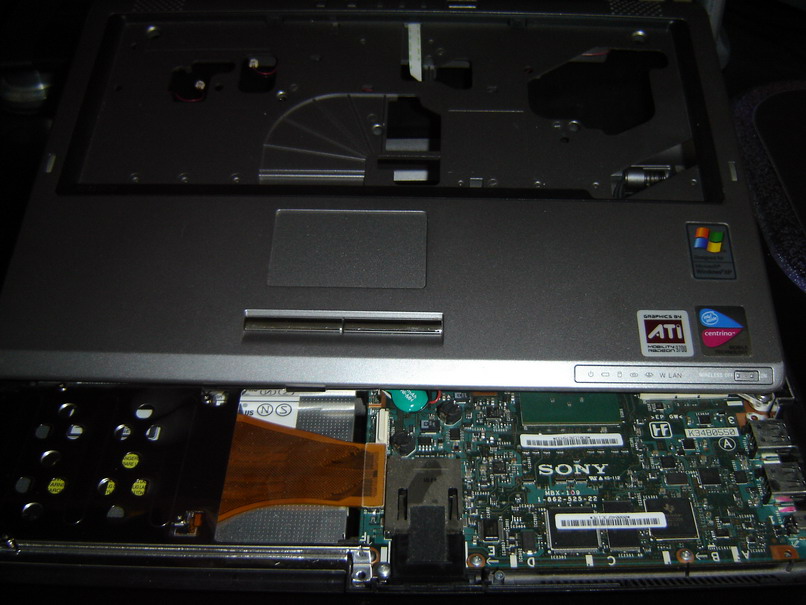
Step 7: There’s still a ribbon attached that I was hesitant to try and disconnect so I let it be – I was able to get the cover plate up high enough to expose the HDD bay (lower right) anyways
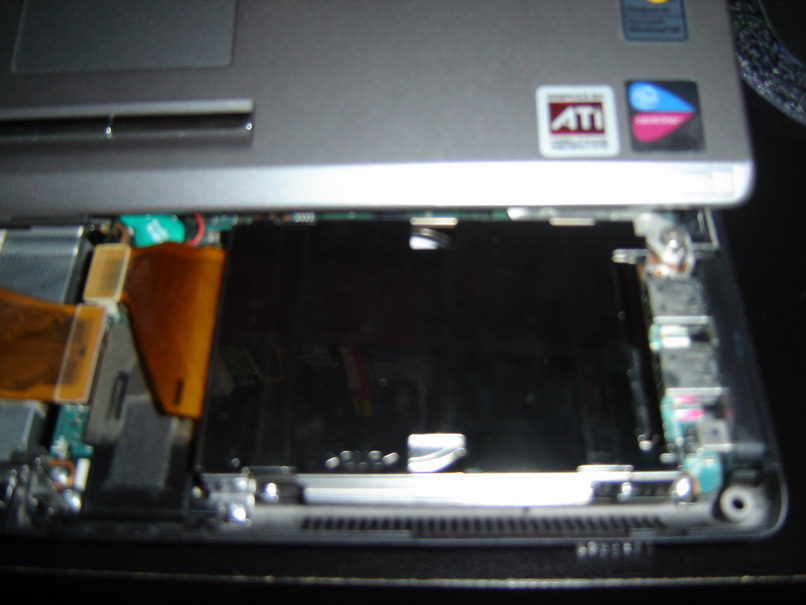
Blech didn’t realize this photo was so fuzzy when I took it. Anyways this is the new HDD caged and installed. Boo yah
Peice it all back together… and we have lift off!!
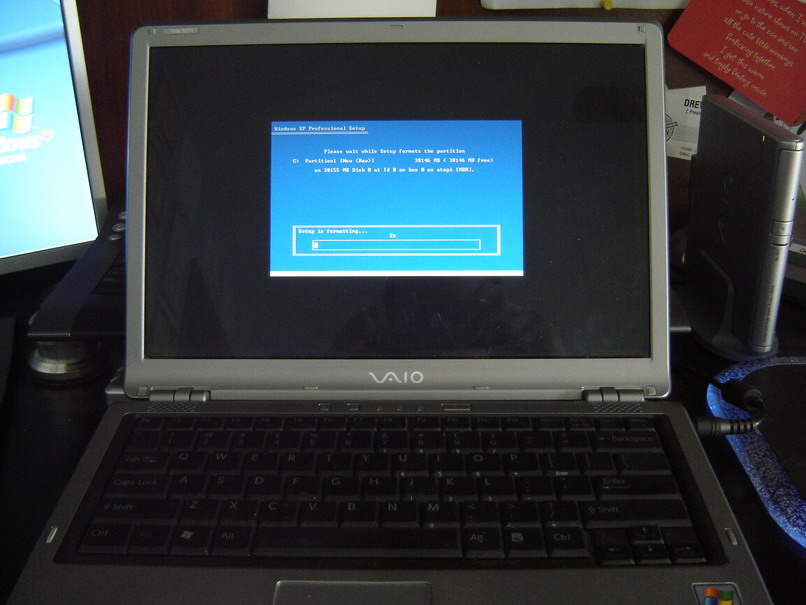
So I formatted and reinstalled windows yesterday and I’ve spent all day today doing nothing but installing applications and tweaking windows. Everything’s now back up and running and streamlined – my services are tweaked, my startup items are tweaked, hard drive is defragged, boot process streamlined (oh wait I still have to run bootvis – drat!). Yea, a drive image would definetly be easier than installing everything all over again, but I like it because it’s a chance for me to refine things – maybe use a different app for this task, or setup this app a little different, try a new app, stuff like that. I guess this would be like… Clean Install v15. Gee that’s kinda sad 
Ahhhhh… but, always nice to have a “clean” computer you know? Yes indeed. Okay well, it seems to be getting light outside – blasted thing about this time of year is that it’s so damn difficult getting to bed before the sun rises. What a nuisance 😛
Video forthcoming – busted out a new trick at the gym on trampoline. Yup got to name another one  But that’s for another entry…
Ihr könnt so gemeinsam neue Spielstufen freispielen, Events für das Team sichern oder vollkommen neue
Games freischalten. Es gibt keinerlei Zweifel daran, dass
du im Huuuge Casino seriös spielen kannst. Möchtest du mit einem Endgerät von Android spielen, kannst du die mobile
Version im Google Playstore laden.
Die Huuuge Casino Billionaire Liga ist ein virtueller Wettbewerb im
Casino, in dem sich die Spieler in verschiedenen Clubs miteinander
messen. Die Free Coins werden zum einen direkt nach der Kontoeröffnung gutgeschrieben. Für
den Willkommensbonus ist lediglich die kostenlose Registrierung
im Social Casino erforderlich. Zusätzlich kannst du in einzelnen Spielen von Münz-Boostern profitieren oder dir kostenlose Chips als Bonus bei einem Chip-Kauf schnappen. Gemeinsam mit anderen Spielern schnappt ihr
euch dann erstklassige Bonus-Promotionen. Zusätzlich dazu bietet das Casino verschiedene Aufgaben und
Herausforderungen.
References:
https://online-spielhallen.de/ggbet-casino-login-ihr-zugang-zum-spielvergnugen/
Just open the site on your phone or tablet, log in, and start playing
instantly. Zoome Casino is fully optimised for mobile browsers on both Android and iOS.
Yes, Zoome Casino is fully licensed under the Curacao eGaming Authority, which means it operates under strict international
gaming laws. While winning is always exciting, losing is part of
the game. What I like about Zoome is how easy
it is to jump in and start playing — even on my phone, everything runs great.
Most of their titles are playable via mobile with full bonus compatibility.
Minimum deposits for most table games are as low as $1.
These can include leaderboard races, surprise reload bonuses, and
weekend-only spins.
Let’s be honest — online casinos are everywhere these days.
We operate under a Curacao eGaming license (8048/JAZ), which means regular audits, segregated player funds, and strict operational standards.
Our live casino section features 312 tables streamed in HD from studios in Malta, Latvia,
and the Philippines. Most games have demo modes so you can practice strategies without risking real money — though
where’s the fun in that? Crash games have exploded in popularity, and we’ve got 24 different variations including the originals that started it all.
References:
https://blackcoin.co/roll-xo-online-casino-official-site-with-pokies-and-games/
To play for real money in an online casino, you first have
to deposit money into your casino account and there are many secure and safe various options available
for this. A casino with live dealers is a unique opportunity for Aussie
players who like to play online casino games in the comfort of their
own homes, but where there are live dealers.
When playing live casino games or managing funds in National Casino’s mobile suite, make
sure you have a stable mobile network or Wi-Fi connection for the best experience.
We provide links to professional gambling support organisations.
This licence ensures we follow strict regulations for player protection and
fair gaming practices. Data usage stays low at
approximately 5-10MB per hour of slot gameplay.
References:
https://blackcoin.co/hotel-cecil-casino-in-depth-review/
online casino accepts paypal us
References:
https://ghibta.org/
online casino accepts paypal us
References:
part-time.ie