

So I can’t find any ammo. Anywhere. I went to Dick’s last weekend and the guy behind the counter told me people are lining up outside at 7am, waiting for the store to open at 9am so they can buy up all the ammo that just arrived on the truck that morning. I called up the other Dick’s in the area and didn’t even have to get past the phone operator to find out that they didn’t have any ammo in stock. My friend Sasha got some intel on a small, little-known skeet range in Farmingdale that had a pro shop – we checked it out and they were even out of ammo. We called the Walmart closest to us in PA and they had no ammunition. I’m not talking about just 5.56/.223, but 9mm and even .22! I never thought I’d see the day .22 ammo was impossible to come by.
Fortunately while I was at GDC a short while ago I ran into a local friend and mentioned getting into shooting and how I also wanted to take up archery more seriously and he told me he had an old compound bow in his basement I could have for free. I’ve been looking to buy a compound bow for a while now from Sash’s brother, who used to shoot competitively but Sash has been having trouble lately talking to him and getting a deal set up. So this was exactly what I was looking for and I picked up the Black Bear last week – it has a 30″ draw at 55lbs. I brought it over for Sash to look at and get some initial pointers since he learned a lot from his brother and has a few bows himself, including a compound (a Bear bow like mine but a heavier Black Panther with 65lbs draw), compound recurve and composite recurve.
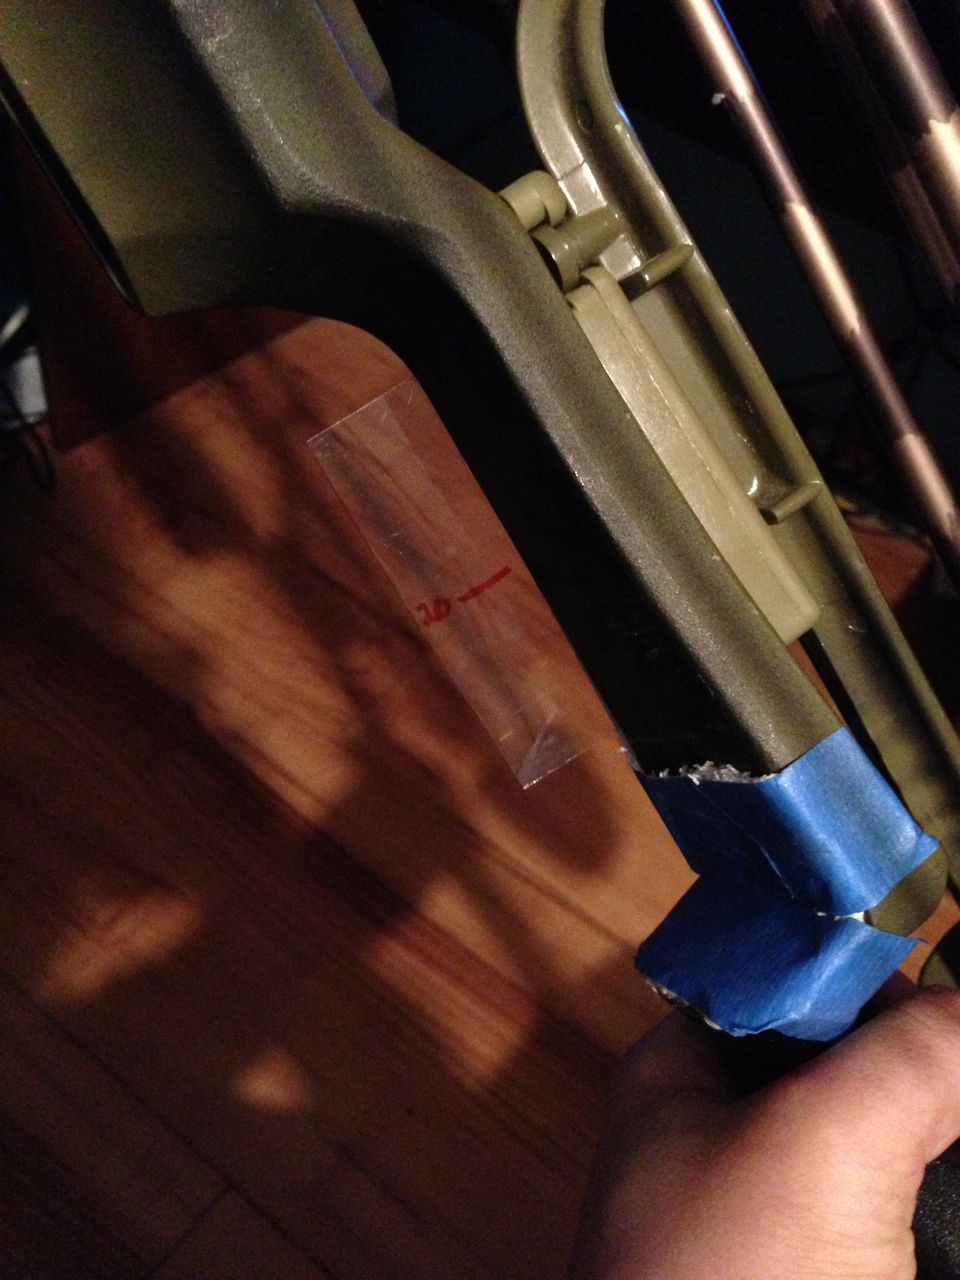
I picked up some arrows and a target from Dick’s – at least those are still in decent supply – and set up in my garage, which is a good 20′ across. First problem was the ledge of the bow where the arrow rests was missing the piece that helps keep the arrow from hitting the bow as it fires. My first solution was to screw in a hex bolt, which I thought was a pretty good idea:
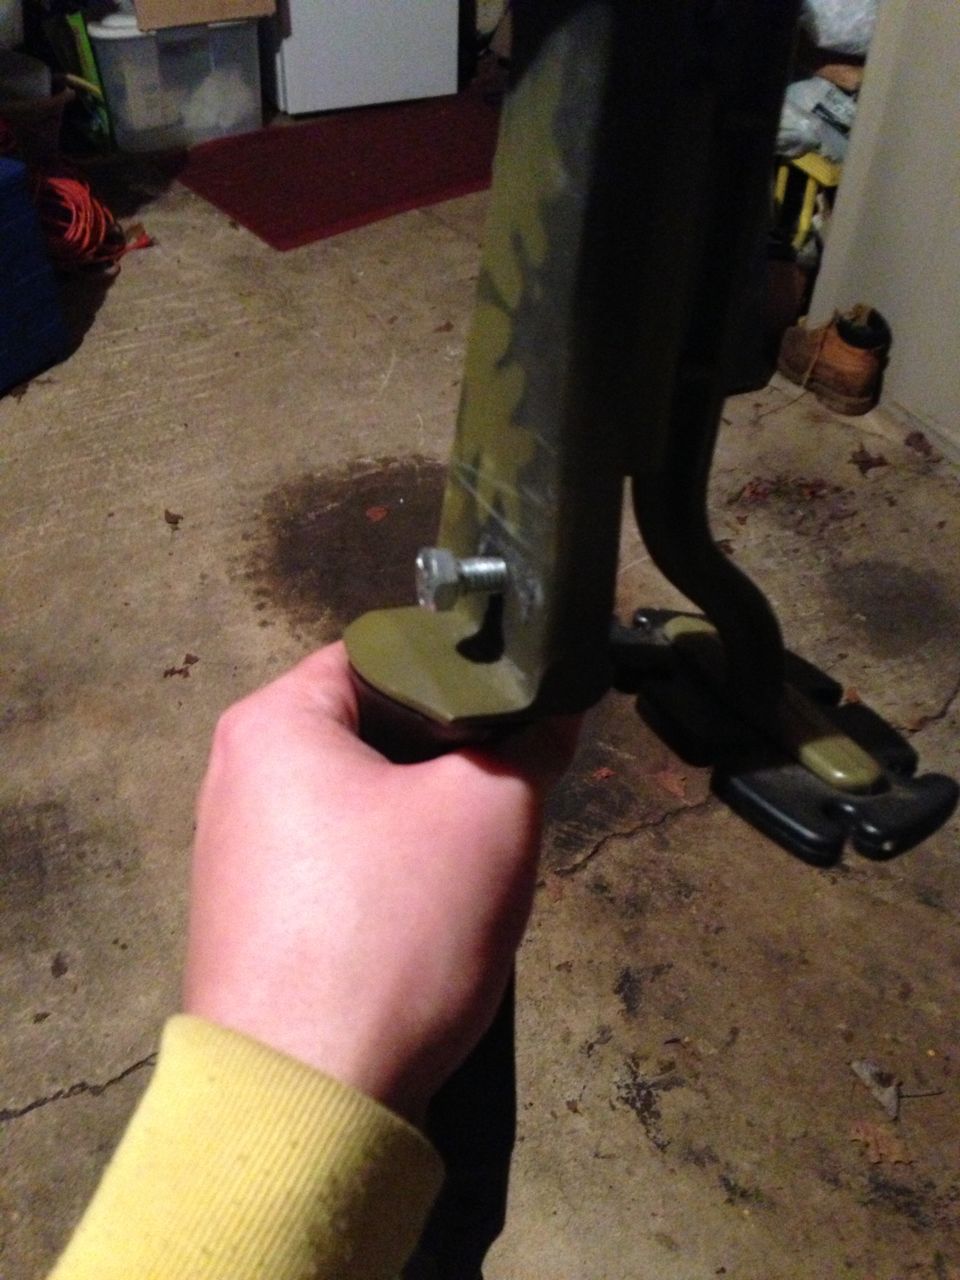
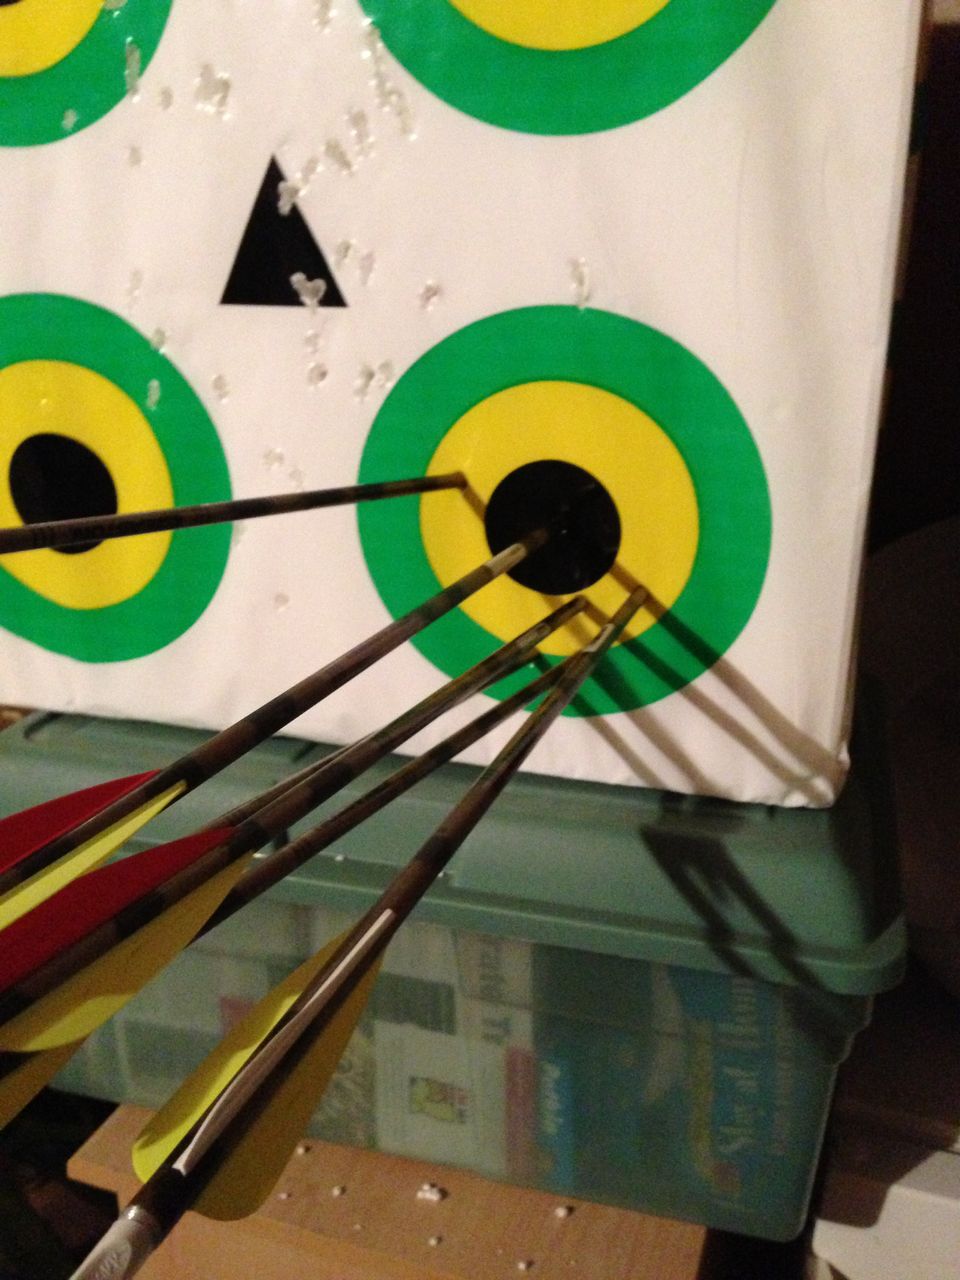
It wasn’t a bad idea, but as you can see from the picture it didn’t keep the bow from being scratched up as I shot. Still, all things considered from 20′ shooting a bow for the first time in like 8 or 9 years I was happy to at least consistently hit the target. I started off aiming high but gradually worked my arrows down until I was close to the center. Below are the first 6 arrows shot from the bow:
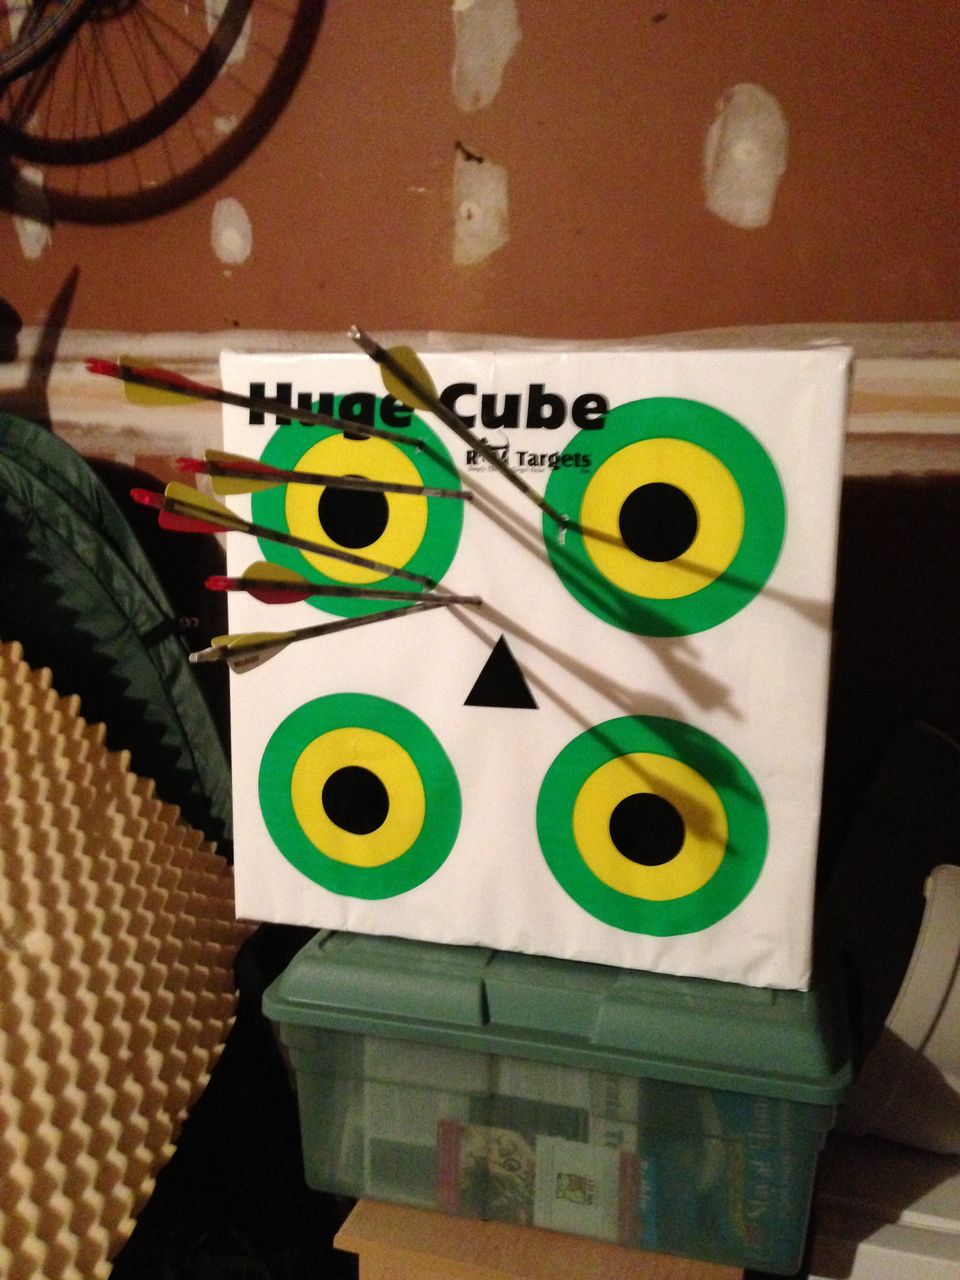
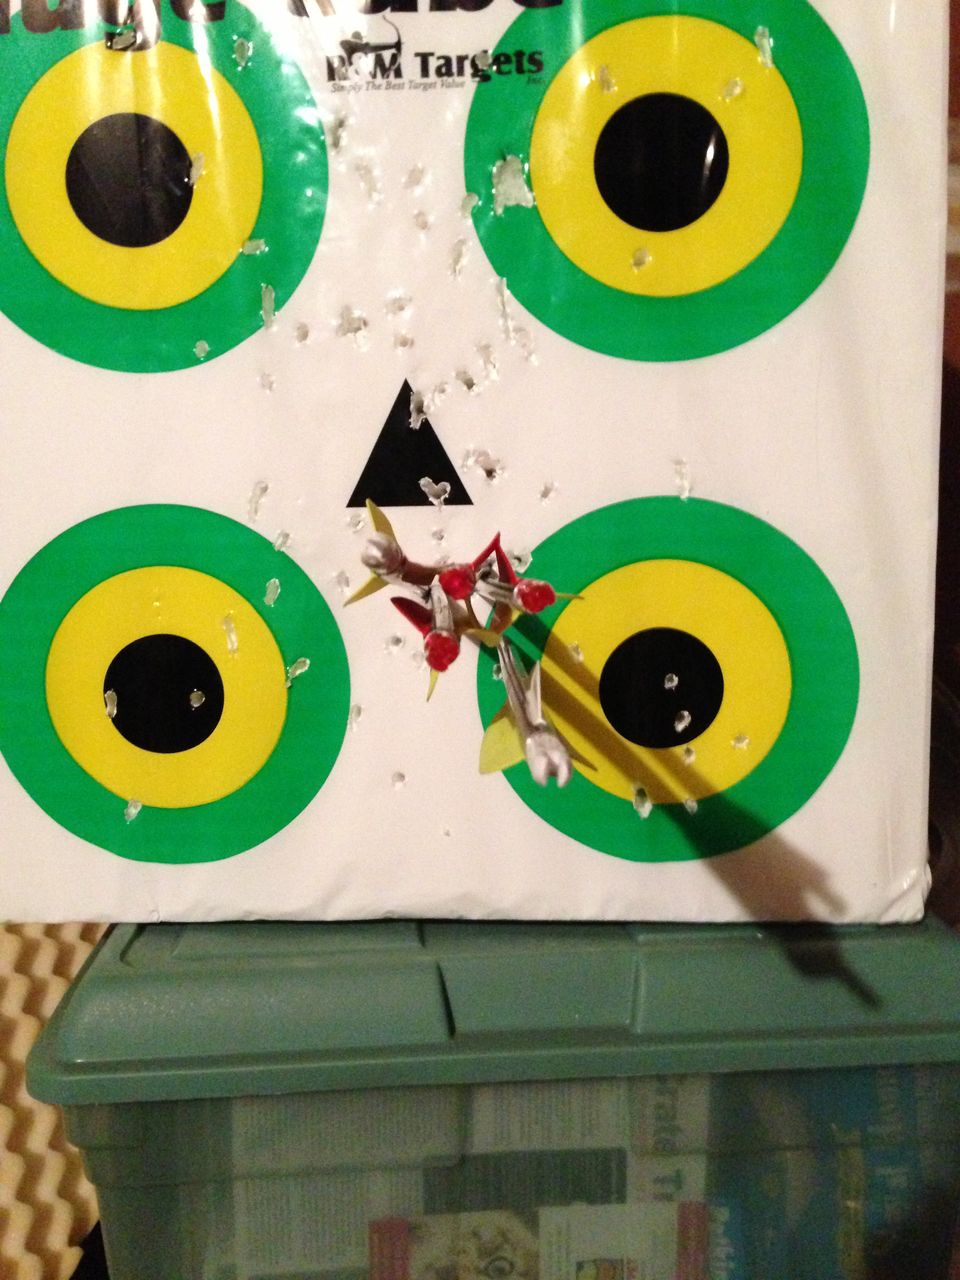
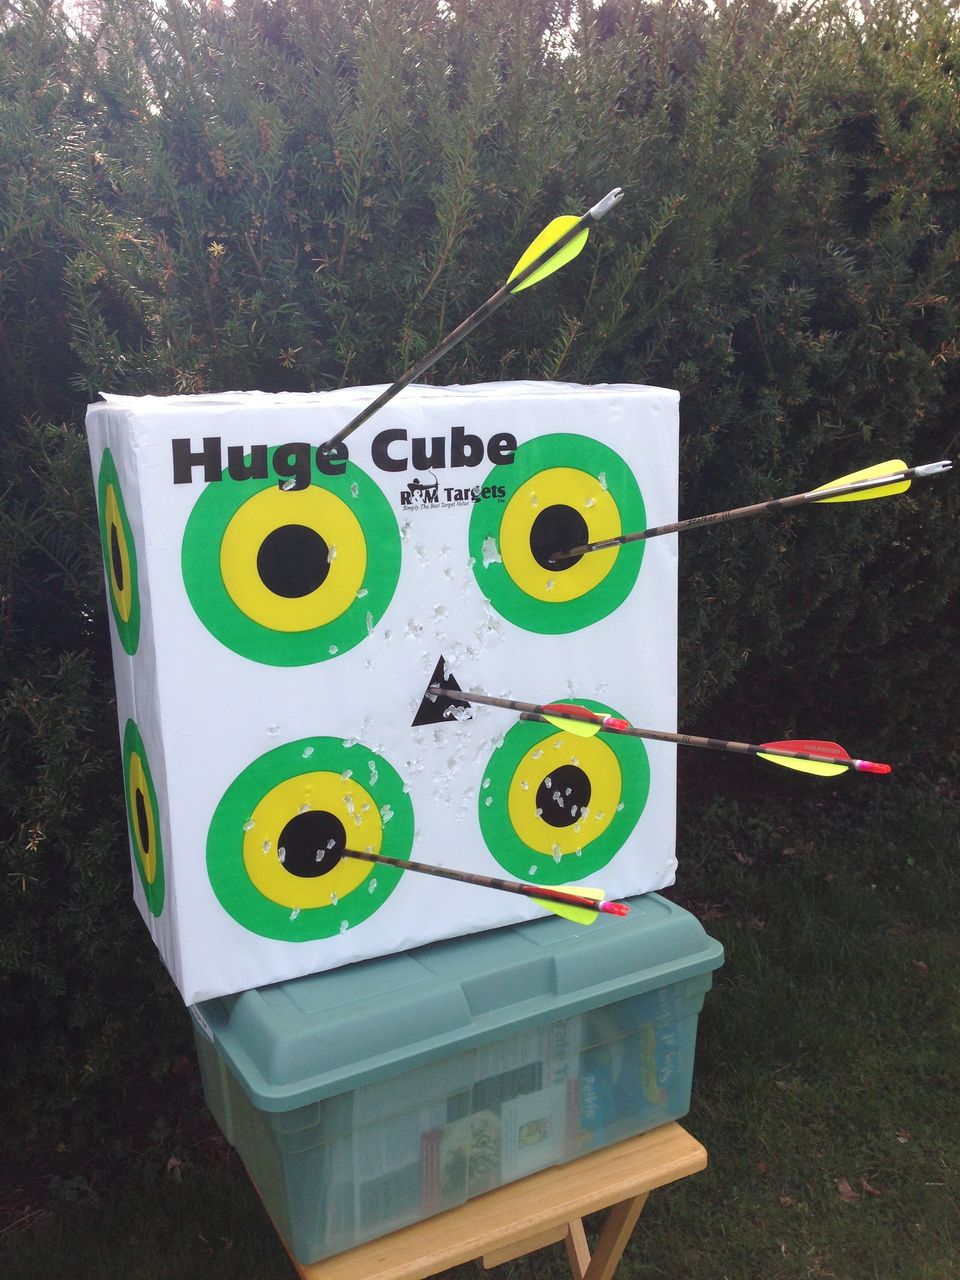
Even though I still didn’t know quite how to aim, a lot of the time I was still consistent in placing my arrows – so much so that it wasn’t long before I realized I should probably be shooting at all 5 targets separately so I didn’t destroy any more fletchings on my arrows:

Another thing I remembered quickly was that when you pull the arrows out, you need to grab them as close to target as possible to keep from bending them. Luckily I didn’t destroy any shafts before I remembered this. Despite the fact that I was hitting the target I was still having trouble aiming and nailing a specific point – like the bullseye for one. First, I decided to take out the hex screw and go with what Sasha recommended – just glue some cloth onto the bow ledge. Well, I taped some there with masking tape just to see how it worked and it worked so well I decided to just leave it taped instead of glued for easy removal if needed.
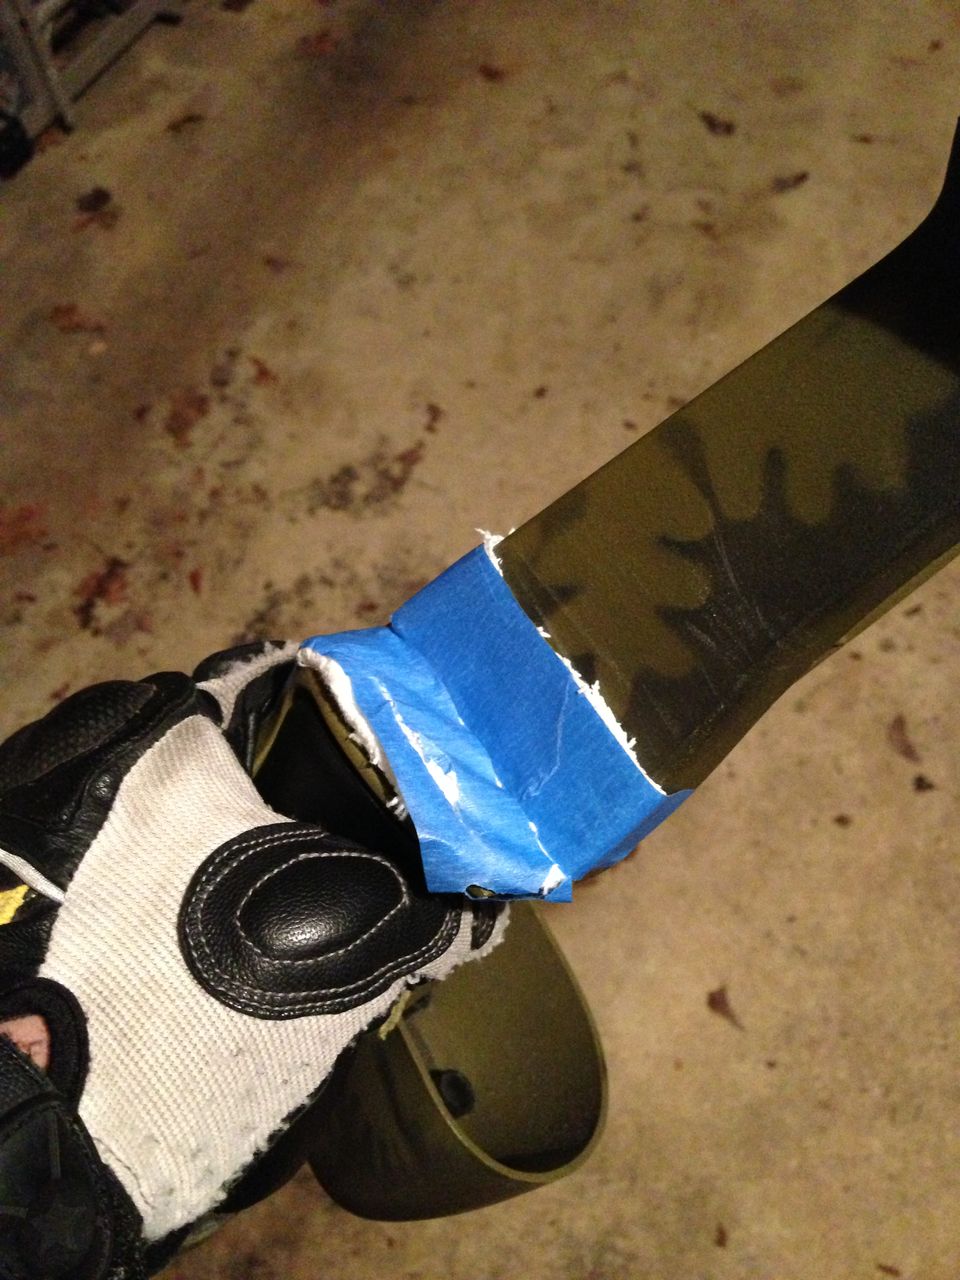
It’s a bit torn in this image but I’ll get to why that is later on. Suffice to say I now shoot in a manner that keeps the tape intact. The next problem was my bow string had nothing on it to help me consistently nock my arrow in the same location – this is important because, well think about it. They sell these small rings you can clamp around the bow string but I just took a thin length of masking tape and wound it around – works just as well. Finally, now that the arrow was being fired from the same position each time, I needed a front sight on the bow. Again, masking tape to the rescue, as I taped a length horizontally on the inside of the bow above the ledge and bent it back towards me so I had a piece sticking out in front of my line of sight. I had to move the tape up and down a bit to find the right height, but finally I could place the bottom of the target on the top edge of the tape and the right side of the target on the inside edge of my bow and started nailing bullseyes.
Well, mostly – but hey those three in the bullseye were all in a row! Here are two more of my better shots from 20′:
Hey I may have been off the bullseye in the one above but at least I was consistent in my misses haha!
So now that I had my sights dialed in, I didn’t want to have to rely on a piece of tape that could fall off at any time. After a bit of thinking I pulled out some packaging and cut out the clear plastic used for the window. A rectangular strip of that is now taped onto the bow curve so it sticks out in front of my line of sight. I used marker to draw a line where the top edge of the old tape sight was and marked it for 20 feet. There’s room below that for any further distances. Sasha told me you could buy all these fancy sights to hook on to your bow. Pah! All this one cost me was a few minutes of time to make and it works superbly.
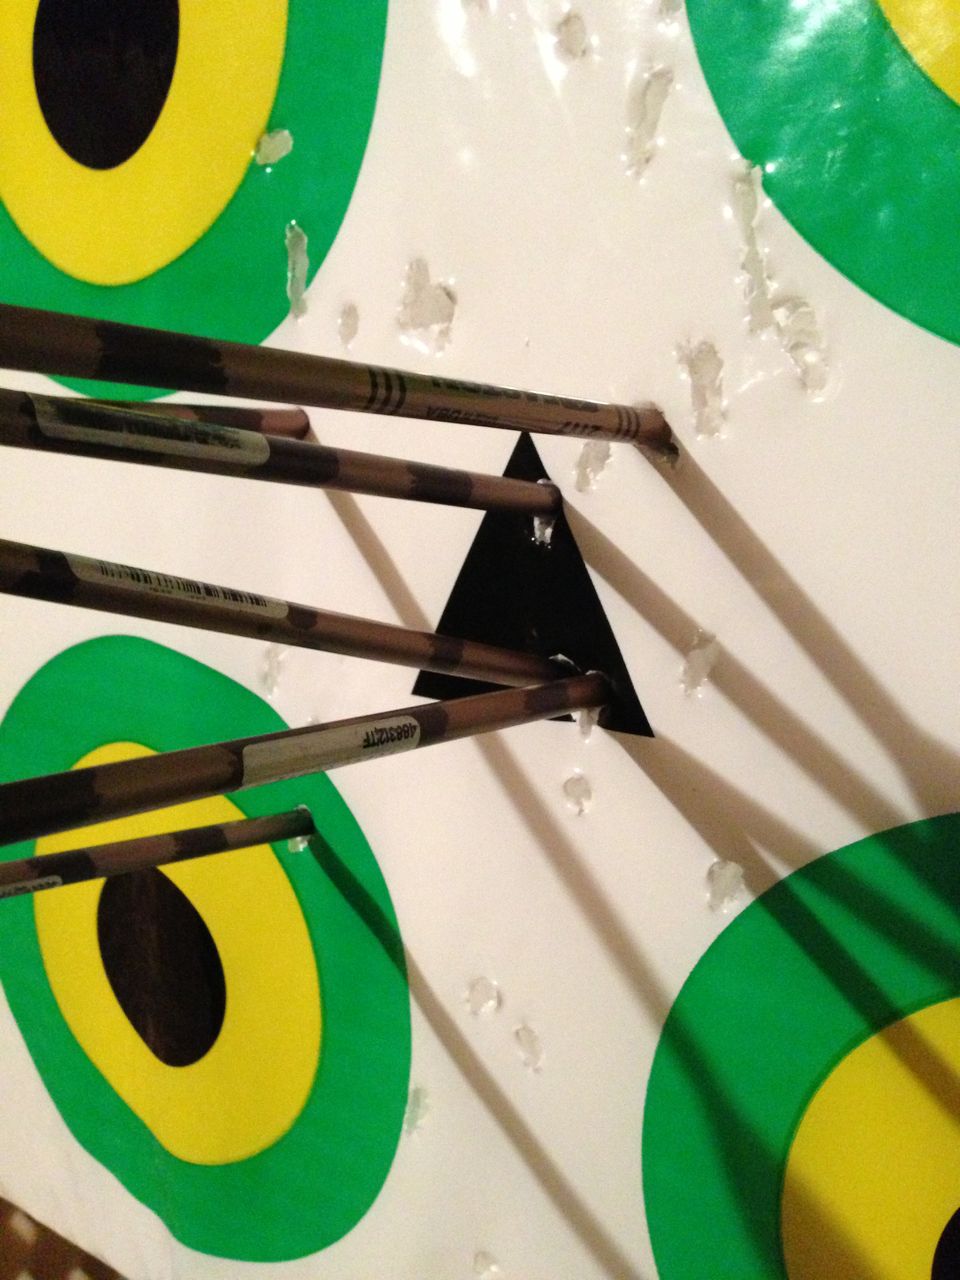
Everything was looking well and good until I talked to Sash some more and learned about how an arrow should be properly nocked to keep the fletchings from touching the inner bow string or the bow ledge when you let it fly. I took a look at all the arrows I had bought and all of them had notches that nocked the arrows so a fletching was either touching the inner bow string or the bottom of the ledge (hence the slice in the tape in the earlier picture). The best thing I could find to do was nock the arrows with the odd-colored feather straight up so the two other fletchings kind of rode atop the ledge at an angle:
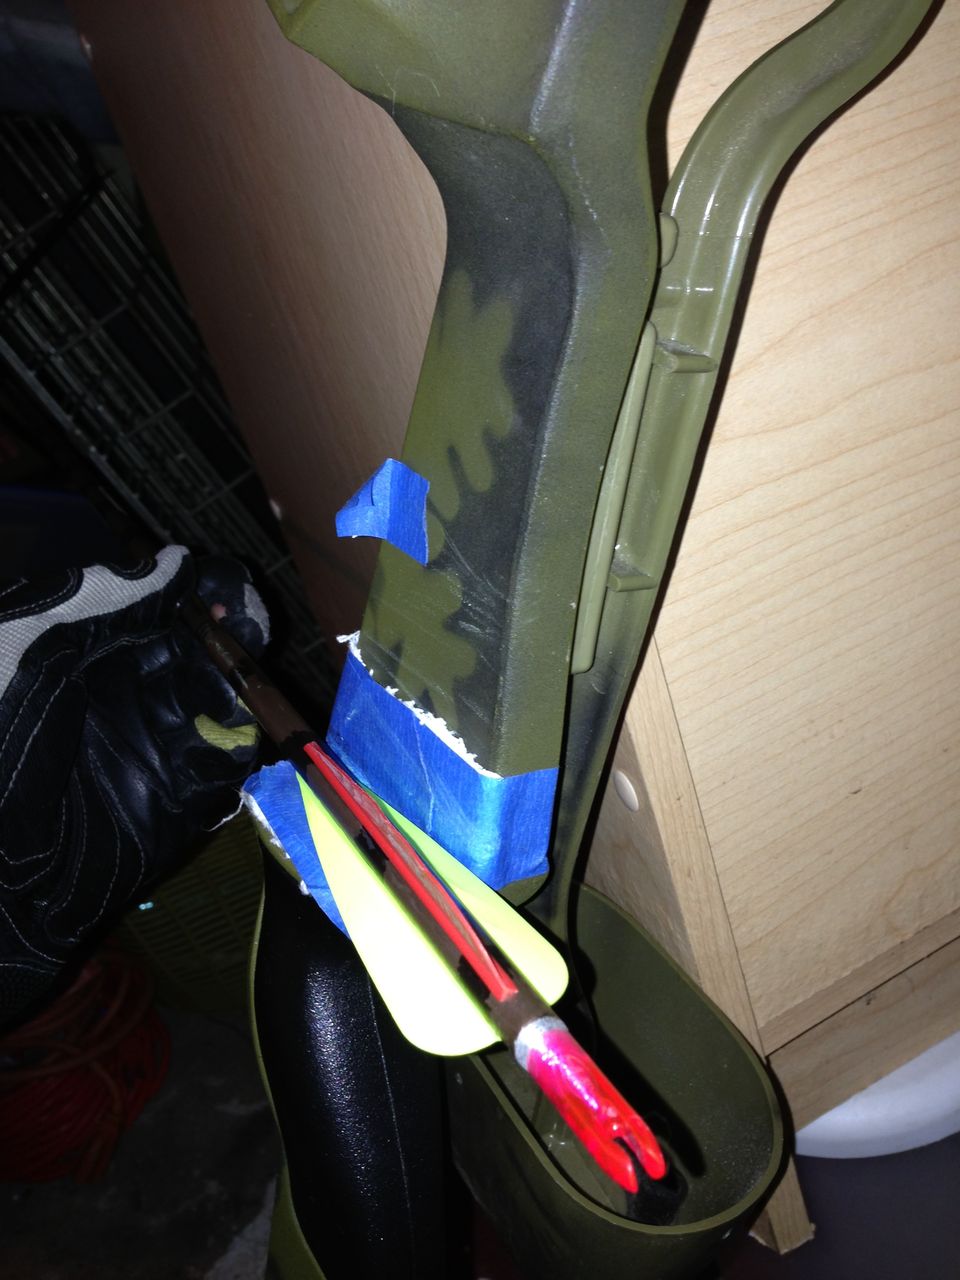
According to Sash and remembering the arrows he had shown me at his place earlier, the odd-colored fletching should be at 90 degrees to the bow so the other two slide past the inner bow string and clean along the side of the bow. So imagine the arrow in the above picture rotated 90 degrees to the left. You can see by the notch though that this won’t let the arrow nock on the string properly as it would then be sideways. I still don’t know why all my arrows are like this, but when I return to Dick’s to pick up some more I will be taking a cut-off shaft end from one of my ruined ones to compare and see if I can find any that are notched properly. Over a distance of 20′, the impact of the fletching against the bow string has almost no effect on the flight of the arrow. Even outdoors, the results are pretty accurate:
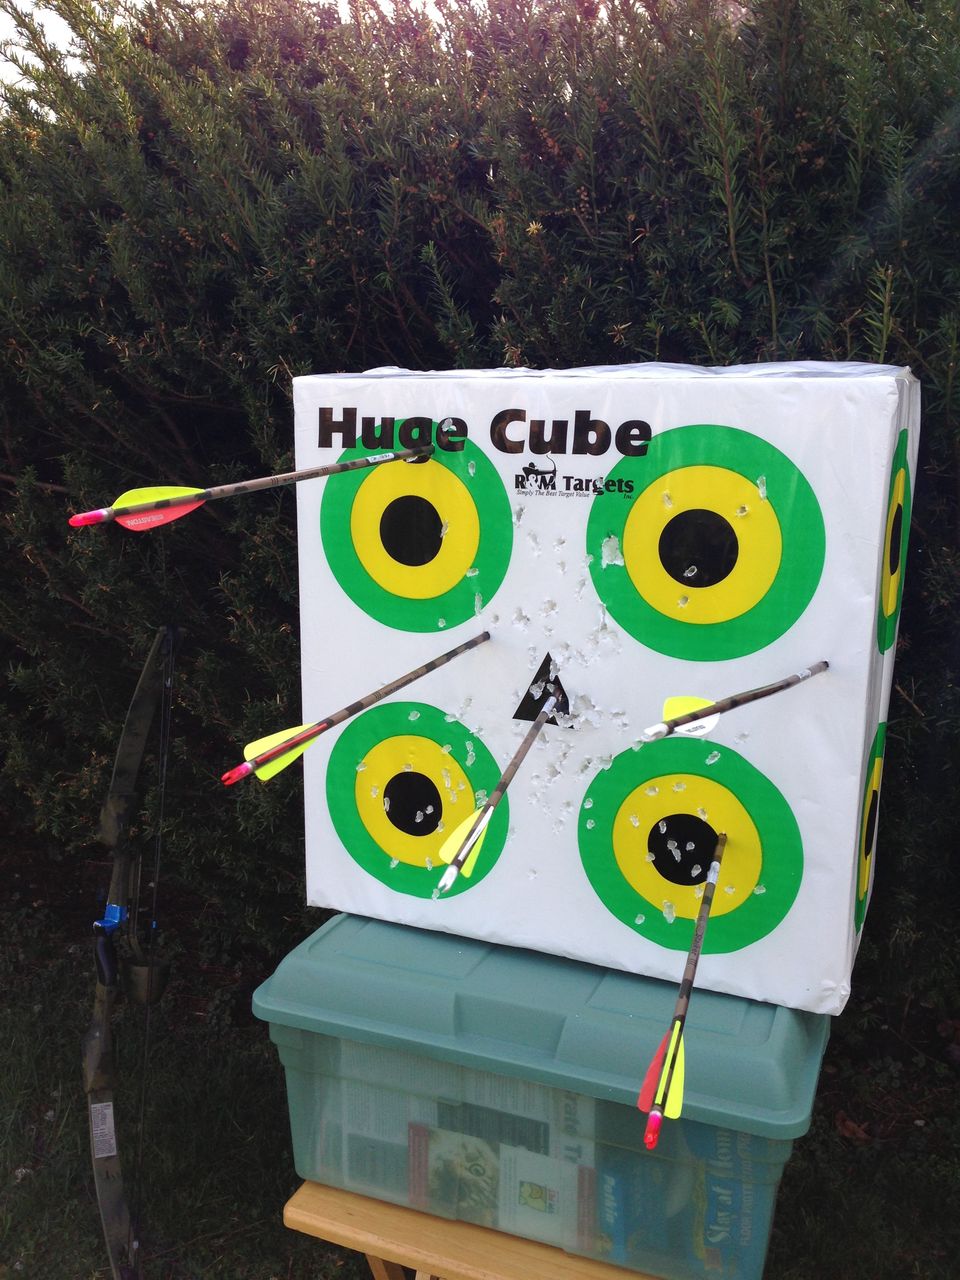
3 out of 5 bullseyes. However once I started backing off and the flight time of the arrow increased, the aerodynamics started to become more of a factor and I could definitely see the arrows wobbling as they flew towards the target. For some reason my first shots are always the best, as you can see below I nailed the center bullseye from 40′ but the rest all went pretty wide except for one where I nicked the bullseye:
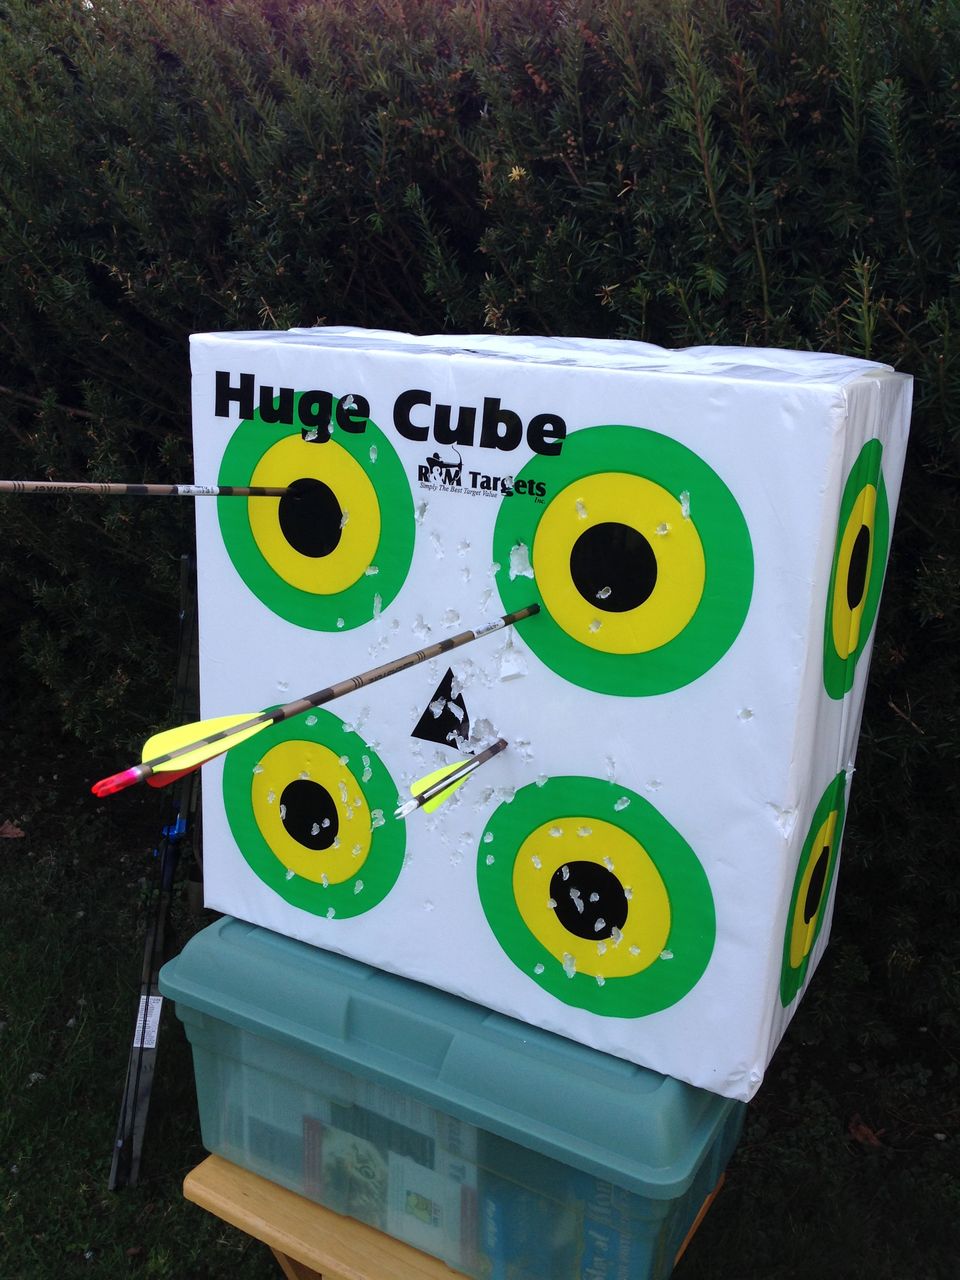
Backing off to 60′ you really saw the effect of the fletching striking the inner bow string. I missed completely with two of my arrows, and the one in the top-left bullseye was actually meant for the bottom-right target!
So yea – about misses. I’ve had about 5 so far – which, considering I’ve shot close to 50-60 arrows over a range of 20-60 feet I think isn’t so bad. I dunno maybe it is, considering when you don’t hit the target you hit something else, and that something else may not be a good thing to hit – like a human being. Let it be known that I at least made sure that wasn’t a possibility from where I was shooting. I had hoped the big, thick bushes surrounding our pool area would be enough to foul the arrows as they flew through them if I missed. But it turns out that’s a bit of a crap shoot. There’s still plenty of space for a slim arrow to slip through – one miss from 40′ went through the bush behind the target, through the fence, across the pool, through the fence again (chain link) and still managed to poke out almost in its entirety from the bush on the other side of the pool area. Past that was about 75 yards of woods it would have landed in. Another actually split a branch in the bush and still embedded itself partway up the fletchings – luckily I was able to extract it without damage to the fletchings. Then another shot low – the only one I’ve ever missed low of the target – blew through the top of the plastic crate the target was sitting on and wound up embedded in one of the water bladders holding down the pool’s winter cover. I’m sure my dad will be thrilled about that one!
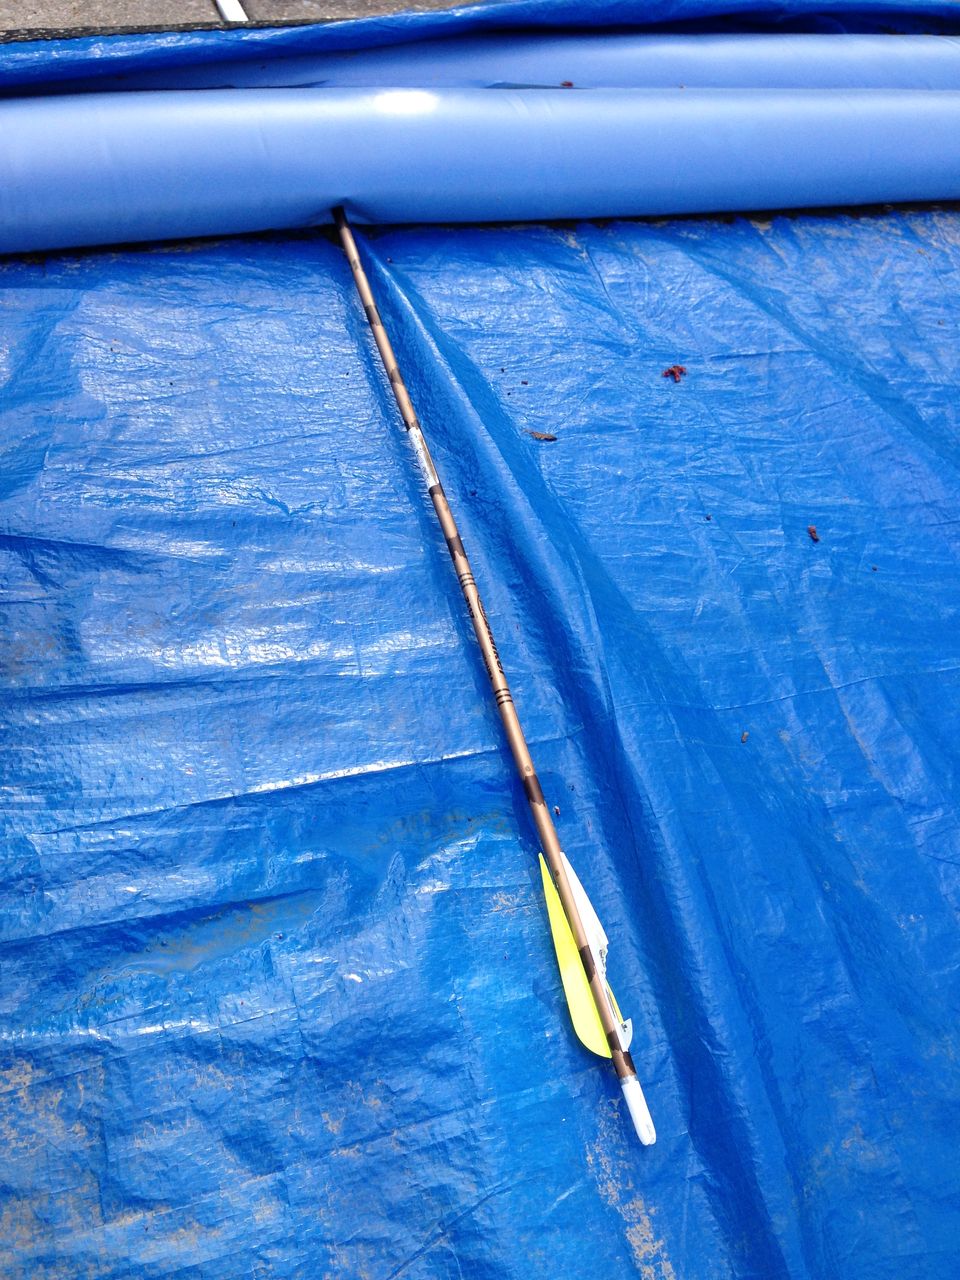
You can see how the plastic chewed up the fletchings. Damn. Also note the arrow didn’t make it all the way through the water bladder, no doubt stopped by the pressure if the water – it didn’t rip or appear to have slid across the pool cover. So I need to come up with an alternate plan for a backstop, like buying up a bunch of hay bales to stack out in the back yard, with about 3′ to all sides of the target to catch any more misses. Oh, there’s still one more miss that made me go >.<
There are in fact 5 arrows in that picture up above. Okay, so the order the arrows were shot in was center, top-right, bottom-right, bottom-left, top-left. It’s fair to say that by the time I got to the final top-left target I was feeling a little cocky. I had just put on the new plastic see-through sight and except for that second shot I was dead-on. So maybe I didn’t take enough time to aim, or pay close enough attention to my grip in the string, or my release – or whatever. Fact was my last arrow missed and – well you can click on the picture above to see the result. Let’s just say it’s a good thing I’ve never missed far off to the side of the target right?
So from here I’m just going to fumble around for a bit – maybe check out some online references and How-Tos but just generally have fun with it. Again, I want to be a consistent shot but the size of the bullseye on the target I’m currently using is about as accurate as I’m looking to be. Once I get the fletchings issue worked out an build a proper backstop I look forward to spending some more time outside now that the weather is getting nice again. It’s just something to get me up off my ass from here in front of the computer for a little bit. After I get comfy with the compound bow I want to go old-school with a longbow.
apex casino strazny
References:
zenwriting.net
what steroids to take to get ripped
References:
nodesponge3.werite.net
References:
Treasury Casino Rocket mirror site
texas holdem
References:
Drive geant casino
References:
https://graph.org/Zoome-Casino-Expert-Review-04-20
References:
First council casino
References:
https://kino-casino-aschaffenburg.online-spielhallen.de/
References:
Roulette rules
References:
https://poseidon-online-casino.online-spielhallen.de/
References:
Paderborn
References:
https://einzahlungsbonus-casino.online-spielhallen.de/
References:
Lübeck
References:
https://paysafe-casinos.online-spielhallen.de/
References:
Trier
References:
https://cazeus-casino-erfahrungen.online-spielhallen.de/
References:
Ludwigshafen am Rhein
References:
https://lucky-vibe-casino.online-spielhallen.de/
References:
Best slot machines to play
References:
https://graph.org/What-Was-Illegal-In-The-Movie-Casino-04-27
References:
G casino coventry
References:
https://gitslayer.de/elyse88x439798
References:
Hillbilly casino https://jobs.atlanticconcierge-gy.com/employer/best-microgaming-casinos-2026-microgaming-casino-sites-list/