Yes it is the timeless classic. For those of you who don't program, Hello World! is usually the first application taught to newbie programmers. It's basically just a simple text-ouputting application that ouputs (you guessed it) "Hello World!" to the screen. Well, we won't be programming anything (whoo!) but we will be outputting "Hello World!" to the screen.
Creating the Font
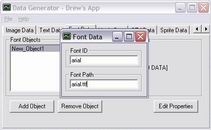
Before we can print anything though, we must define what to print it in, namely, a font. In the Data Generator scroll through the tabs until you find the Font Data tab. Select it to bring it up front and click on Add Object. Now double-click on the new object to open it's meager properties. A font is not at all complex - all we care about is what to call it and where to find it. Let's name it "arial" and in the path box put "arial.ttf". Close the window.
Creating the Text
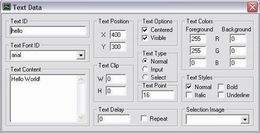
Now that we have our font loaded and ready to go, lets move on to the Text Data tab. Once again we're going to create a new object via the Add Object button and double-click on it to open the plethora of properties. I like that... plethora of properties... plethora of.. oh, sorry. Anyways let's start in the upper left with the text ID. We'll call it... well, you can call it whatever the heck you want, just don't use any spaces. After naming your font object, go down to the Text Font ID drop box and select the font object "arial" that we created just before. Now in the Text Content box type "Hello World!". Let's place the text in the center of the screen so enter in 400 for the X value and 300 for the Y value. To make sure it's really centered, check the Centered option just to the right. If you really want to shout, you can adjust the point-size of the font (default is 12) I'm setting mine to 16 for a little loudness. Finally lets set the font fore color. You can choose any RGB value, but I like yellow so I'm setting my Red and Green to 255. Now I know there are more options here, but for the sake of this tutorial this is all we need, so you can close the window.
Making a Scene
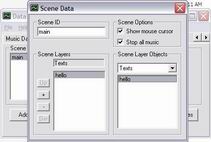
Okay, we have the font, we have the text... d'oh! We forgot something! Go back to the Scene Data tab and double click on your "main" scene object. in the Scene Layer Objects frame click the drop-down list box and select Texts. up pops your text object - double-click on it to add it to the scene. Sweet. Now that the object is in the scene, it will actually be rendered on screen. Starting to get the hang of this? If it hasn't dawned on you already, the use of scenes is very powerful. Instead of having to worry about setting each object's visibility flags to on or off to show or hide objects, you just switch scenes and the objects simply aren't rendered. Switch back and there they are again. We'll only be using once scene in this tutorial but in a normal game you would have quite a few - menus, game screens, etc. But I digress.
Hello World!
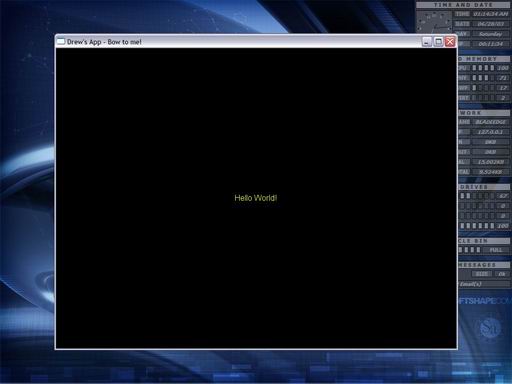
Ready to roll! Save your work (notice you can now select File->Save) and generate new data (likewise, you can now select File->Generate Data). Again click Yes through the save prompts. Run the application again and marvel at the wonder you just created - no programming! Awesome! It's such an original idea that... oh, wait. It isn't. Oh well - it's still damn cool. Let's continue then.
| Prev: Getting Started |
Next:
Music to my Ears
|