Greetings
Hello and welcome to the Data Generator tutorial. This tutorial is meant to demonstrate the various applications of the Data Generator and how it can be used by anyone for content creation - not just the programmers. This tutorial won't give you an in-depth lesson on the Data Generator, however. You can expand upon what you learn here by reading the actual Data Generator documentation.
Tutorial Material
Before we can go any further, you must download the ZIP archive containing all the neccessary files. If you have a slow connection and don't feel like downloading a 7MB file, click here and make sure you skip the music section of the tutorial, since that's the big file you're cutting out. Otherwise for the full experience click here. A seperate download is required for the DLLs that you will need to run the program successfully. Get that here, unzip both files to a folder and read on!
Patch: Download the file comdlg32.ocx and place it in your Windows/System32 directory if the Data Generator does not work.
Running the Application
Let's try running the application and see what happens. Got to the folder where you unzipped the file and double click on Application.exe. BOOM!! BAM!! CRASH!! Eeps - what just happened? Most likely you'll get an error message of some sorts telling you the program quit in some strange way. Is this bad? Are the files corrupted? Not really - you're just missing a vital peice of application data.
Backing up a Step, or Six
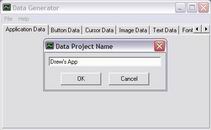
Okay - let's do things the right way this time! Double click on DataGenerator.exe to launch the Data Generator application. From the File menu, select New, enter in a name for your project, and select OK
Now that we have a valid project, the form will display its controls and allow you to edit the project's data. We're going to start on the Application Data tab. For starters, lets look at the Root Application Folder textbox. When you generate your data, the application has to know where to access it. You'd think that when you save the generated data in a location, that's all the program needs. Normally this would be true, except when you run the program on another computer, that full data path will most likely no longer be valid. To get around this we need to use a relative data path. So if your data was stored in "C:\Program Files\My App\My Data" and your program is in "C:\Program Files\My App", then the relative path to your data would be "\My Data". In order to figure out the relative data path, Data Generator needs you to place the name of the application folder in the Root Application Folder textbox. Make sure the caps are correct as well. You could leave this blank and the Data Generator will use the full data path - but again, this won't work well if you ever move the application folder around your computer or to another computer.
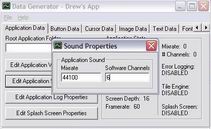
Okay - that's was a bit long for such a little thing don't you think? Let's move on. Click on the Edit Application Window Properties button. In the window that pops up we can edit the properties of our application window. Lets select the Windowed radio button, and enter in a screen size of 800x600 with a bit depth of 16. Set the framerate lock to 60 to give us some smooth animation. Finally, lets change the caption of the window to something less generic than BES Application.

Notice how the App Stats frame has updated to reflect the changes you just made to the data. Cool. Moving on, let's click on the Edit Application Sound Properties button. This one is a breeze, simply set the mixrate to 44100 (44.1Khz) and the number of software sound channels to 6. Who doesn't have a sound card anyways? We won't be making too much noise anyways to worry about maxing out the hardware sound channels.
Okay next we're going to click on the (you guessed it) Edit Application Log Properties. In the event that something goes horribly awry during the course of this tutorial, this log file could be your saving grace - if you new how to read it. Drat. Oh well - we're going to enable it just so you can look at it if you feel so inclined. Check the Enable Log checkbox to turn on error logging. You can ignore the Log Location text box - that's if you want your log to appear in a certain location. Leaving it blank will cause the log to be created in our root directory (where the application is located).

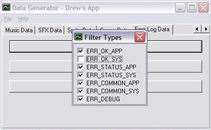
Now (surprise) let's skip over the Edit Splash Screen Properties (we'll come back to it later) and click on the right arrow up by the tabs. Keep clicking until you see the tab Error Log Data. Select that tab and click on Edit Type Filters. In the window that pops up check all the checkboxes except ERR_OK_SYS. These filters prevent the log from writing certain report types. If you left them all blank the error log could easily swell to over a megabyte in only a few seconds of runtime, depending on how many objects are loaded. So lets keep it trim and only allow it to report infrequent status messages.
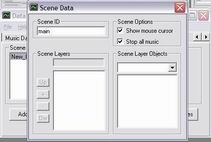
Okay, almost there - really. Normally at this point you would have enough data to start up the application properly. However we have one more step to do since the application is coded to load a scene. We need this because without a scene loaded, we won't be able to render objects in later parts of the tutorial. Makes sense right? Anyways Click on the Scene Data tabe right next to the Erroe Log Data tab. Click the Add Object button to create a new object and then double-click on it to open its properties. We have to call the scene "main" since that's the scene that's coded to load so lets put "main" in the ID box and close the window - no need to touch anything else - yet.
Very good! Now lets save our progress so far. Close the Filter Types window and click on File->Save As. In the dialog box that pops up choose the folder you want to save your project file in and click on Save. You will be prompted to confirm the save - this is because any new and uninitialized objects will be deleted when saving. We'll understand this later. For now just select Yes. An important note I want to make now is that the file you just saved is not the file that will be read by the application itself. This is a seperate file for use only with the Data Generator program. We're about to create the files that are read by the application. Select File->Generate Data As. Now create a new folder called Data in the root application folder and save the generated data in that folder. Notice that you do not have to specify a filename, just the location. You'll be prompted once again for safety's sake, so just hit Yes.
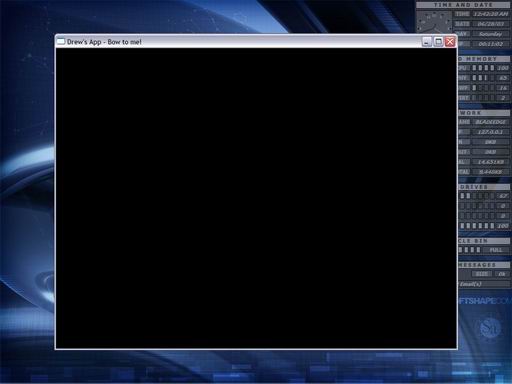
Allright, we've generated enough data to get us started. Let's fire up the application again by double-clicking on Application.exe. Ta dum! Up pops your window with your caption, set to 800x600x16. Press escape to exit or close the window and go to the Data folder. Here you will find several different data files that were created for the application. Don't tamper with these files or change their names or you will break the application (ouch). Now lets return to the root folder and click on error_log.txt. Here you will find what went on during the program's execution. Since we've disabled pretty much all the log types, there's not much to see besides a few timestamps and a few status reports. But it's good to know it's there if we need it.
Well, that was fun! We have our application up and running so now lets play around a little bit hm?
| Prev: Table of Contents |
Next:
Hello World!
|